Preparing an example for the fourth grade project
For over a month now, many of us have been confined to your homes and were forced to navigate our lives and the lives of our families amids the treacherous waters of the Covid 19 crises. Health concerns, employment - or tragically the absence of it, homeschooling, and food shopping are just a few of the challenges that we have to negotiate and ford these days.
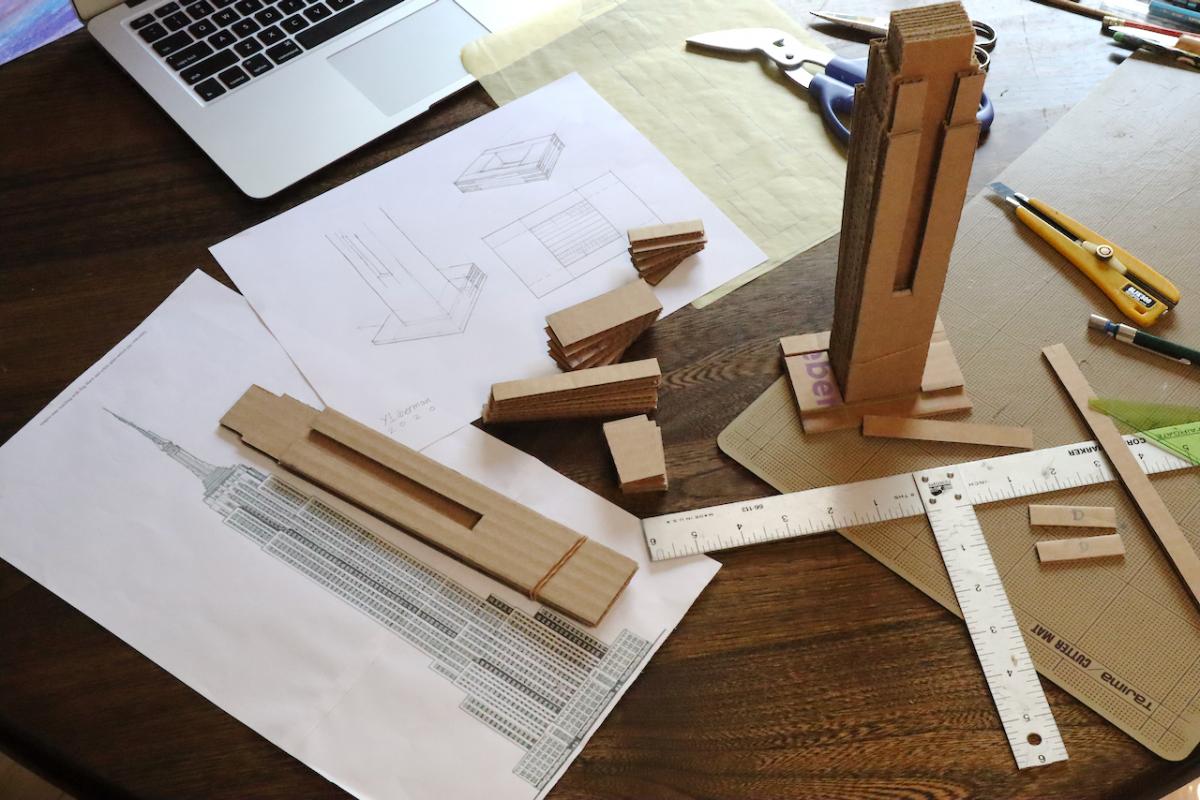
As a teacher I was thrown into this predicament and was challenged to come up with a swift and effective plan for conducting surrogate courses instead of my traditional shop classes. This novel program (tailored for our latter-day Coronavirus pandemic) was launched almost immediately and allowed the students of grades 4th, 5th, 6th and 9th to study a hands-on subject from the confinement of home. My material of choice for this class was corrugated cardboard, which with a minimal tool kit consisting of a pair of scissors, an Zona/Exacto knife and some PVA glue, opened a sea of opportunity to us.
But before we delve into my current classes and their relationship to woodworking I want to talk a little about my teaching philosophy and the mission of our school’s during normal times.
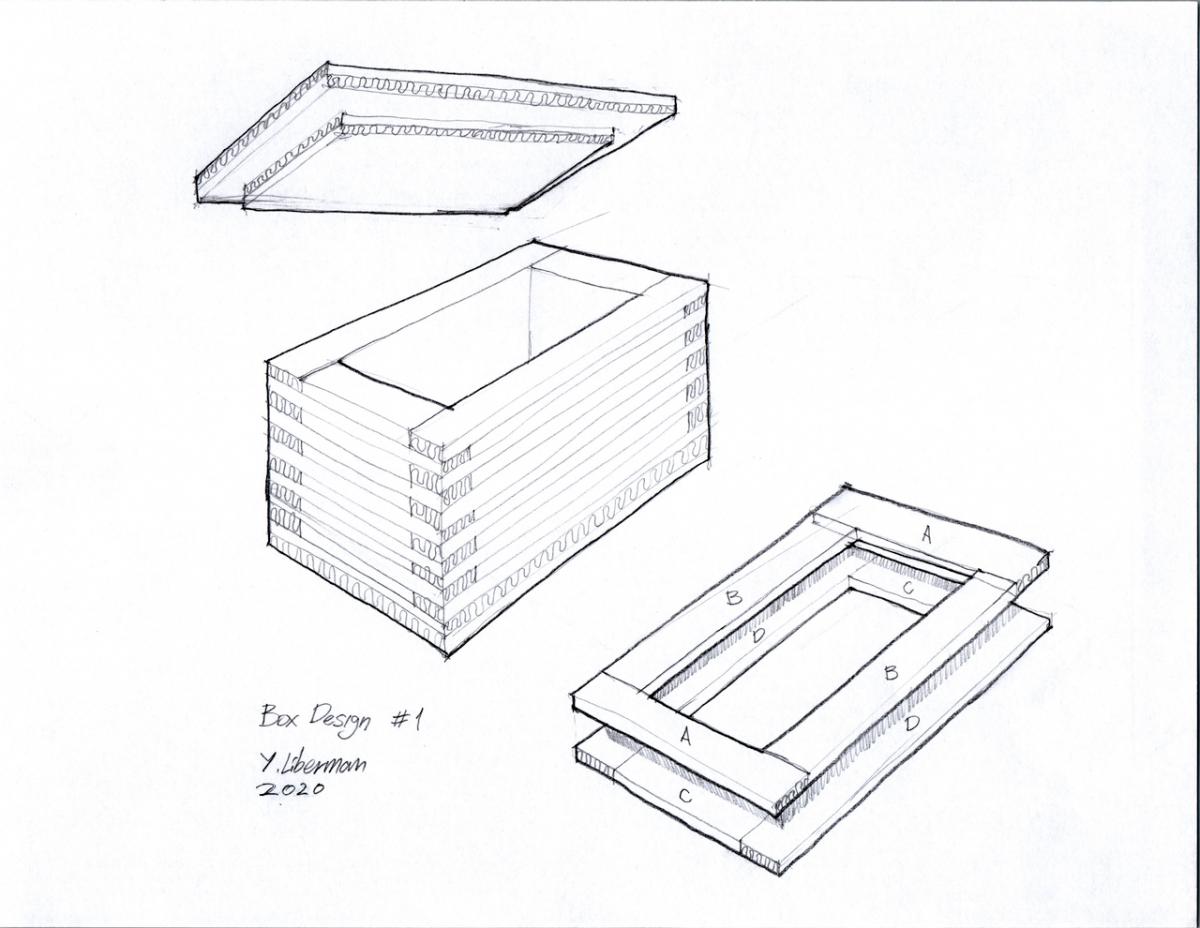
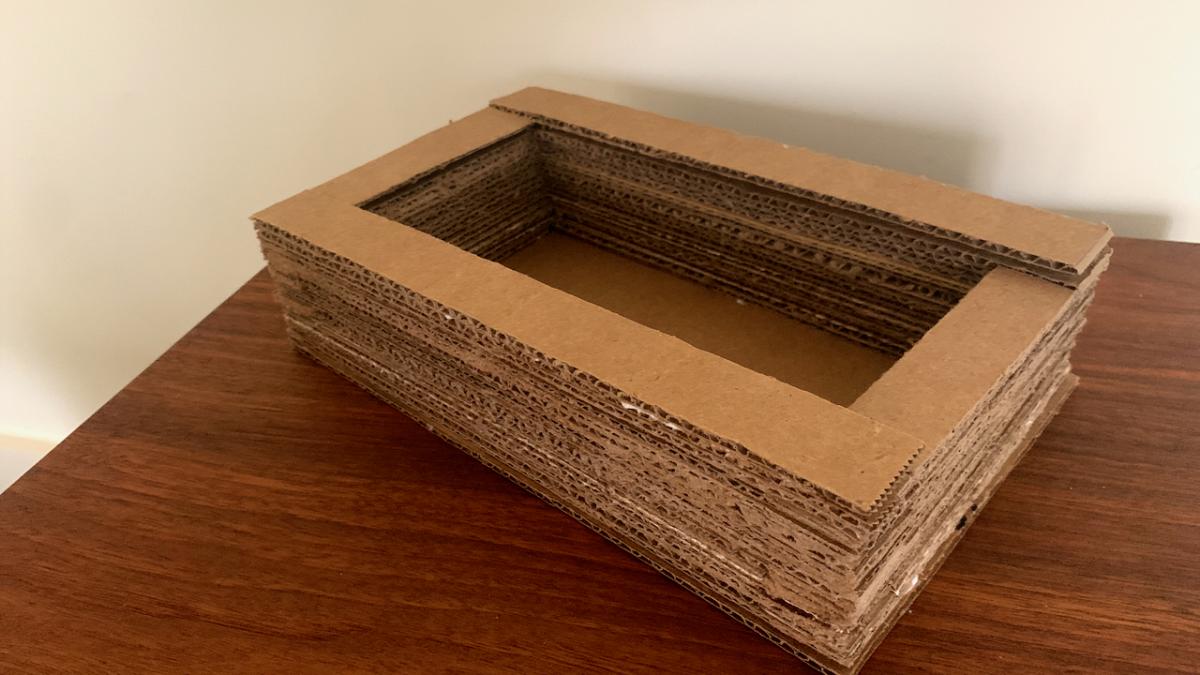
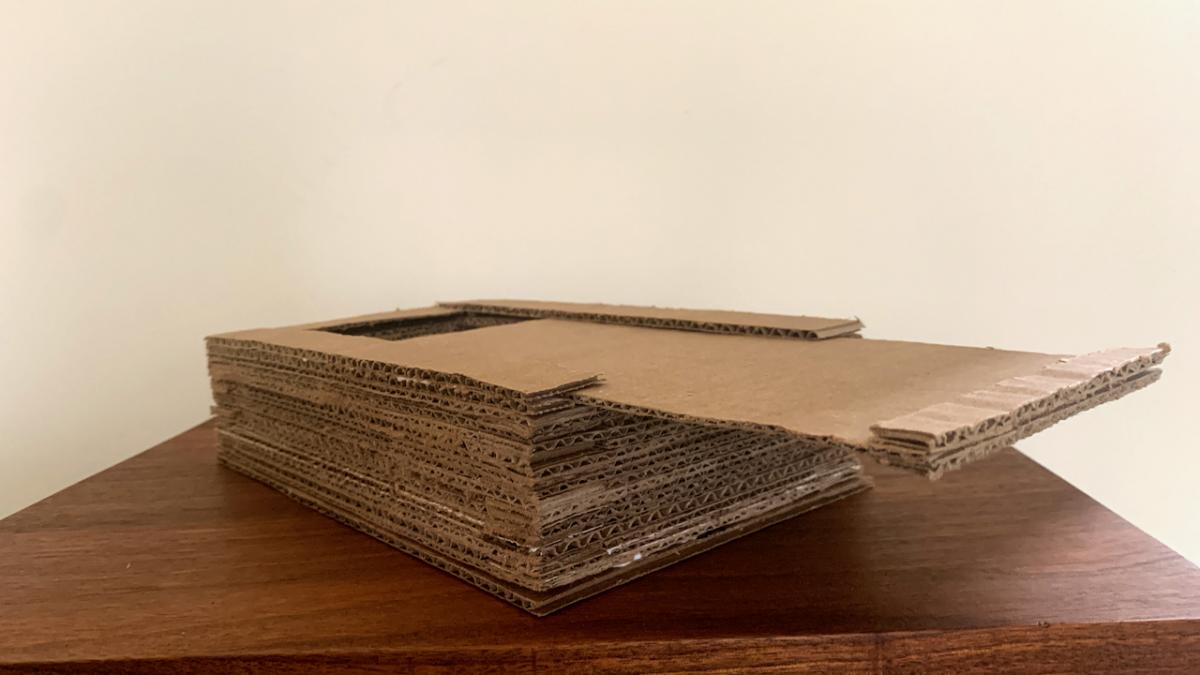
For the last eight years I have been teaching woodworking at America’s first Waldorf School. Our school, the Rudolf Steiner School is named after the founder philosopher of the anthroposophical movement and is located at the heart of Manhattan, just around the corner from the Metropolitan Museum of Art. As a Waldorf school we elevate the arts and the craft curricular high and proud. Students from a very young age learn how to knit, sew, draw, play a musical instrument, craft wood and much more. Students arrive at our basement shop for the first time when they ascend to the 4th grade and frequent the shop almost every year to study woodworking, metalworking or stone sculpture. We begin our voyage with wood by crafting objects of beauty and utility via a set of reductions. Forming walking staffs and butter knives from branches and blanks in 4th grade, and making a set of spoon and fork for serving food at 5th grade. My students learn early on how to saw chisel and gouge, form a spiral, a finial and a copper retainer on their staff, and a year later how to refine their carving skills and develop a unique hollow form when excavating their spoon and forks. Our shop is a well equipped facility with plenty of professional grade hand tools and many woodworking machinery of high caliber. And yet most of the work is done by the students' hands, as only in the higher grade I allow some operations to take place on the bandsaw and drill press. At 6th grade they learn for the first time how to make a proper joint and how parts come together to make the whole. Their first interdependent project is a frame saw, and here too they spend time making an individual design that stems from the basic H frame of the saw - which they have to finish prior to jumping into self expression. In 8th grade they build a three legged stool; in the 9th grade, a box; and in 12th I give them freedom to come up with their own ideas to create a functional or a sculptural (or a combination of the two) project. On top of saws, chisels, gouges, rasps and files, and many other hand tools of different size and shape, we rely on our sturdy benches and vises to arrest the work pieces and mitigate the forces of mallets, chisels and gouges blows. The shop also facilitates one last, but very important pedagogical component - the teacher’s hand. I came to realize that on top of visual demonstrations, the best way to guide our young woodworkers through the prime challenges of holding a mallet, driving a whittling knife, chiseling and gouging is by combining my hands and the student;s hand on the tool’s handle. This literal “hands on” or “joining hands” demonstration explains the process and initiates the first acquisition of muscle memory. This hand in hand approach allows the student to grasp intuitively and clearly the needed choreography of carving and shaping wood. 9th Grade Box Project from pre-covid school shop days
With the closure of the school and the importance of woodworking and other practical arts to our program you can imagine how devastating was the realization that we could no longer continue (in any practical way) to conduct this line of teaching at school. As our physical school abruptly closed down and teachers and administrators began toiling on a “moving forward” plan, I asked myself: can woodworking be taught over the computer? Will it be safe? And is it reasonable to ask parents to invest in equipment and materials so we can do some kind of woodworking at home during the current financial situation?
As I was thinking about my options I came up with two main ideas:
The first one called for a chip carving class, and the other was teaching a corrugated cardboard class. Chip carving requires a knife, a piece of basswood, and a way to clamp the wood blank to a desk or a kitchen table. Chip carving would have allowed us to develop some drawing and laying out skills, enhance mind and hand dexterity, and a way to produce shallow patterns in wood, or even venture into letter carving. Chip carving knives can (relatively) be easily sharpened using a generic kitchen sharpener (the one with the “V” shaped ceramic rods) and thus enable us a continuum of effective cutting results. You may ask: so why not go full throttle into relief carving? The reason is that it comes with a higher price tag. A decent set of tools that doesn’t need initial sharpening and honing will lay on the families yet another expense. But even if we are lucky and get a set that allows us to go to work straight on, certainly down the road it will demand from the child or the parent a much higher degree of sharpening fuss - just think of the moment where you needed to learn how to sharpen your first gouge. So after dropping the relief carving (at least for now) and chip carving for pretty much the same reasons, I was left with cardboard constructions.
Cardboard and Design
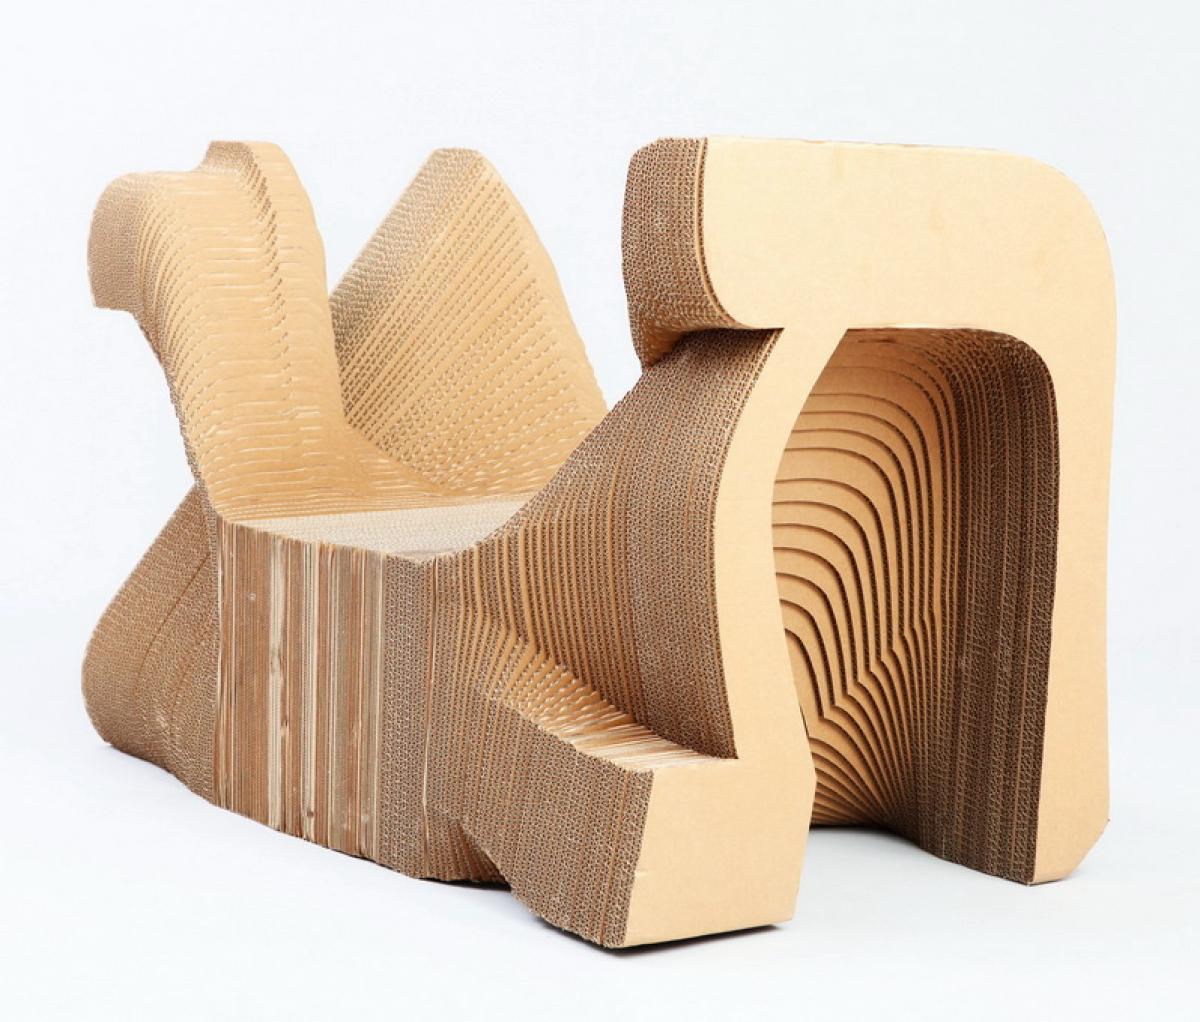
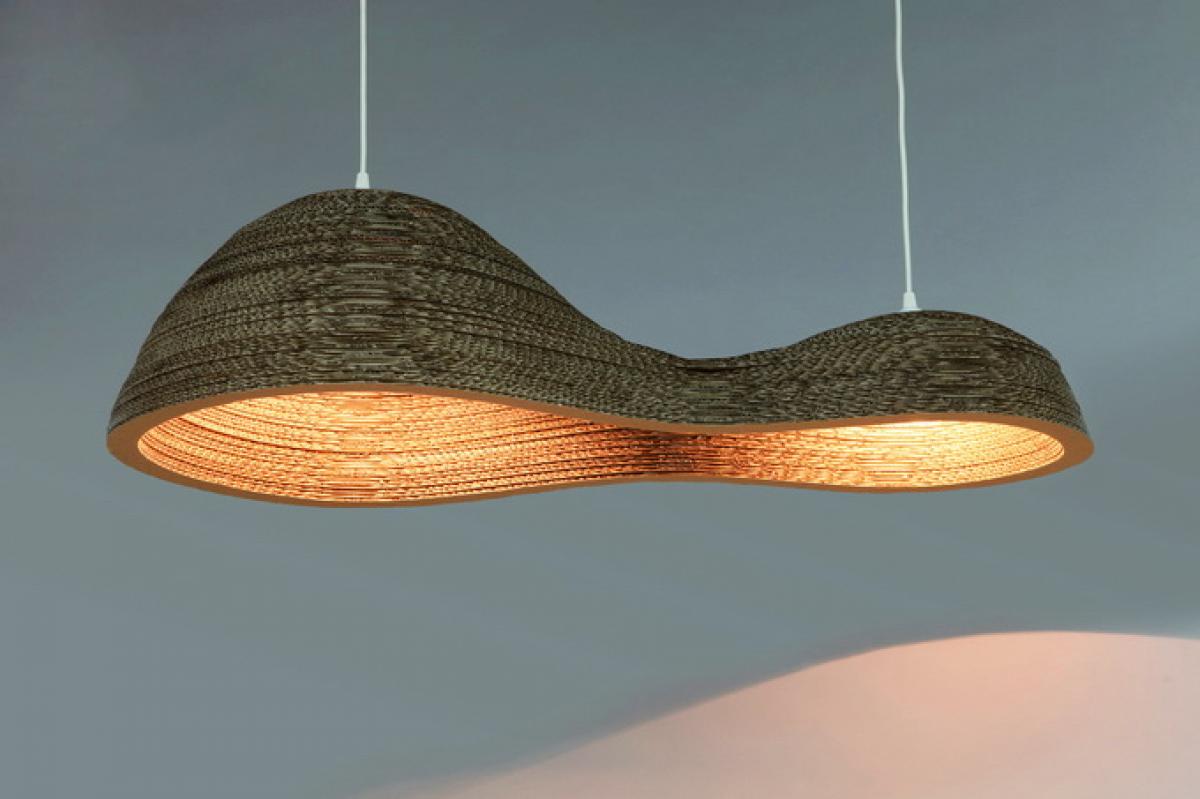
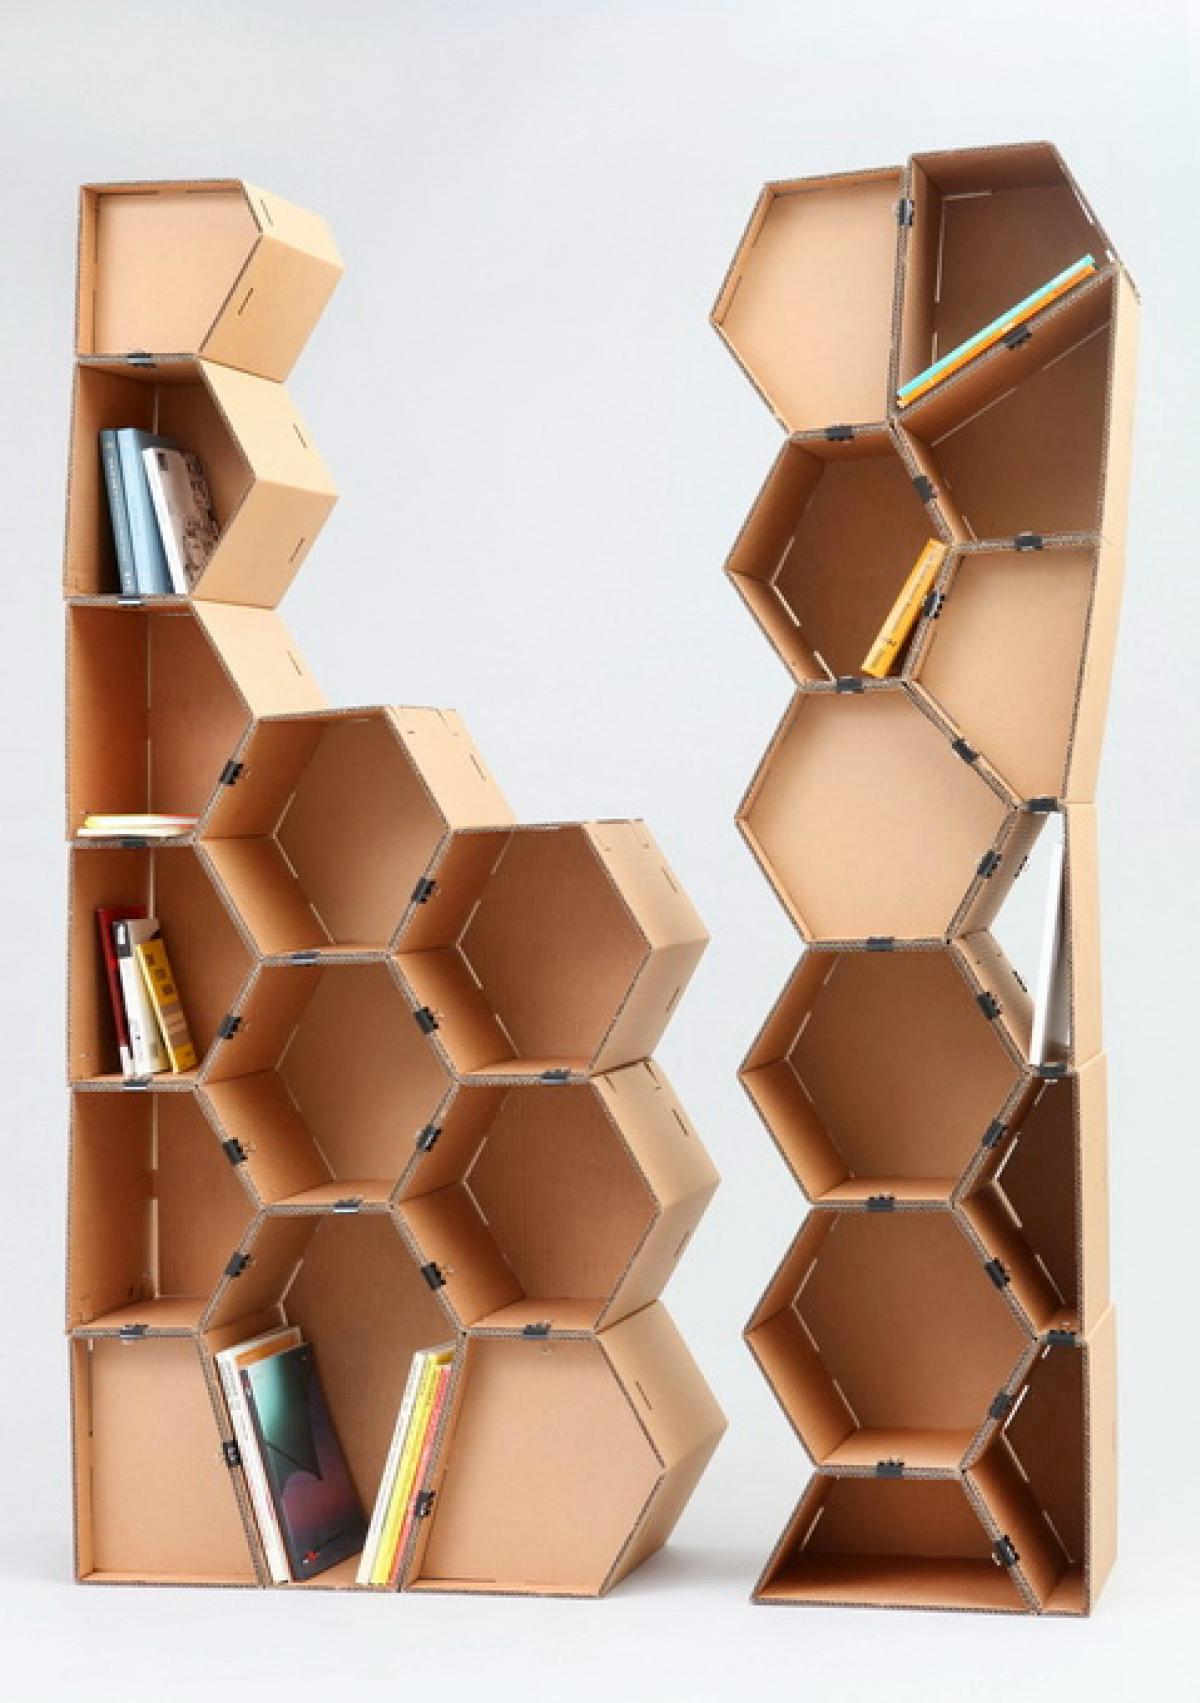
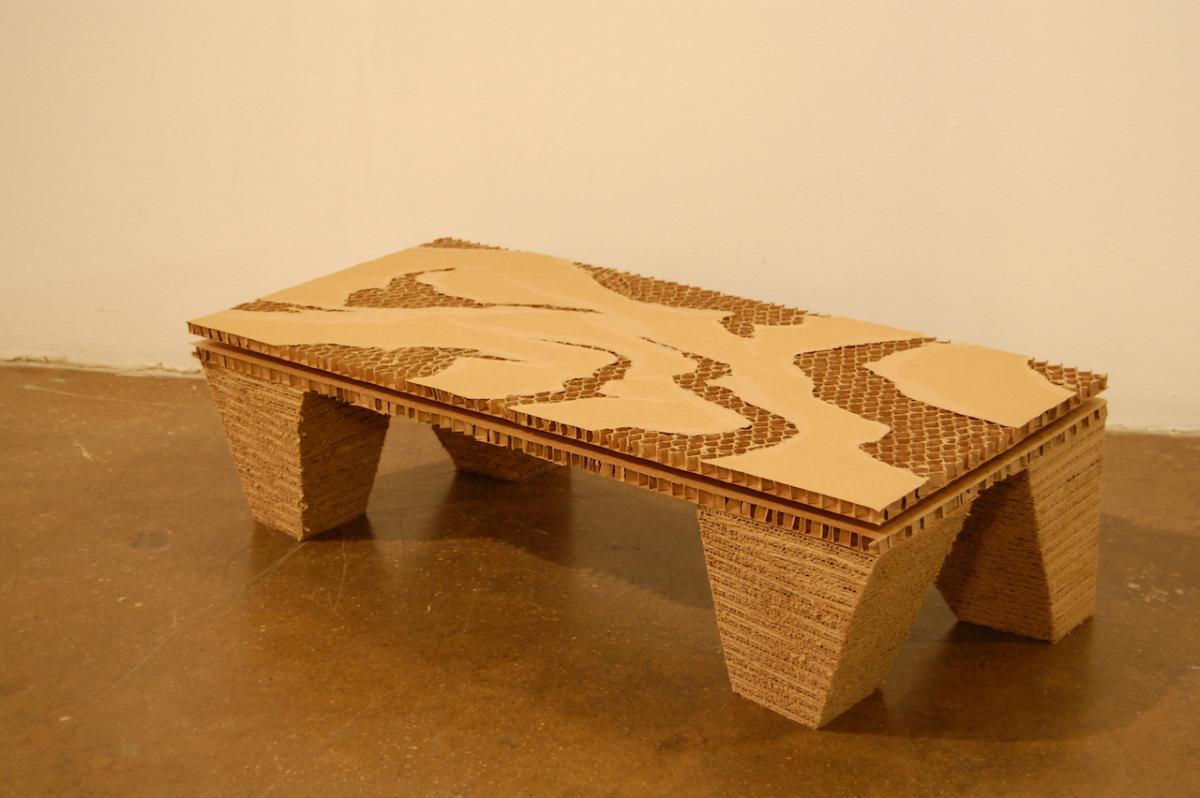
About fourteen years I developed an academic curriculum for an Interior Design class that revolved around corrugated cardboard furniture - material and techniques. While most of my students at Shenkar College of Design used computer aided design programs (CAD) to help in realize their ideas, and then compute the parameters of each individual ply of cardboard, which was then cut using a laser beam, others decided to stick to the “old” technique of pencil and knife and accurately cut the plies by hand. The outcome of this class was remarkably successful. Our class produced quite a diverse crop of furniture that could be classified into three main groups.
Laminated pieces, or stacked up furniture
Notched design
Folded or Origami designs
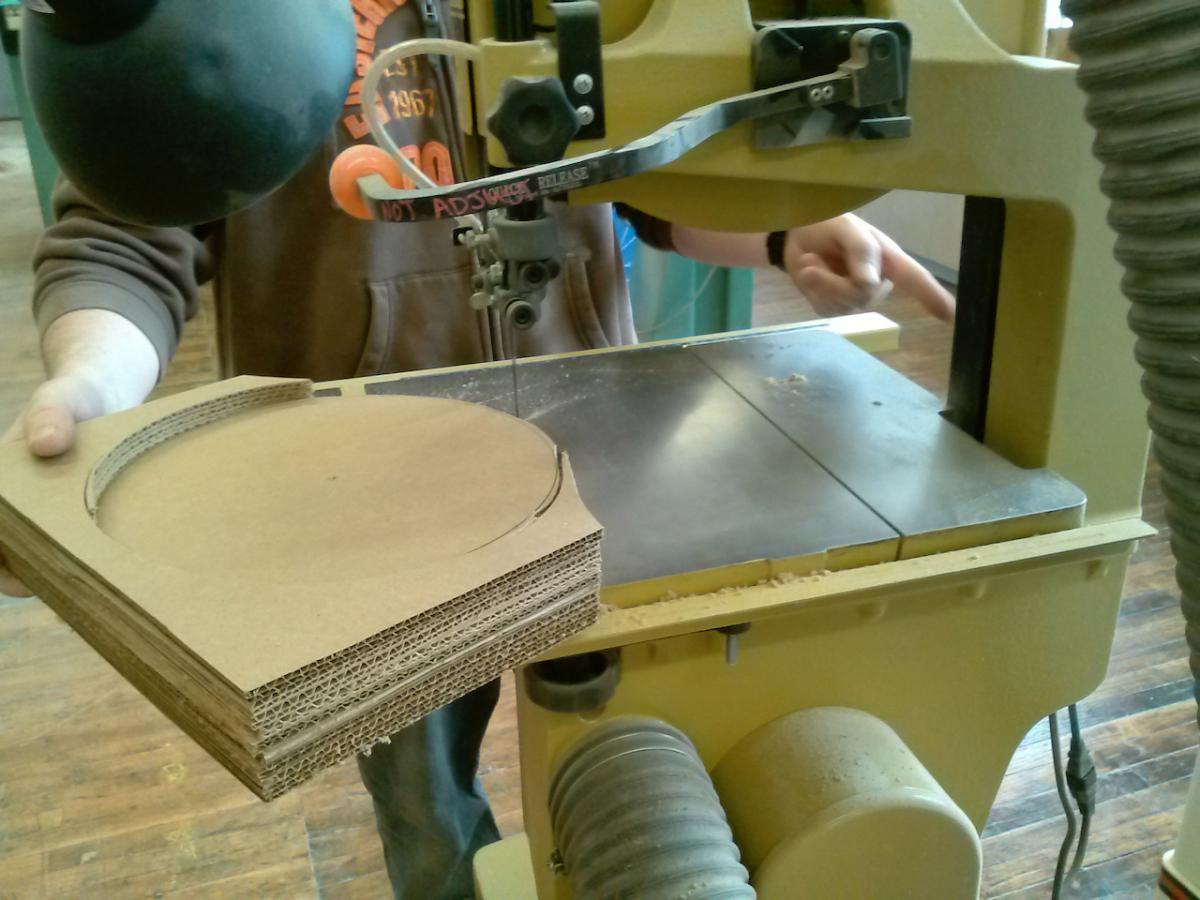
Encouraged by the success of this class I offered to teach a similar class at 3rd Ward Brooklyn, NYC preeminent makerspace of the time. That class too was a success, but unlike the CAD oriented students of Shenkar, most of my students in Brooklyn decided to adopt a more traditional woodworking approach of using the bandsaw and the table saw for realizing their projects. The techniques that we developed are quite self-evident to anyone who used the band saw. In essence the students glued up a thick block of corrugated cardboard and then used mostly a band saw to saw off the furniture parts. Then the parts were glued together to form a permanent “volumed” furniture (in the case of a laminated piece), or were notch together in the case of a knockdown design. First Assignment 9th Grade Box
Equipped with my previous experience I set sail to create a new program for Corrugated cardboard designs for our students that is geared to a home setting, and that will require a minimal tool set. I based my class on the assumption that cardboard is free and that due to the high volume of mail orders these days, it is safe to assume that this material will arrive at the students' home routinely in the form of Amazon and other mail order companies boxes.
Next time I will talk about the tools that we use, some of the basic techniques and the projects that I teach.
Take care and stay safe.
First Assignment 9th Grade Box
Student work Shenkar 2011 Student work Shenkar 2011
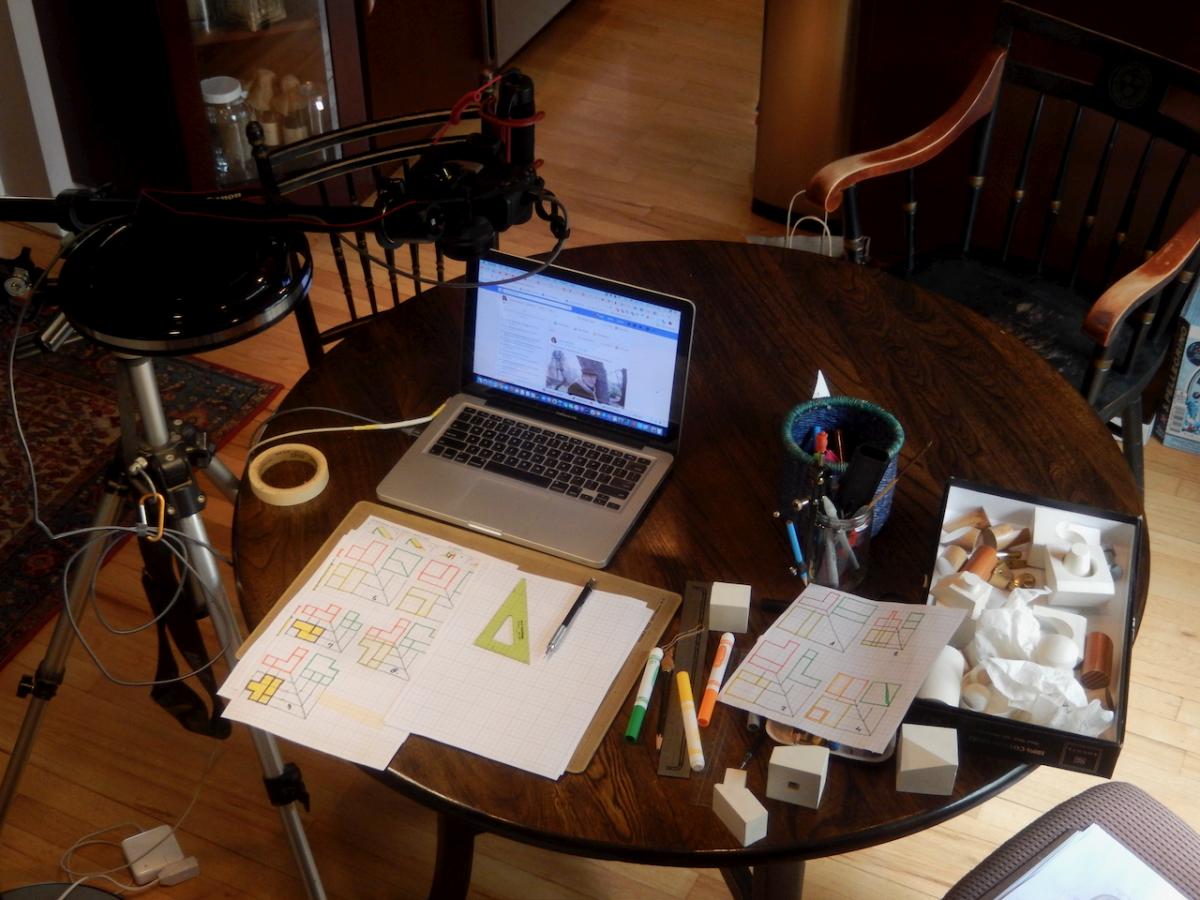
Student work Shenkar 2011 Student Work 3rd Ward 2013 At the bandsaw 3rd Ward 2013 After teaching a class on orthographic projection for the ninth grade. Notice the overhead camera setup and the 3D sample objects I used to illustrate the drawings
Join the conversation
05/15/2020 Paul Bailey
For me, woodworking - or any "hand-made" endeavor - is a very solitary and satisfying experience. There's frustration, determination, failure, analysis, thoughtful "recovery", success and, ultimately, pride in the final result. I'm my own worst critic, and (deep inside) my own best pat-on-the-backer. The mentoring you're giving these kids will provide them with a life-long sense of self-confidence and satisfaction. Good stuff.


 Joel's Blog
 Built-It Blog
 Video Roundup
 Classes & Events
 Work Magazine