Pilot holes are one of those things that is both totally mundane and standard in woodworking and also magical the first time you learn about them. Unless you learned woodworking in some sort of (formal or informal) structured way (e.g. shop class, your grandmother, job training, YouTube, etc.) you probably didn’t learn about pilot holes off the bat. I still remember when I first learned what they were after years of putting screws into wood and splitting it. A lot.
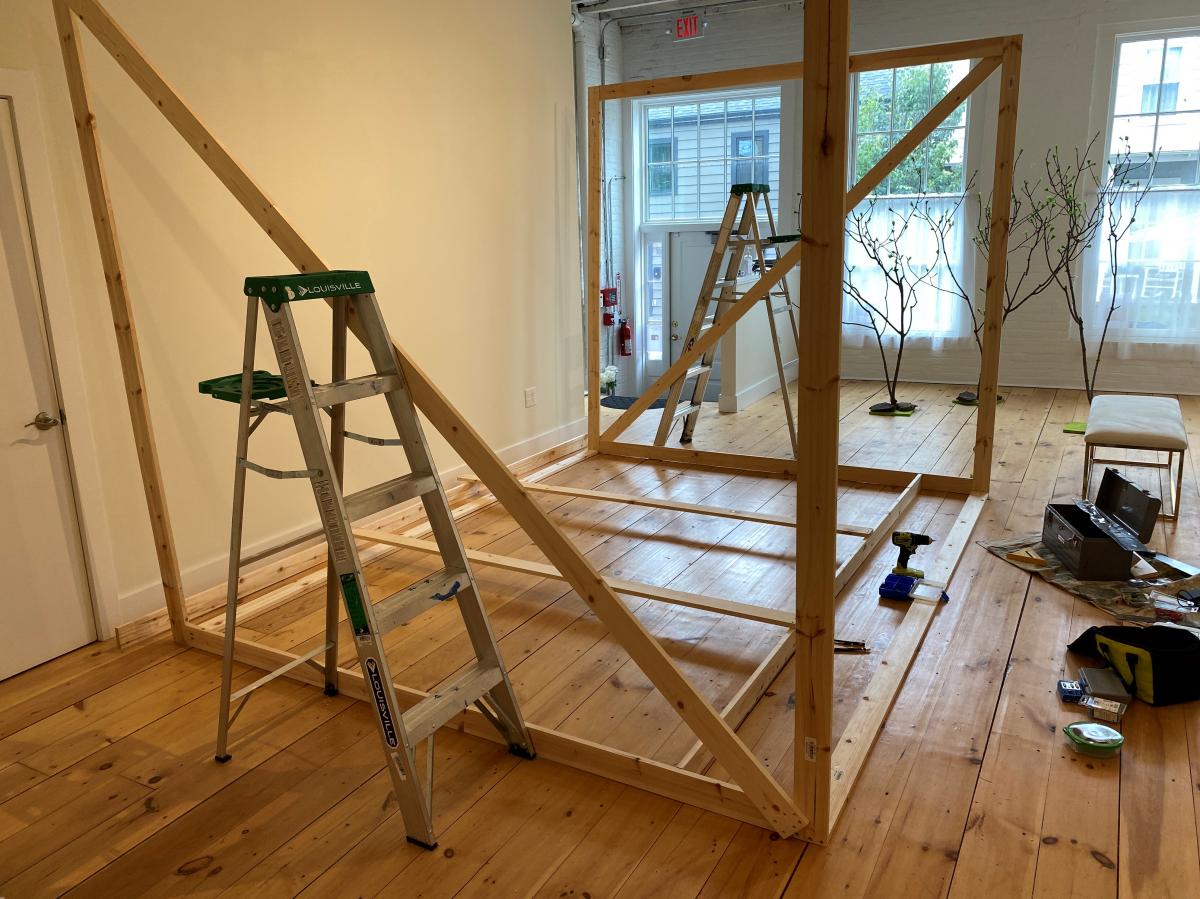
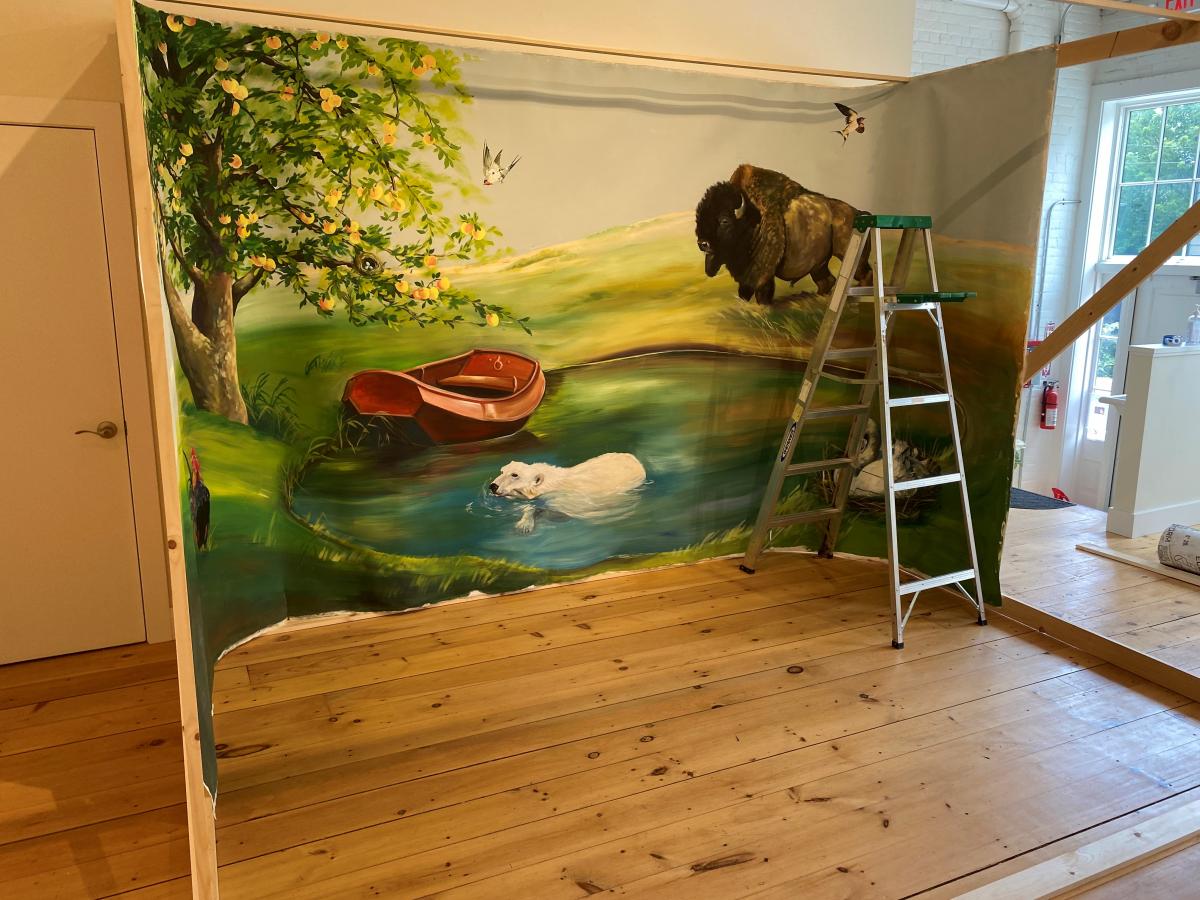
On a recent project I built for a gallery show (a 12’ x 8’ standing structure) I thought about pilot holes and where we learn the little yet oh so important things. A deceptively simple build, but it involved a few of those little lessons that some folks newer to woodworking might not have learned yet, such as the importance of pilot holes. This was put together with pocket holes in some places and wood screws in others, and so, lots of pilot holes.
The beast! Standing structure to hold a variety of multi-media artwork.
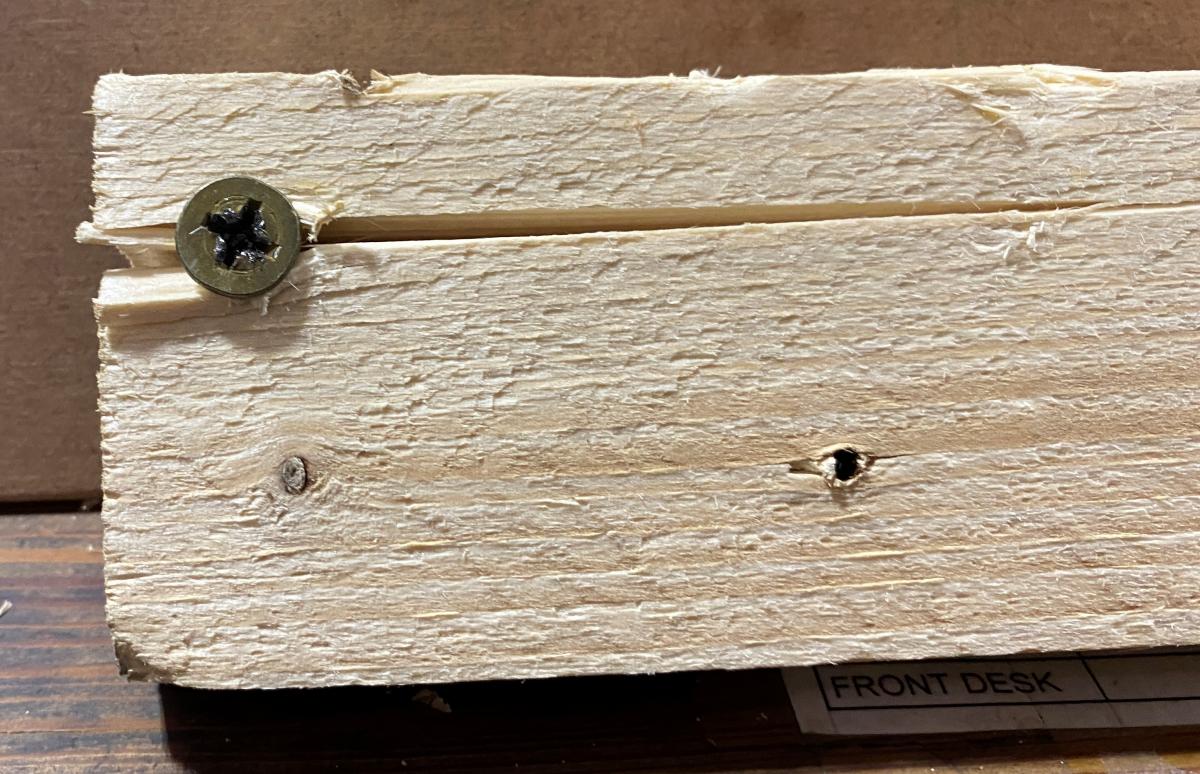
Pilot holes are simply holes drilled in before driving a screw into a piece of wood. Pocket hole joinery is essentially just drilling a counterbore (more on that a little lower) pilot hole at a specific angle. Pocket holes are good practice anytime you are using screws to join wood to wood, but most folks use them as needed in situations where a screw is more likely to split the wood they are using. Situations with risk factors such as:
Placing a screw close to the edge of a piece of wood
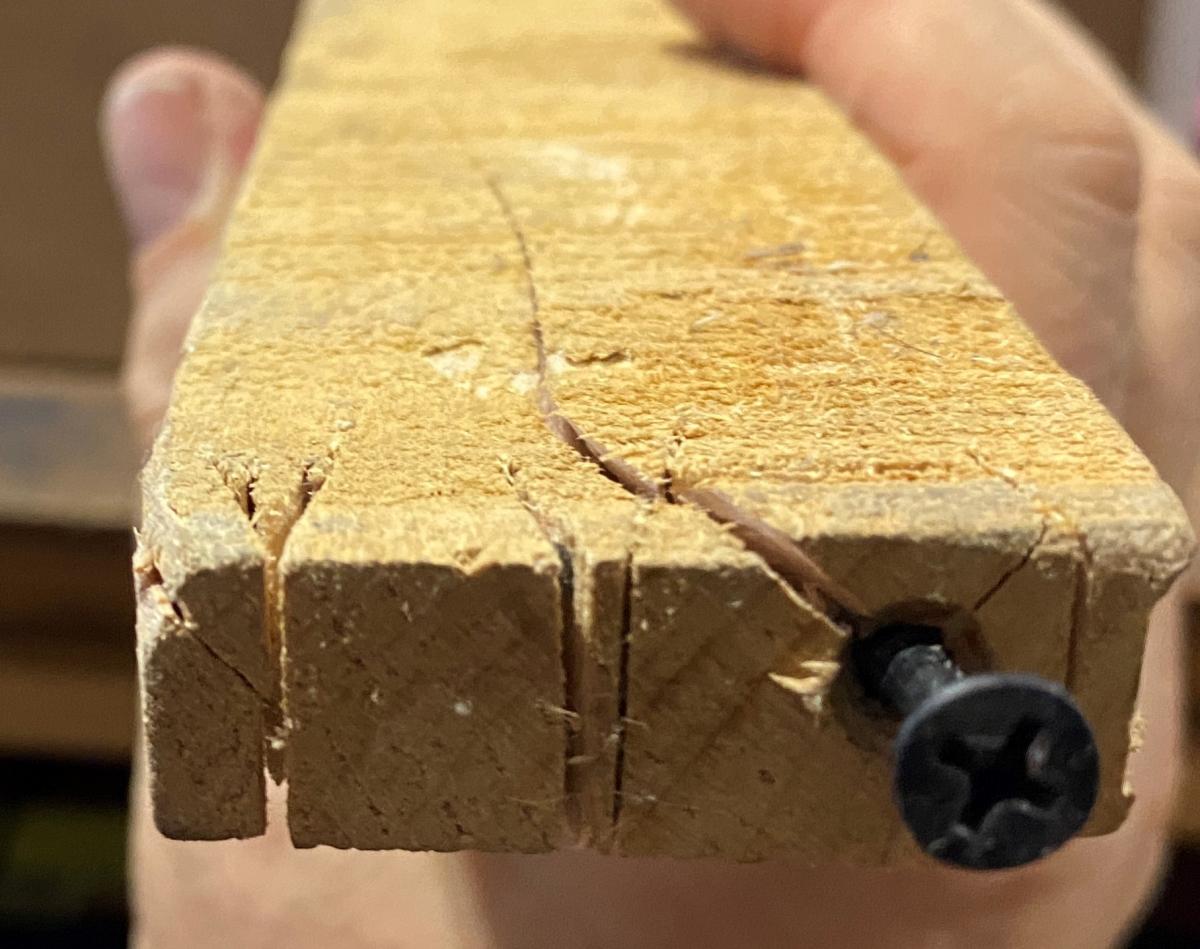
Placing a screw into the end grain of a piece of wood
Using massive screws on smaller, weaker wood also increases your chances of splitting.
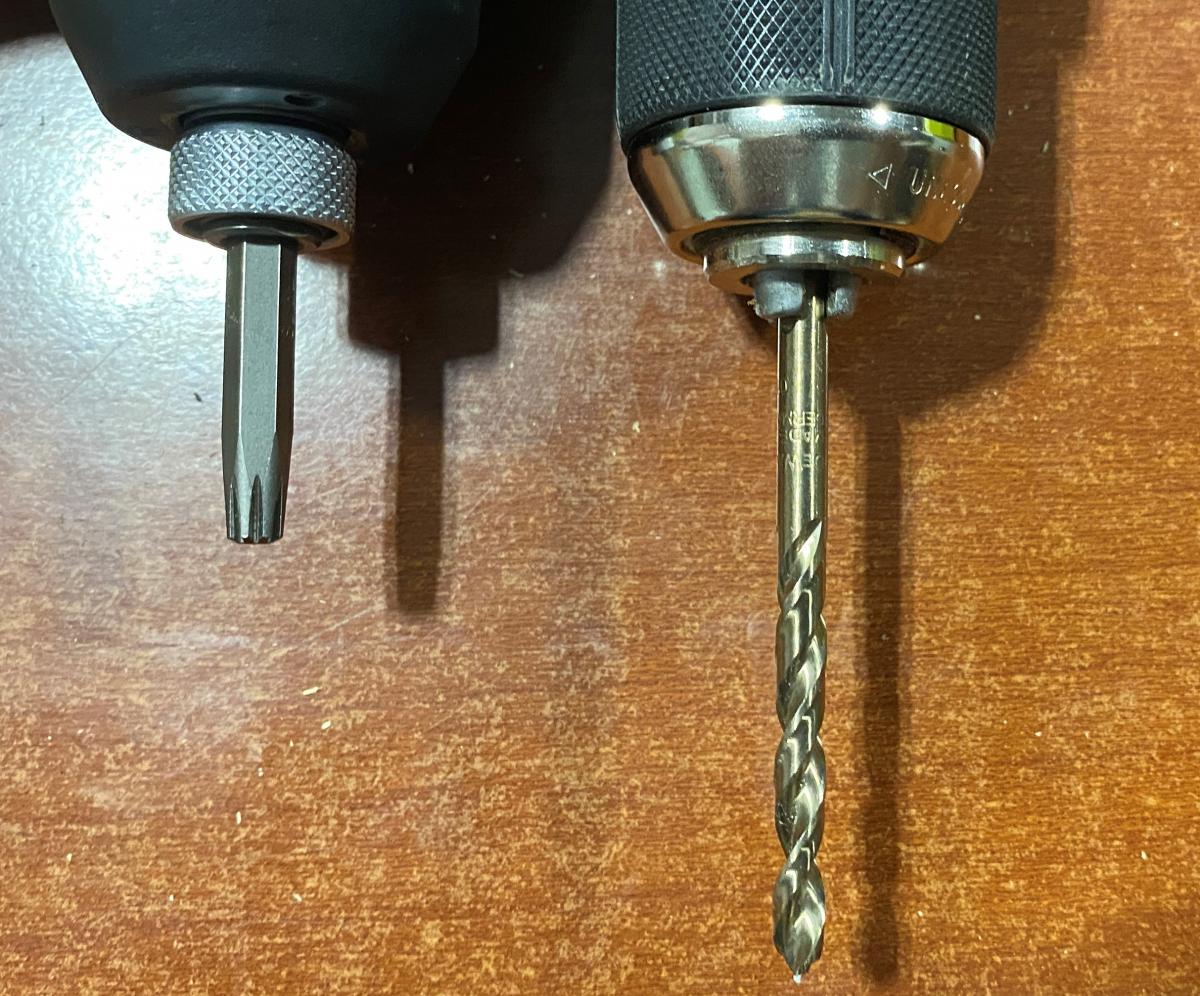
Most folks drill a pilot hole the same way they drive a screw, with a power tool. Simply select a drill bit that is slightly smaller than the width of the screw and drill a hole right where the screw is going. If you are doing a lot of pilot holes, put the drill bit in one gun and your driver bit in another, or drill all your pilot holes first, then drive your screws.
If you are joining two pieces of wood then drill a pilot hole through both pieces of wood, ideally clamping them first or in some other way ensuring they don’t move before driving the screw, making the pilot hole pretty pointless. After splitting enough wood sans pilot holes and/or using them correctly you will soon get a sense for when you need them and how to do them quick and easy.
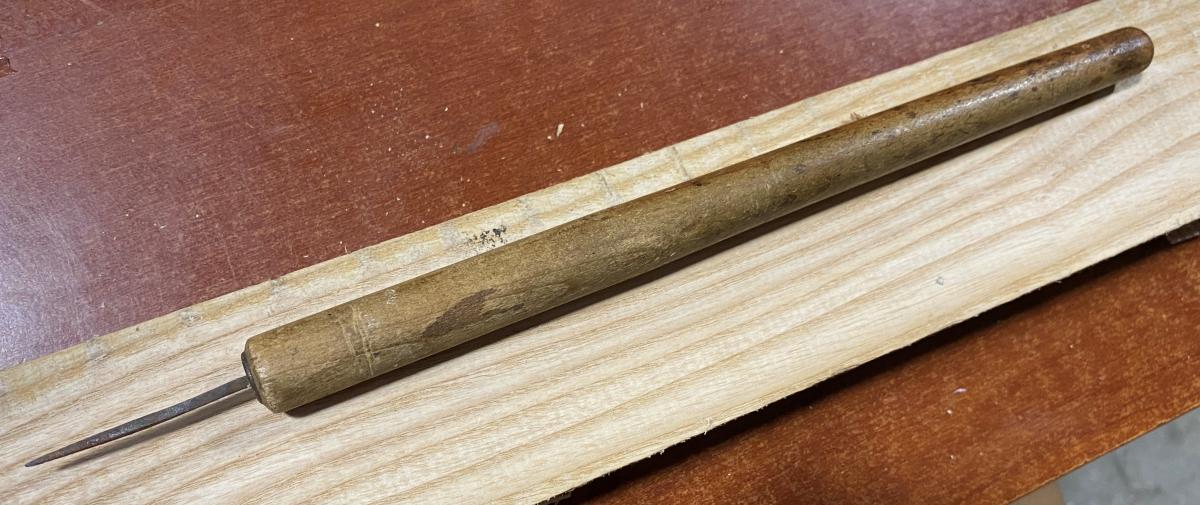
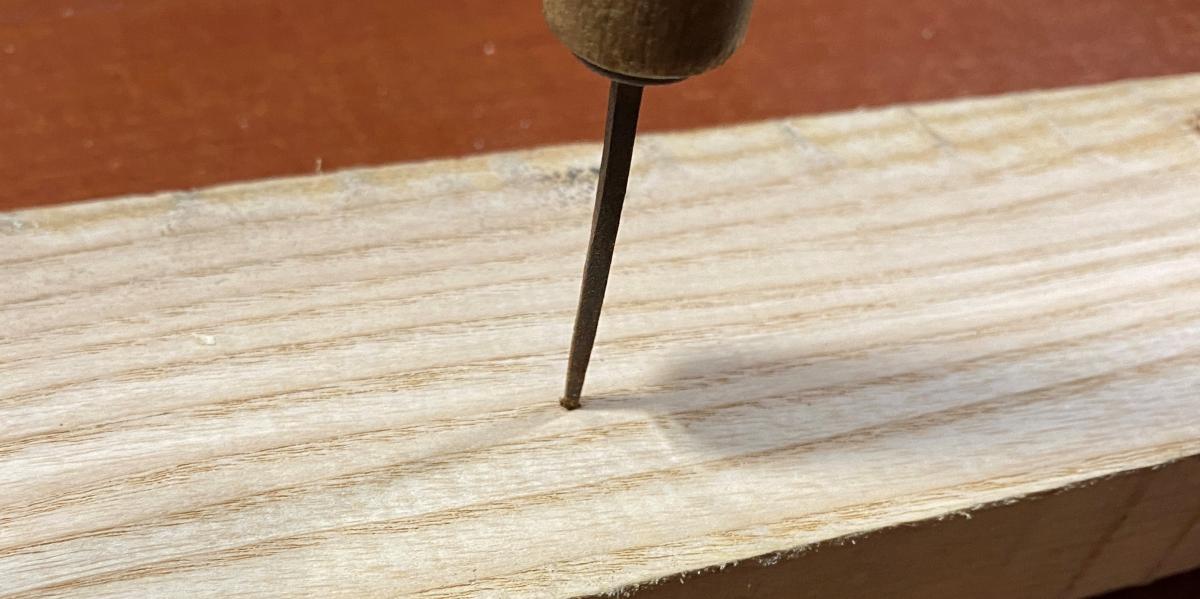
As we like to say around here, if you know what you are doing, a lot of times using a hand tool over a power tool can actually be quicker and more efficient. And so you could also invest in a set of gimlets - old school hand tools designed to make quick work of pilot holes. Recently I picked up a few Japanese style pilot hole tools which make really quick holes by rolling them quickly back and forth between your hands into the wood like you were trying to start a fire. Cool stuff.
Japanese pilot hole maker. You don’t get more simple than this!
Counterbore and Countersink
In addition to not splitting your wood, pocket holes can also help in other ways - structurally and aesthetically. There are specialty drill bits you can use, namely counterbores and countersinks. They are cheap to buy, easy to use, and available at Tools for Working Wood and elsewhere. A counterbore bit allows you to drill the pilot hole for the screw and then a larger flat-bottomed hole above it, which hides the head of the screw, and can take a simple wooden plug which actually buries the screw. You can even make your own plugs with a plug cutter bit out of the same wood. Like a ninja, no-one will ever know there is a screw buried in your piece. “How did she do that?!” they will marvel.
But I digress.
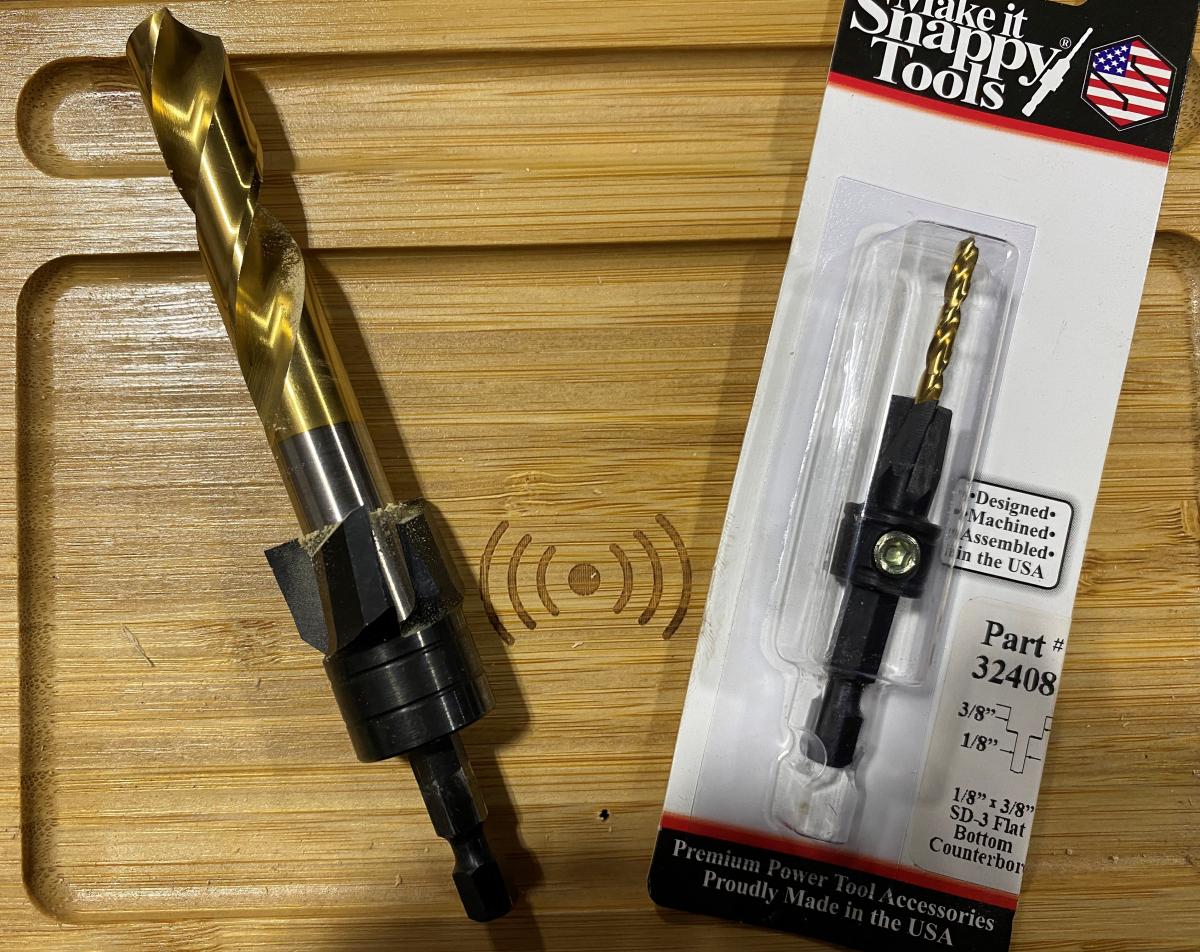
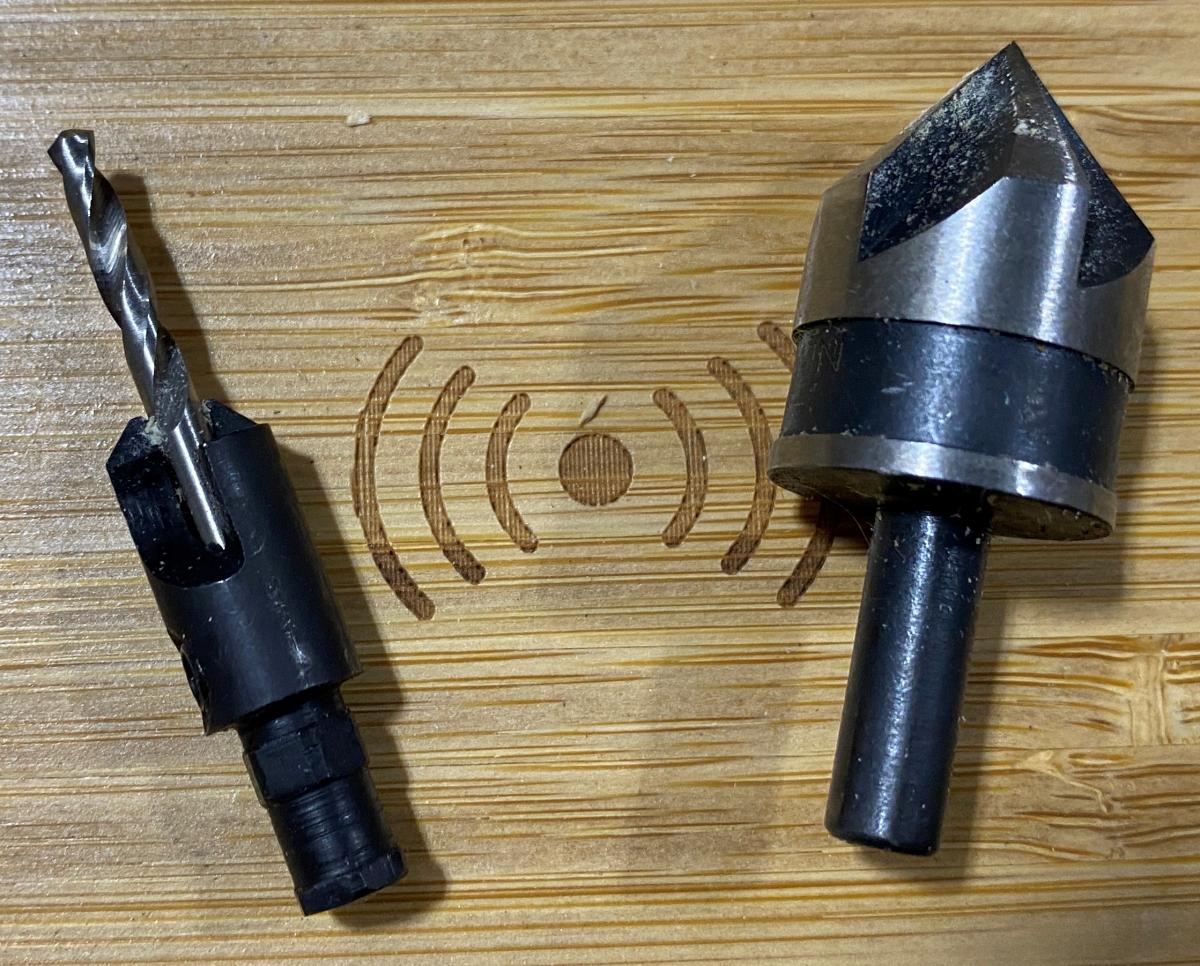
Counterbore bits, big and small.
Counterbores are an easy way for DIY’ers and hobbyists to make more professional looking projects. Note in the picture that there are two dimensions to be aware of when buying and using counterbore bits - the diameter of the pilot hole bit (⅛” in the picture on the left) and the diameter of the bored hole (⅜” in the picture). This is important to make sure the head of the screw you are using fits in the counterbored hole, and to make sure you are using the right size wooden plugs if you are closing up the hole after the screw is inserted.
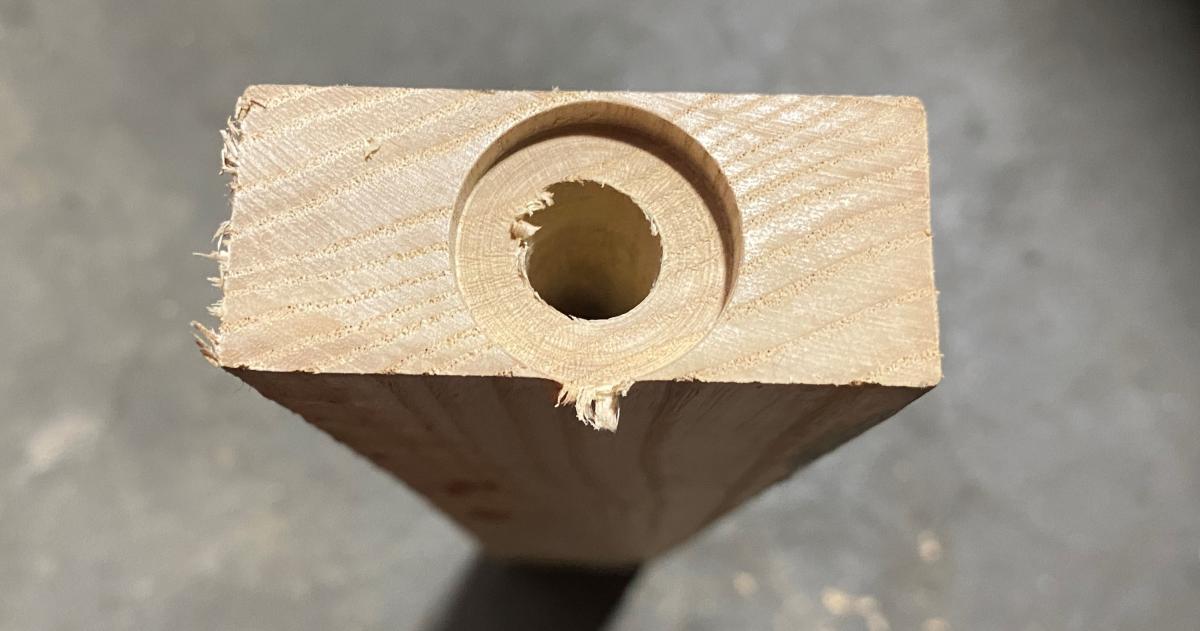
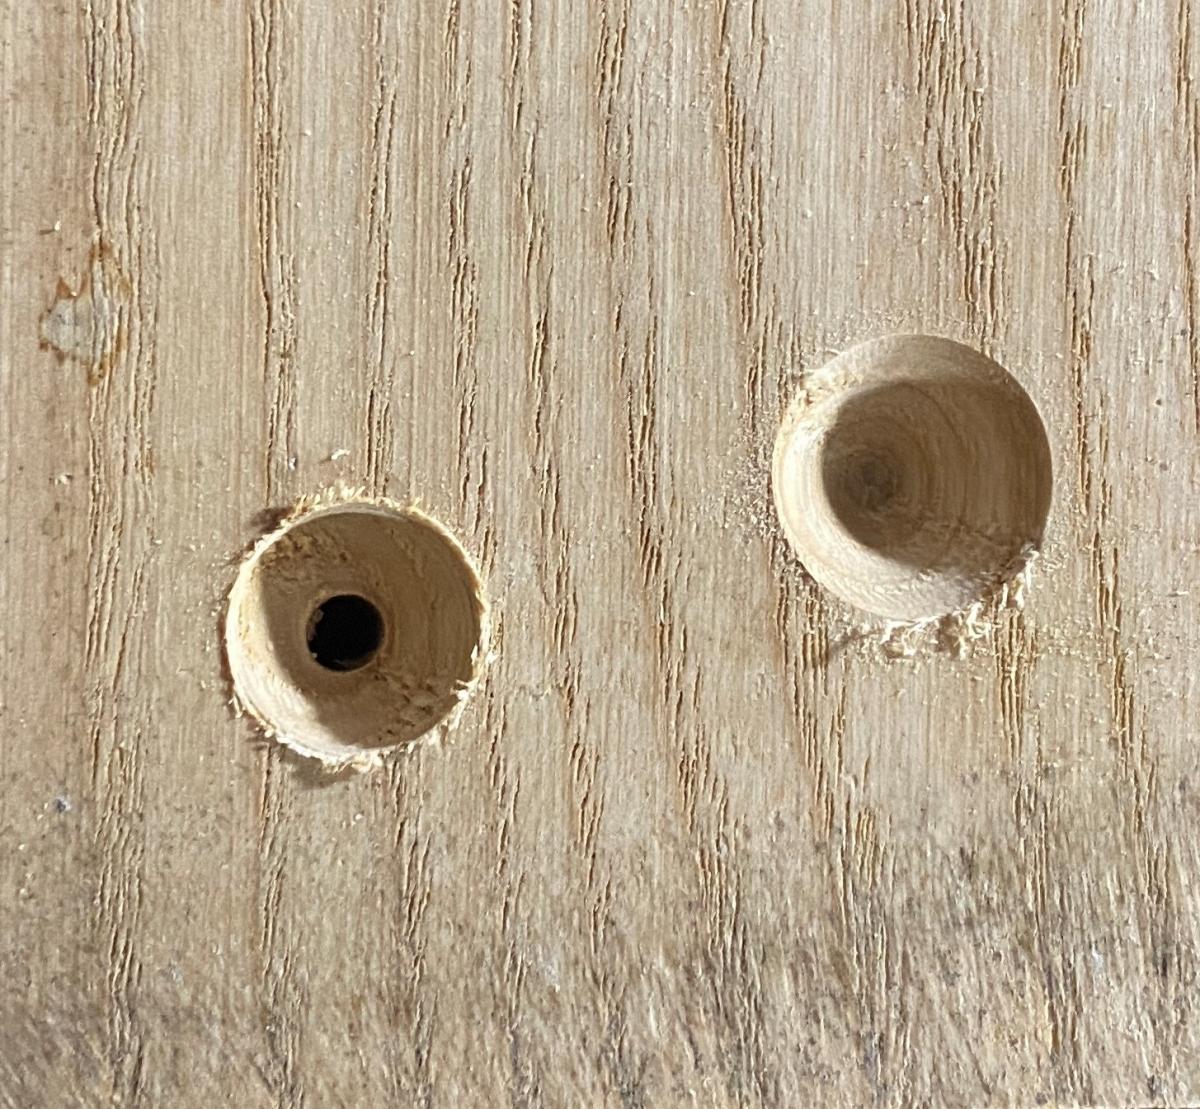
Very large counterbored hole and pilot bit. I only drilled down a bit here so you can still see everything, but you can make the hole as deep as you need/like.
Countersink bits are similar, except instead of drilling a larger flat bottomed hole over the pilot hole, it allows you to make the screw head flush to the surface of the wood. It creates an inverted pyramid divot on top of the pilot hole, matching the shape and angle of most standard wood screw heads. This also gives a clean, professional look, and allows you to have a smooth surface.
Countersink with pilot hole on the left, countersink only on the right.
Another cool option is a countersink bit without a pilot bit. You can use a separate bit for the actual pilot hole (or not) and then use a countersink bit just to create the room for the head of the screw to sit flush. This is actually what I do, because it saves me having to buy a number of different size pilot hole countersink bits, as I already have regular wood bits with which to drill the pilot holes. Whether using a counterbore or countersink, be careful not to go too deep into the wood as to compromise the strength of the joint.
Countersink with pilot hole on the left, just the countersink on the right.
Countersink to flush or just under the surface.
Both counterbores and countersinks come in a variety of sizes, and we carry a wide range of both bits sold individually and in sets. If the projects you do tend to use wood screws of the same diameter, then you probably don’t need a set at first, though they are useful to have, and sets more cost effective than buying multiple bits individually.
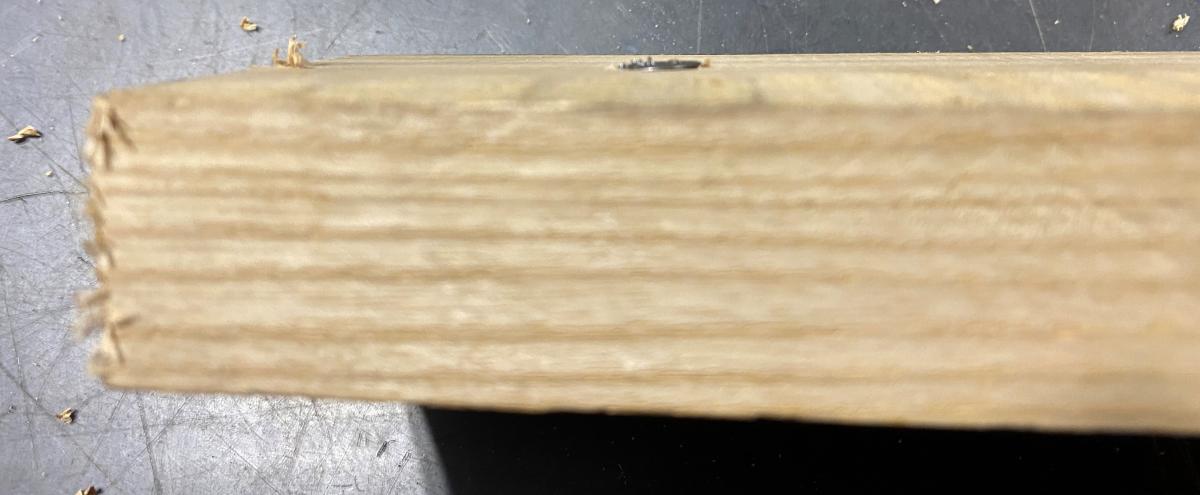
Even though I put this together in about 2 hours using big-box store 1” x 4” soft stock, I was able to make the whole thing without a single split using pocket screws and pilot holes.
The finished product.
Join the conversation
07/15/2021 Michael in South Jersey
Hello Joe,
Thank you ........... thank you......... very much for not even once suggesting how we should "pre-drill" this or that. I wonder when that expression started being used interchangeably with the word "drill" or the expression drill a pilot hole ? Bison and Polar Bears........hmmmm ?!
Best
Michael
07/19/2021 Bob in Indiana
Joe,
As you address the benefits of pilot holes, I think it would be useful also to address clearance holes and how they work in conjunction with pilot holes to provide a tighter joint.


 Joel's Blog
 Built-It Blog
 Video Roundup
 Classes & Events
 Work Magazine
Thank you ........... thank you......... very much for not even once suggesting how we should "pre-drill" this or that. I wonder when that expression started being used interchangeably with the word "drill" or the expression drill a pilot hole ? Bison and Polar Bears........hmmmm ?!
Best
Michael
As you address the benefits of pilot holes, I think it would be useful also to address clearance holes and how they work in conjunction with pilot holes to provide a tighter joint.
Take care,
Bob