In my previous blog entry, I showed how our 8th-grade students began working with a carving knife on a basswood blank to shape a sphere.
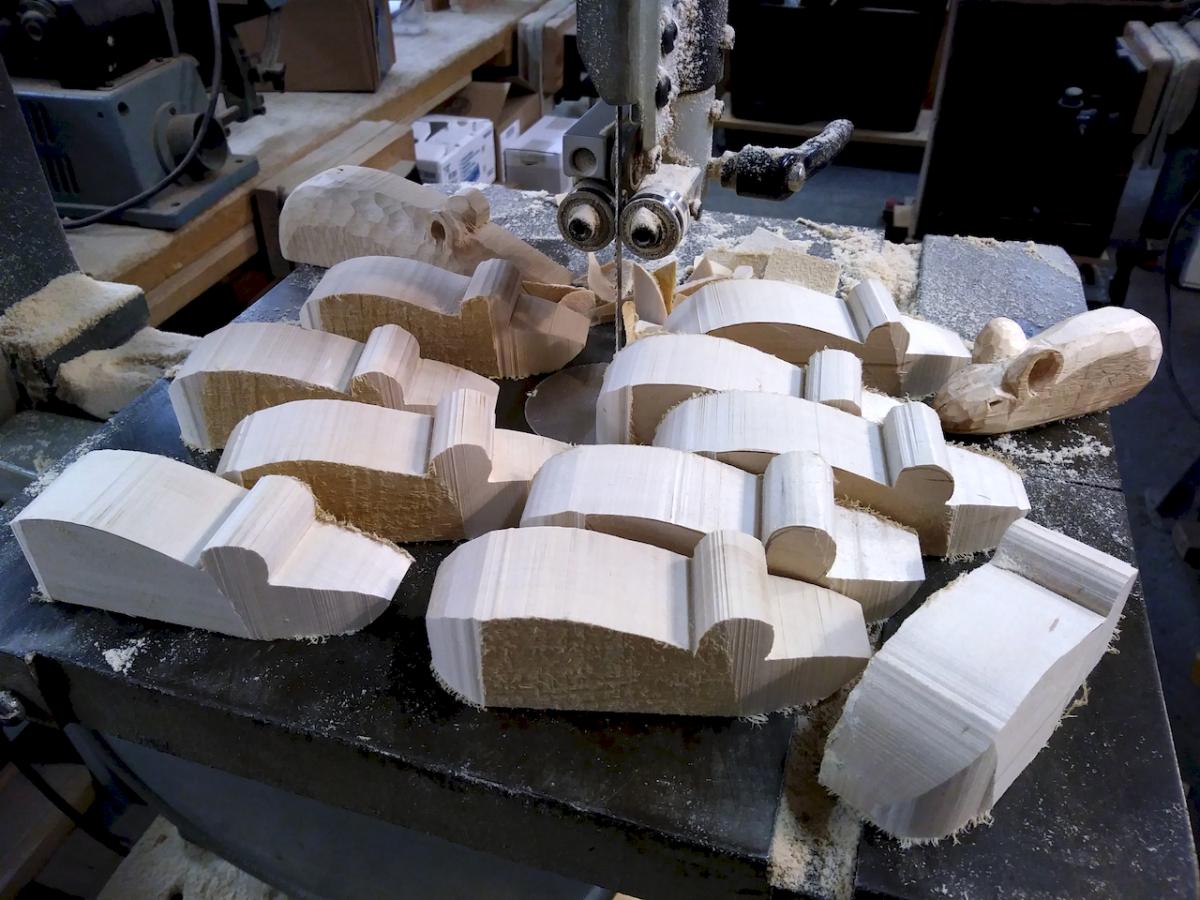
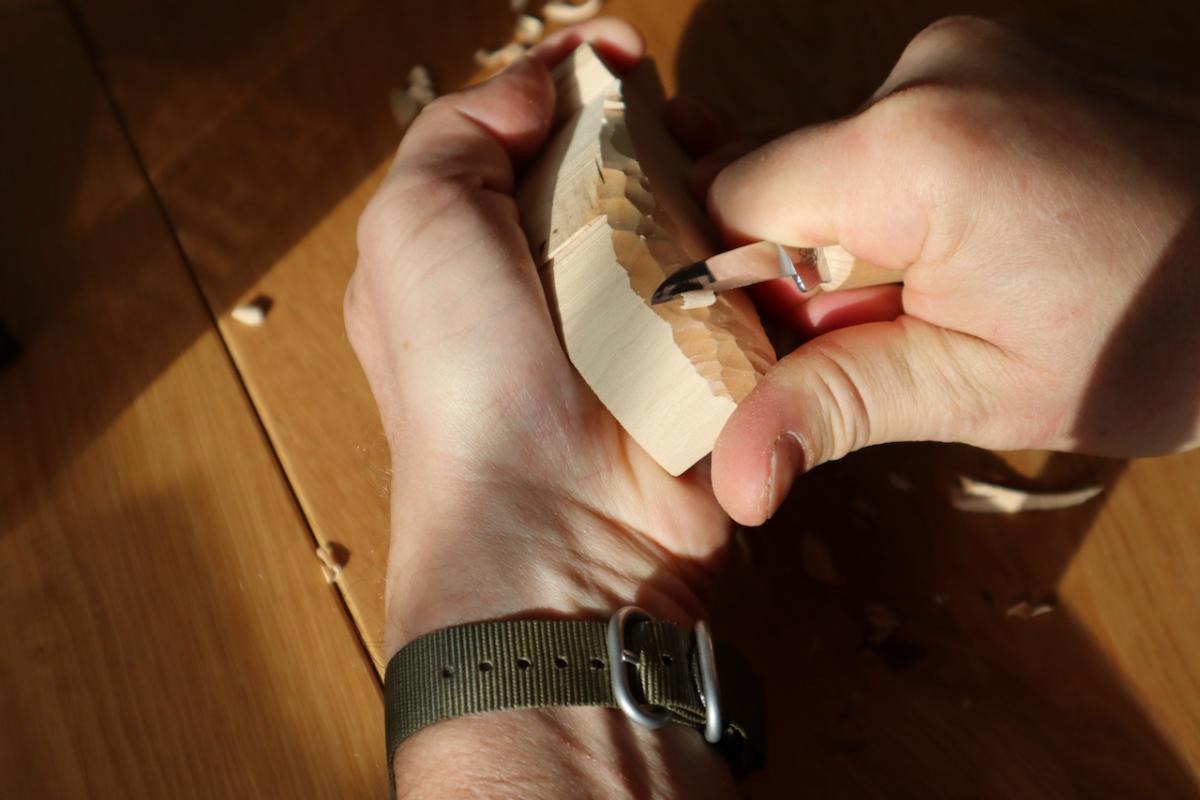
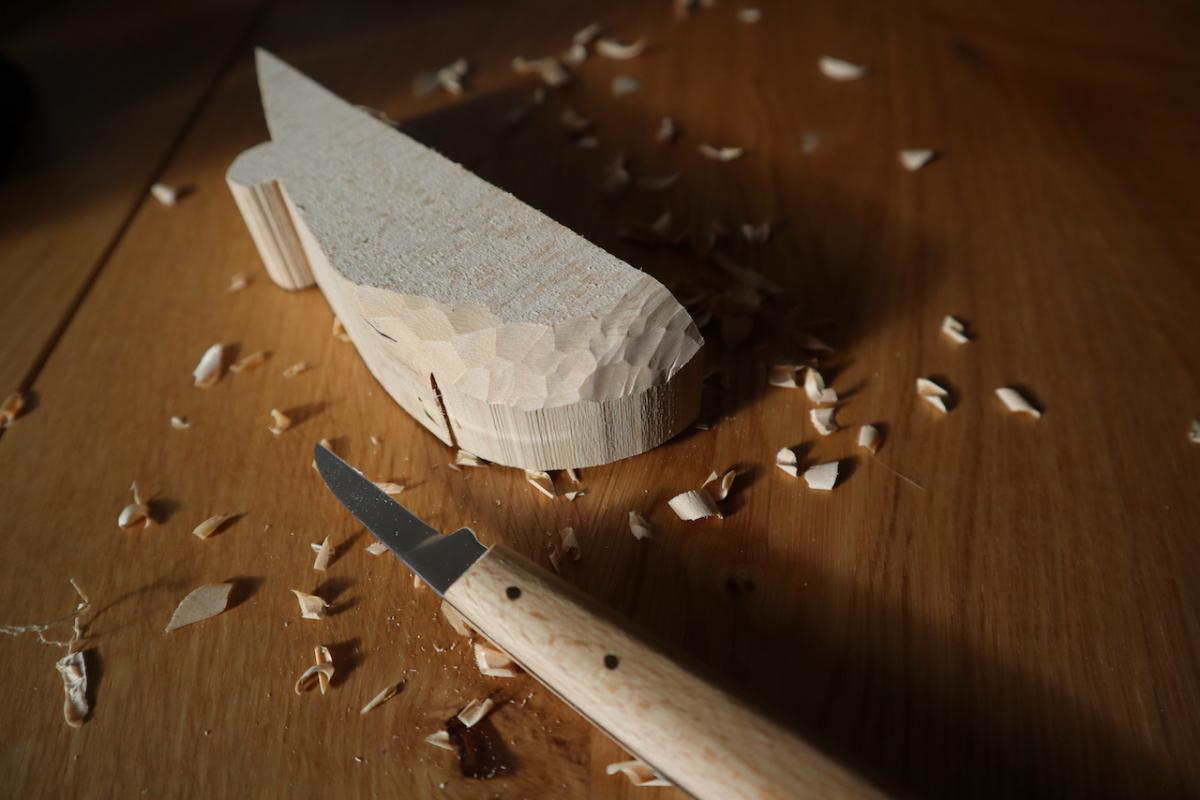
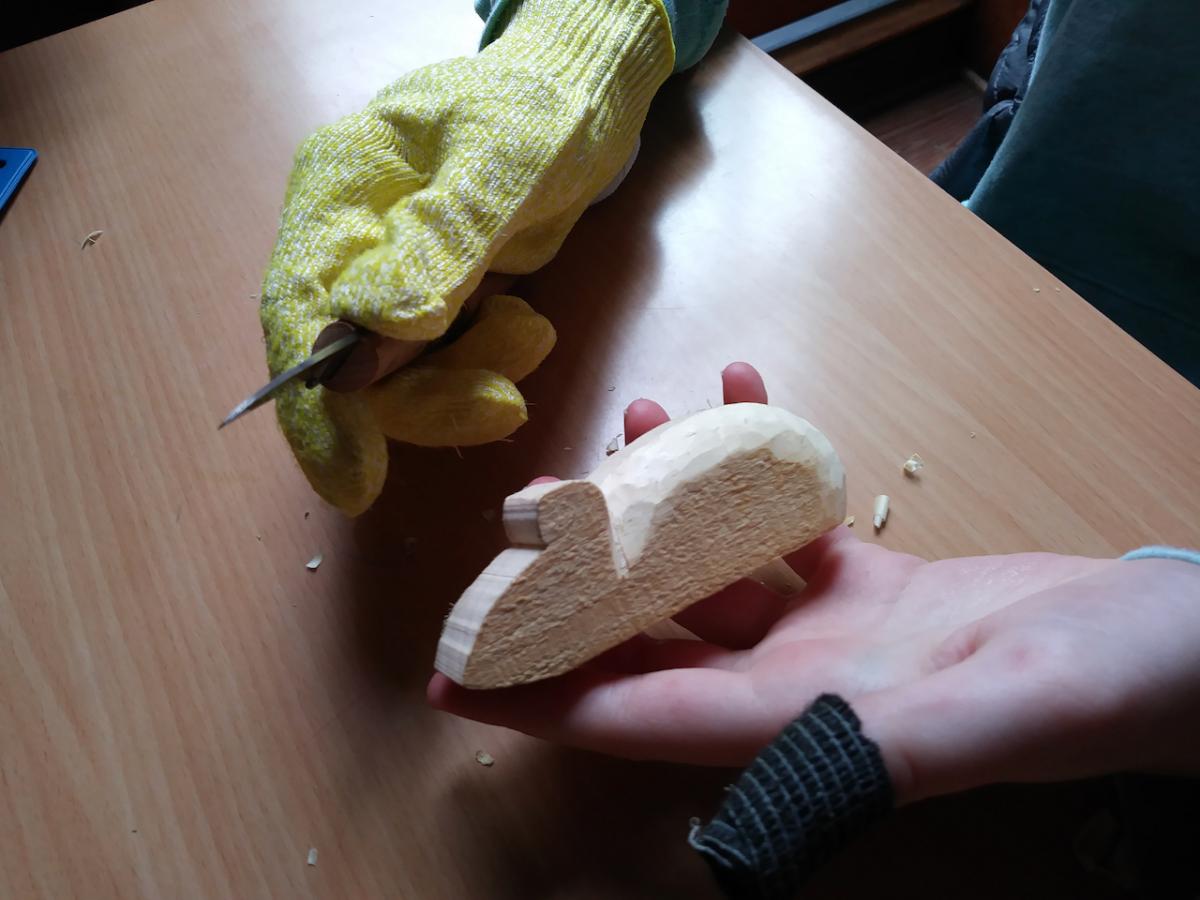
Once a student finished his or her sphere, and added a few more details to the 6” long basswood blank, I presented them with a new piece of basswood that I roughly cut on the bandsaw to the outline of a mouse.
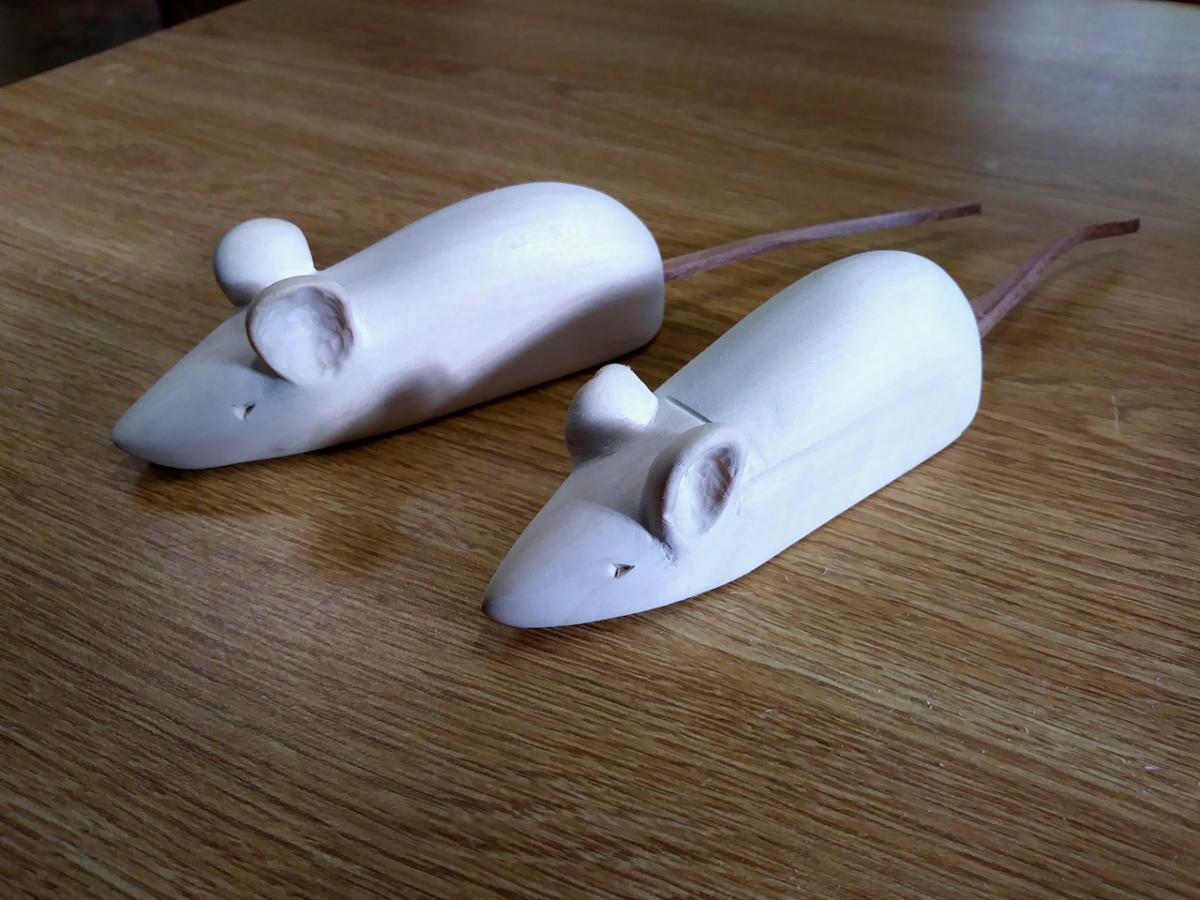
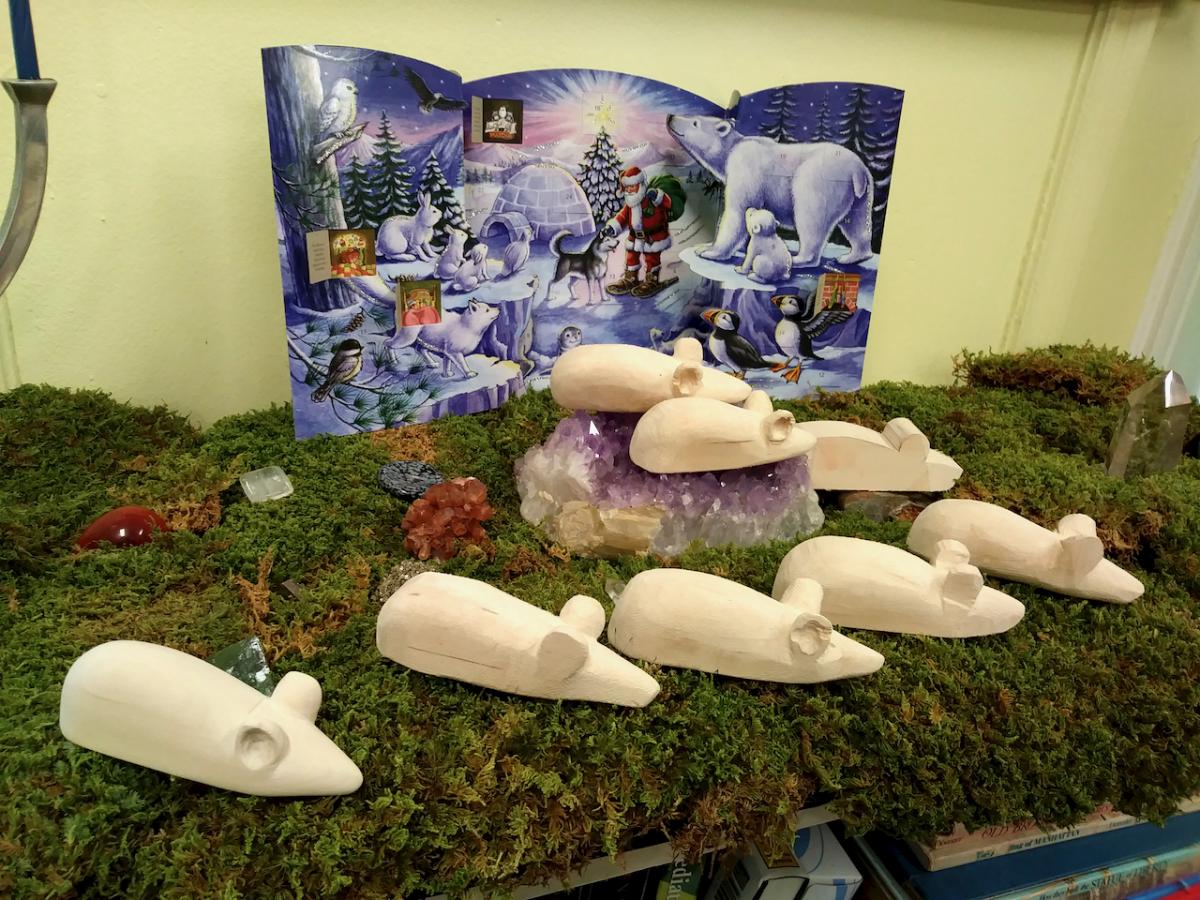
Why a mouse you might ask? Well, after sketching and trying a few animals I concluded that carving a simple mouse would be a great starting point for animal whittling. A mouse is a relatable animal that many find cute. The shape of the mouse resembles that of a teardrop. Its oblong shape provides solid fundamentals to train the young hand in whittling. A mouse blank can be conveniently held by hand or be supported on the lap, and it has plenty of curved surfaces to hone the student’s skills on. The mouse’s back and torso provide an opportunity to learn the importance of carving downhill with the grain, and yet the animal shape is rudimentary and forgiving enough in case the student makes an against the grain mistake. Furthermore, the rodent’s ears bestow us with both support and protection for our digits when working on the snout. And, lastly, carving the mouse’s inner ear allows the student to experience using the knife (or a gouge) in hollowing out via a delicate procedure that is done once everything else is completed.
A step by step instruction:
After giving my students their mouse blanks
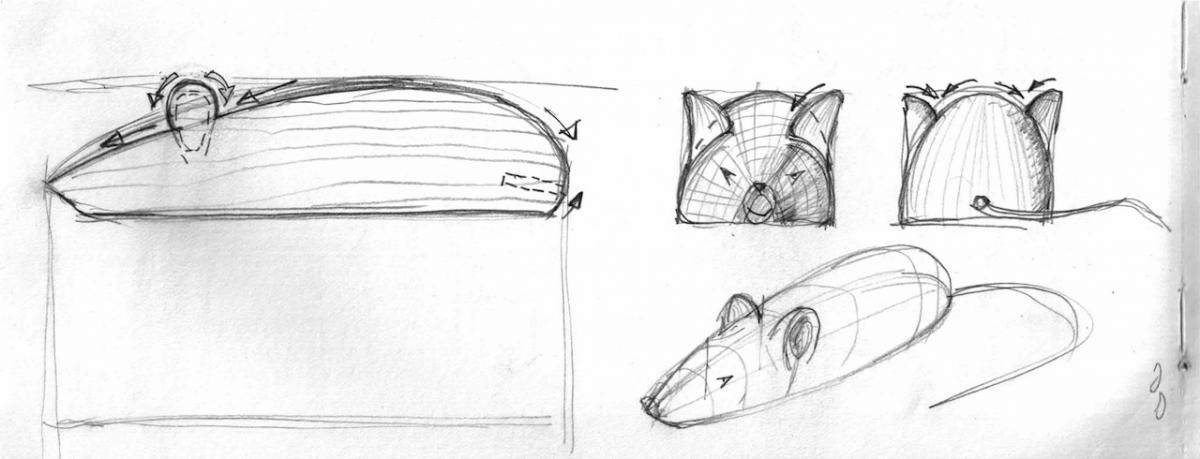
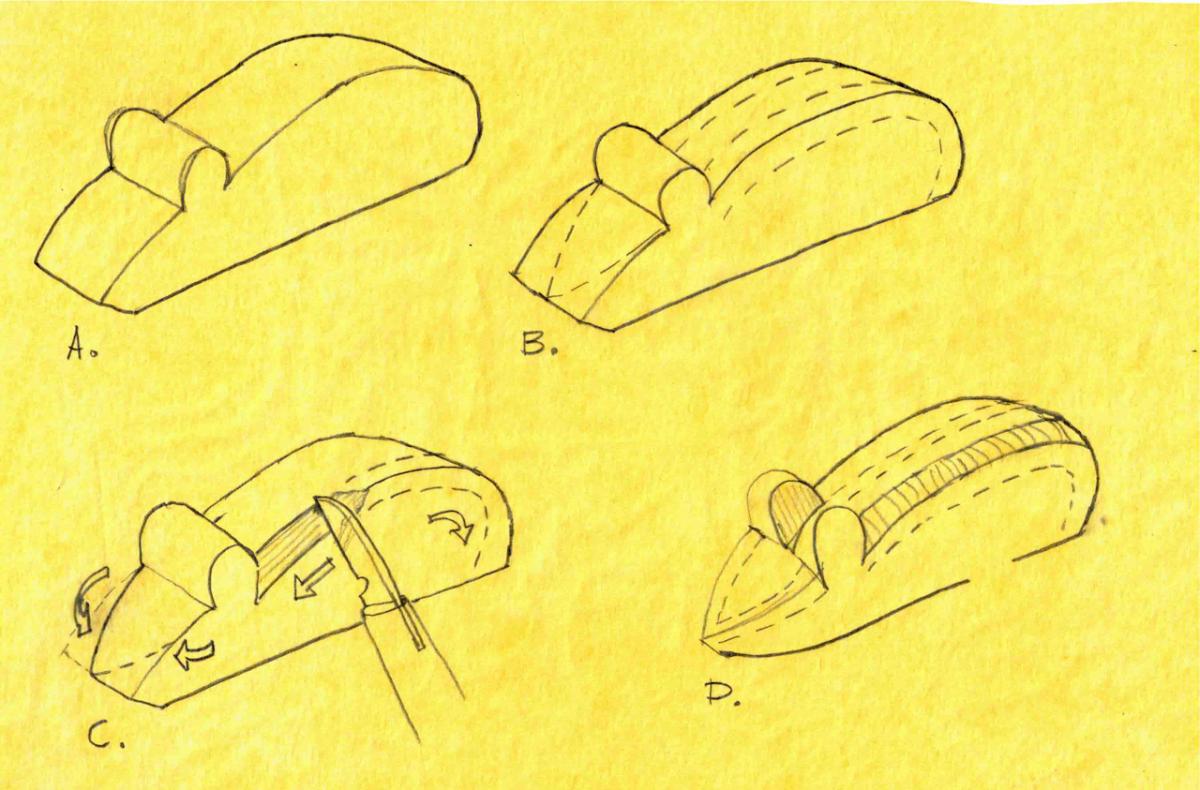
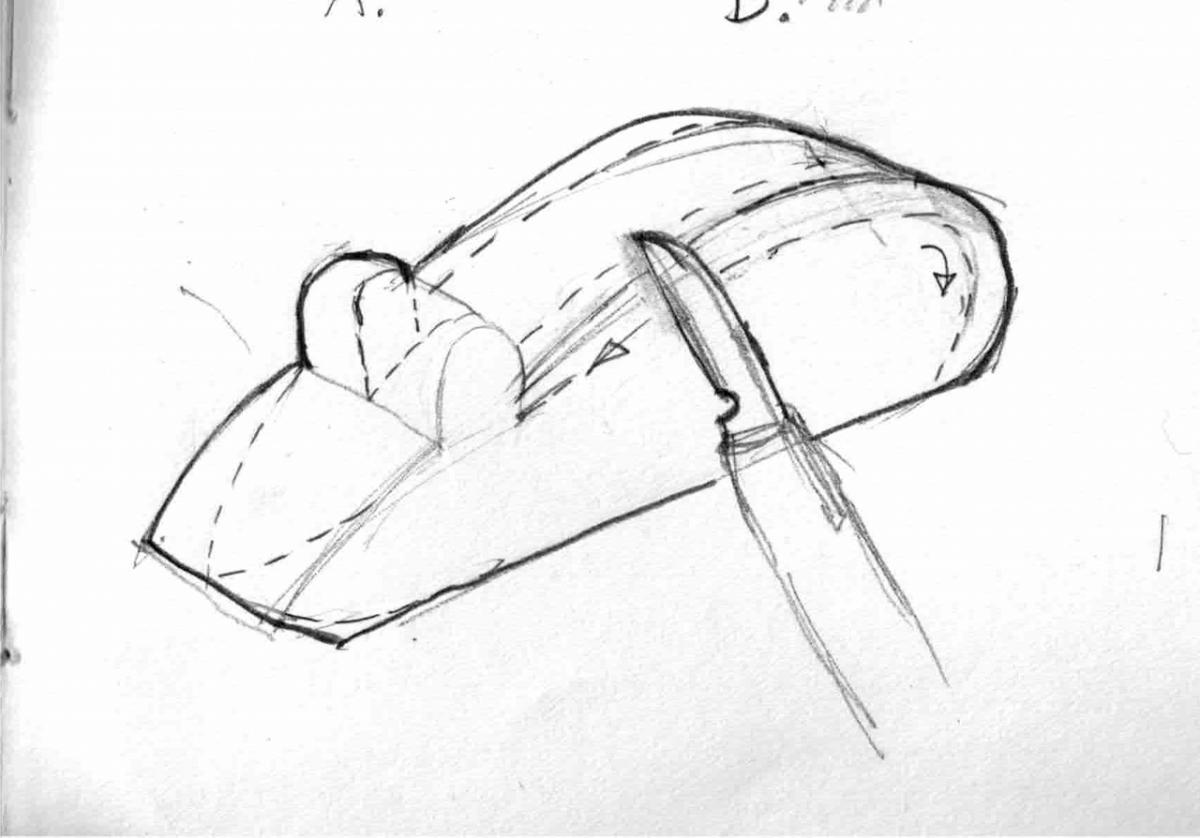
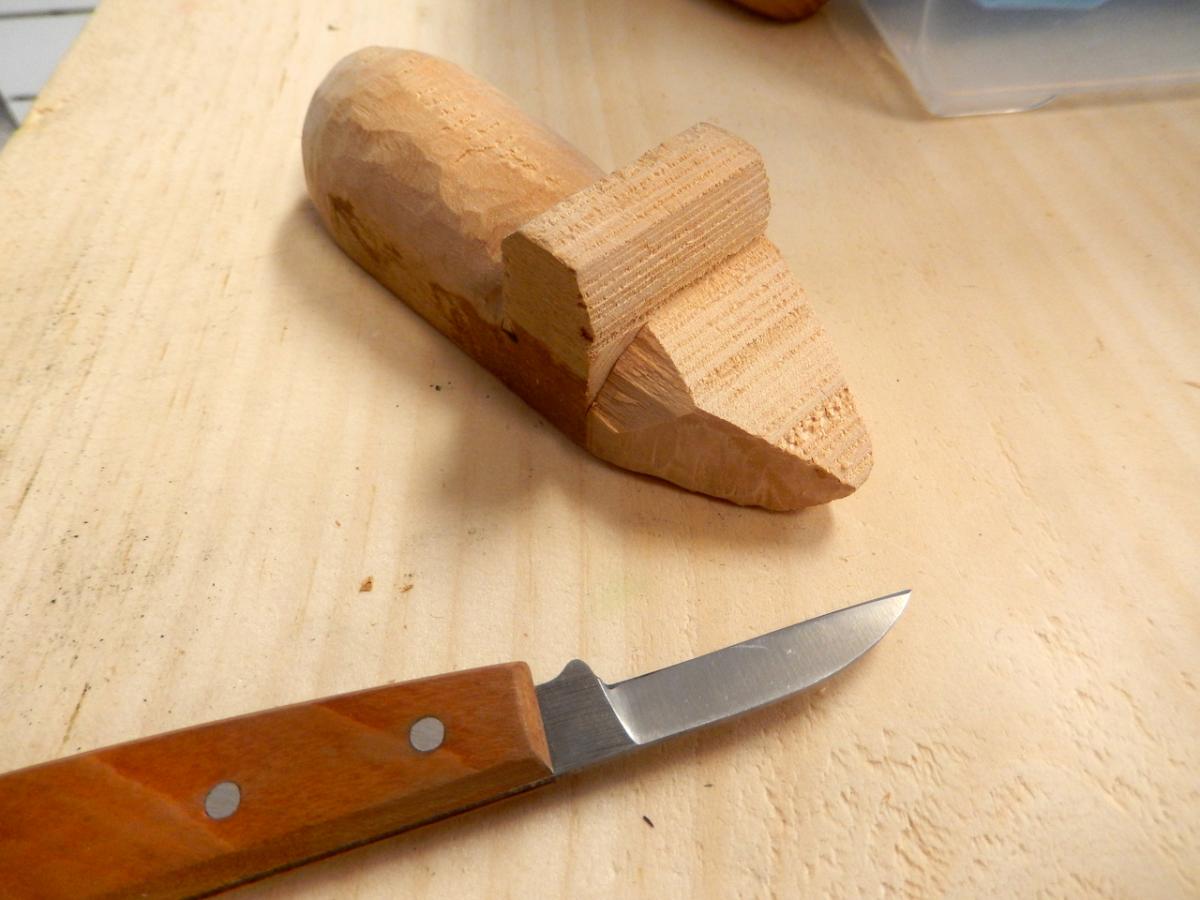
I asked them to draw two inset lines from the corner of the blank’s back (A, B)
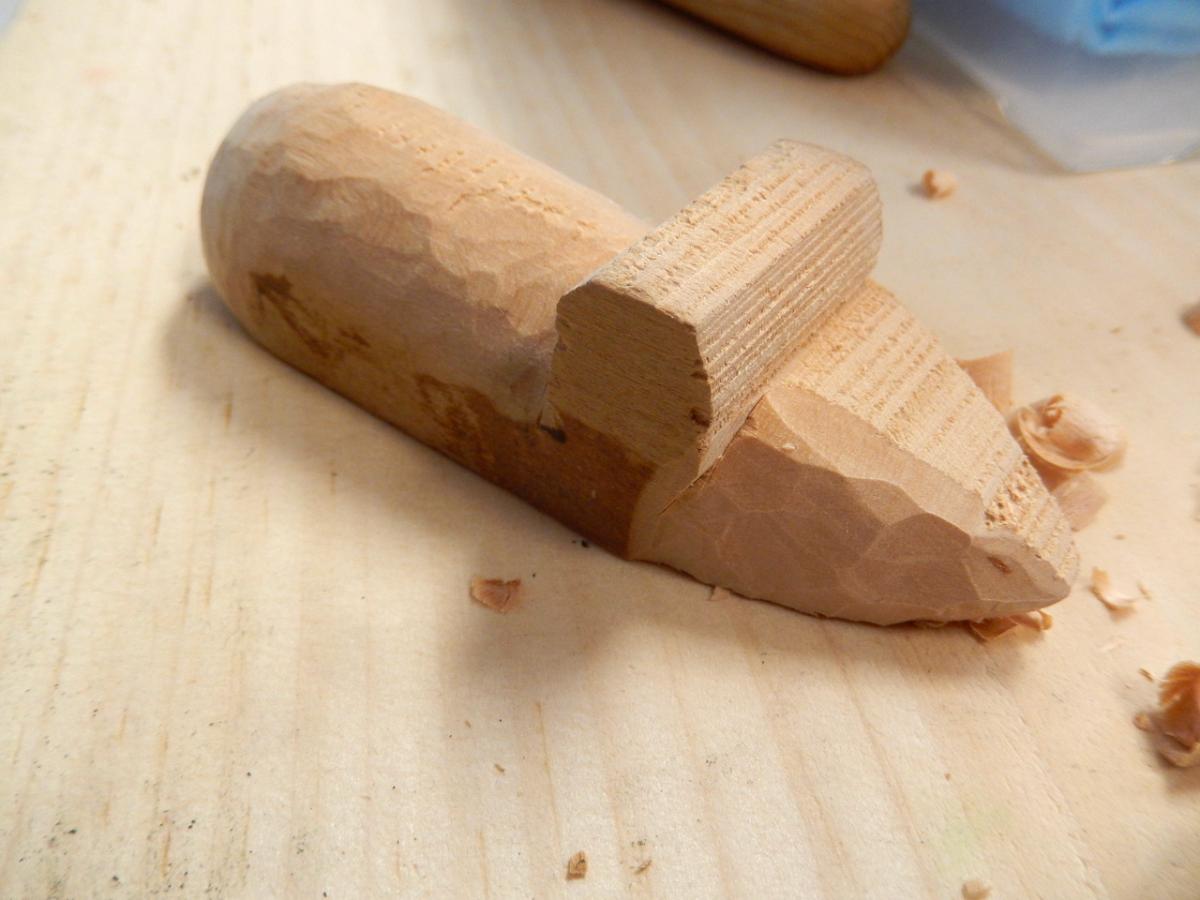
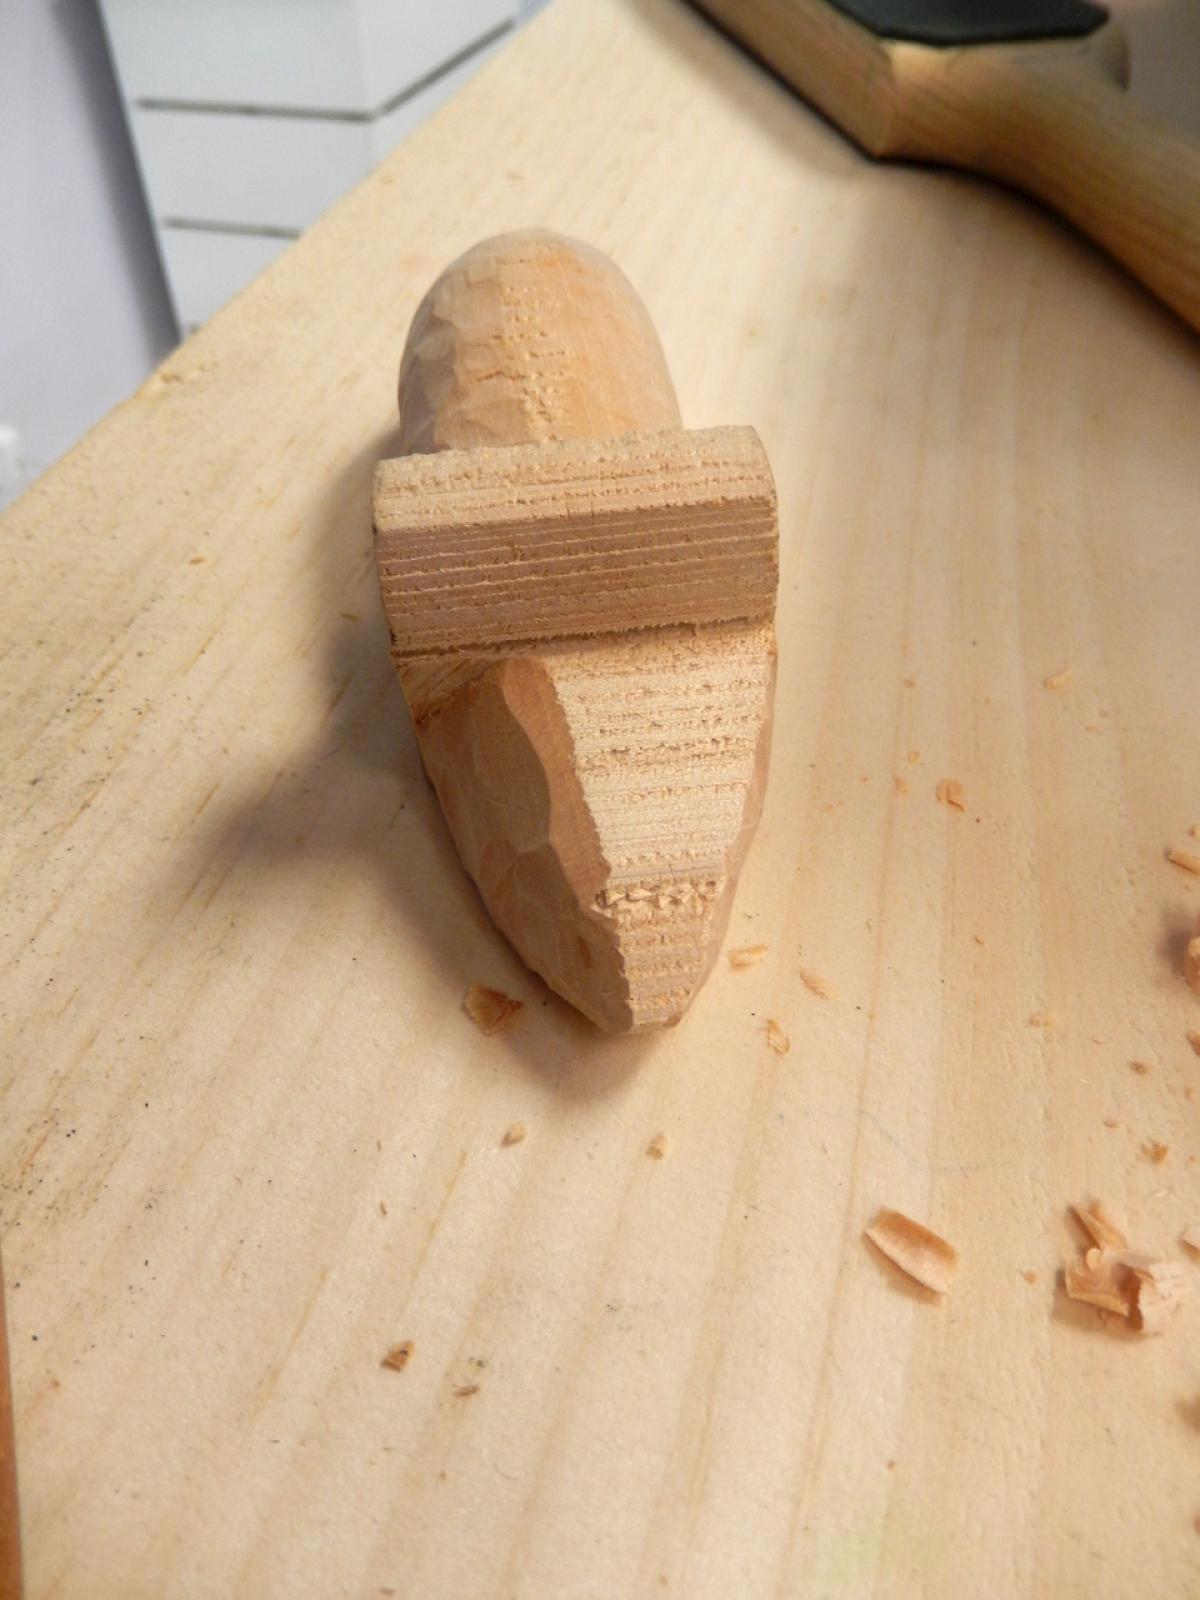
Once they finished, they chamfer the corner from one inset line to the other (C). Once they reached the first inset lines we drew a second set of lines located further inwards, and this time I asked them to carve a curved chamfer in order to round over the back.
We began by rounding over the mouse's back using a carving knife The students first rounded over the back from its apex to the rear of the mouse Then we switched to rounding the part of the back that slopes towards the ears
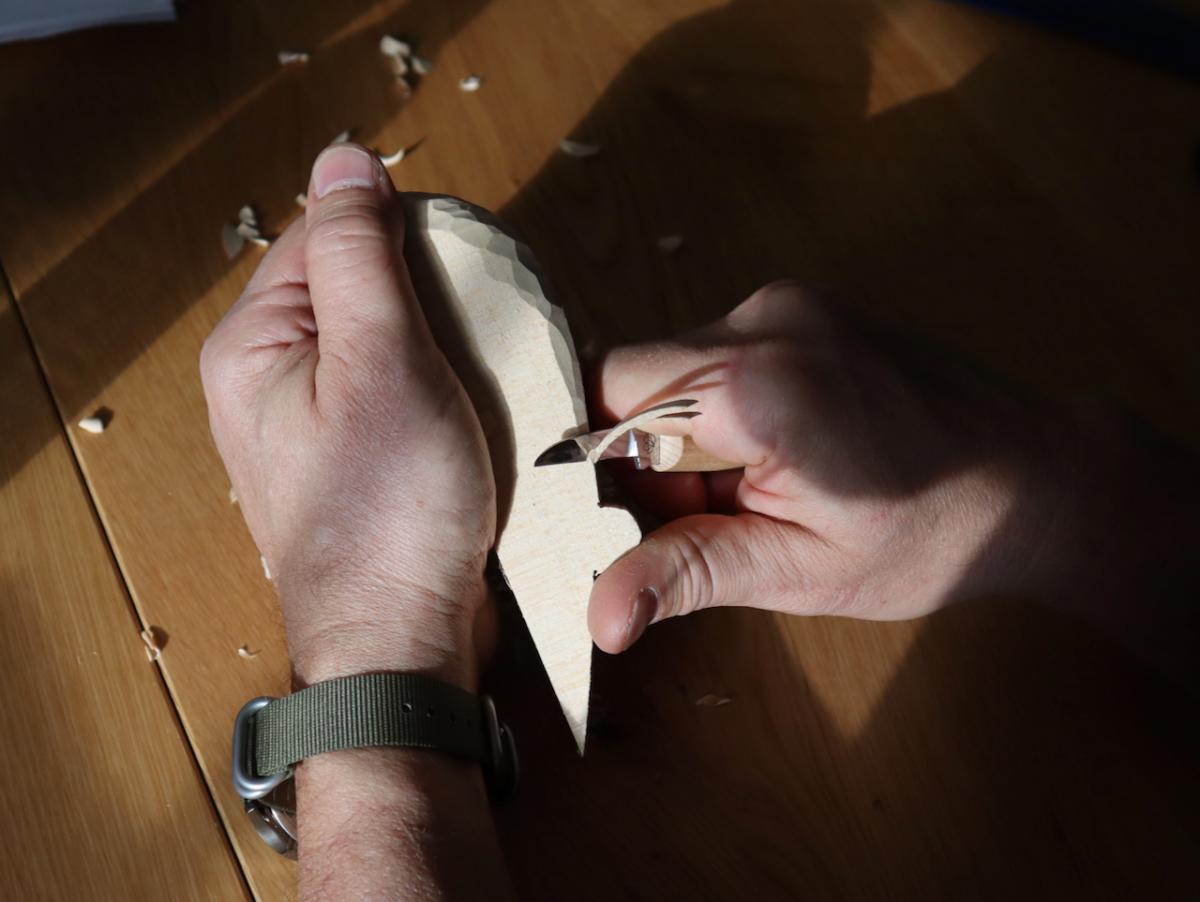
With the back done they narrowed the snout by whittling an arch from the mouse’s ears down to the nose (they had to mirror/repeat this on the other opposite too). Following this we drew chamfer lines on the snout and the students rounded the snout over. (below and D).
On my next blog entry I will show how my students form the ears, affix the tail and finish the mouse.
Join the conversation
02/04/2021 Larry LaRoque
Great project for a new carver/whittler, the ears are just enough detail.


 Joel's Blog
 Built-It Blog
 Video Roundup
 Classes & Events
 Work Magazine