While it is easy to buy a vintage brace in perfect condition from a reliable dealer, the best bargains are found with braces that need a little restoration. A few indicators will tell you if a used bit brace is a good candidate for a successful rehabilitation. The amount of rust and grime found on it, and the stiffness (or resistance) of the rotating parts as you try to turn them are without a doubt an important feature to investigate. But perhaps the most important indicator relies on a simple test that will reveal how much wear the brace has accumulated over the years. After tightening the chuck (ideally with an auger bit inside it) try to wiggle it from side to side. If you notice a lot of play, it means that the brace has been either made to poor quality or that the moving parts inside the ratchet housing are worn out. Replacing the chuck’s mandrel or its housing will be a pain in the neck or even impossible, plus a brace which show excessive involuntary movement in one domain is probably inflicted with other problems in other areas. Therefore I would try to avoid it.
The first brace in this video has a lot of play in the ratchet housing, but since it is one of the braces in our possession I am not willing to give up on it. If I were to meet it in a flea market I would probably pass and give another brace a chance. The second brace is a direct drive, or a no-ratchet brace. Non-ratchet braces obviously don’t suffer from this infliction, but they are not that common to find either, plus, because of their lack of versatility they perhaps should not be your first choice for spending both time and money. That said, if you own a no-ratchet brace, go ahead and restore it as it will prove useful in some situations. The third brace is a newer model that hardly saw any use and with a minimal play inside chuck’s housing. The fourth one is a brace with a concealed ratchet mechanism of high quality and accurately machined components that show no play or wear.
The same excessive play test, but this time with an auger tightened inside the chuck. Notice the amount of wear in the first brace.
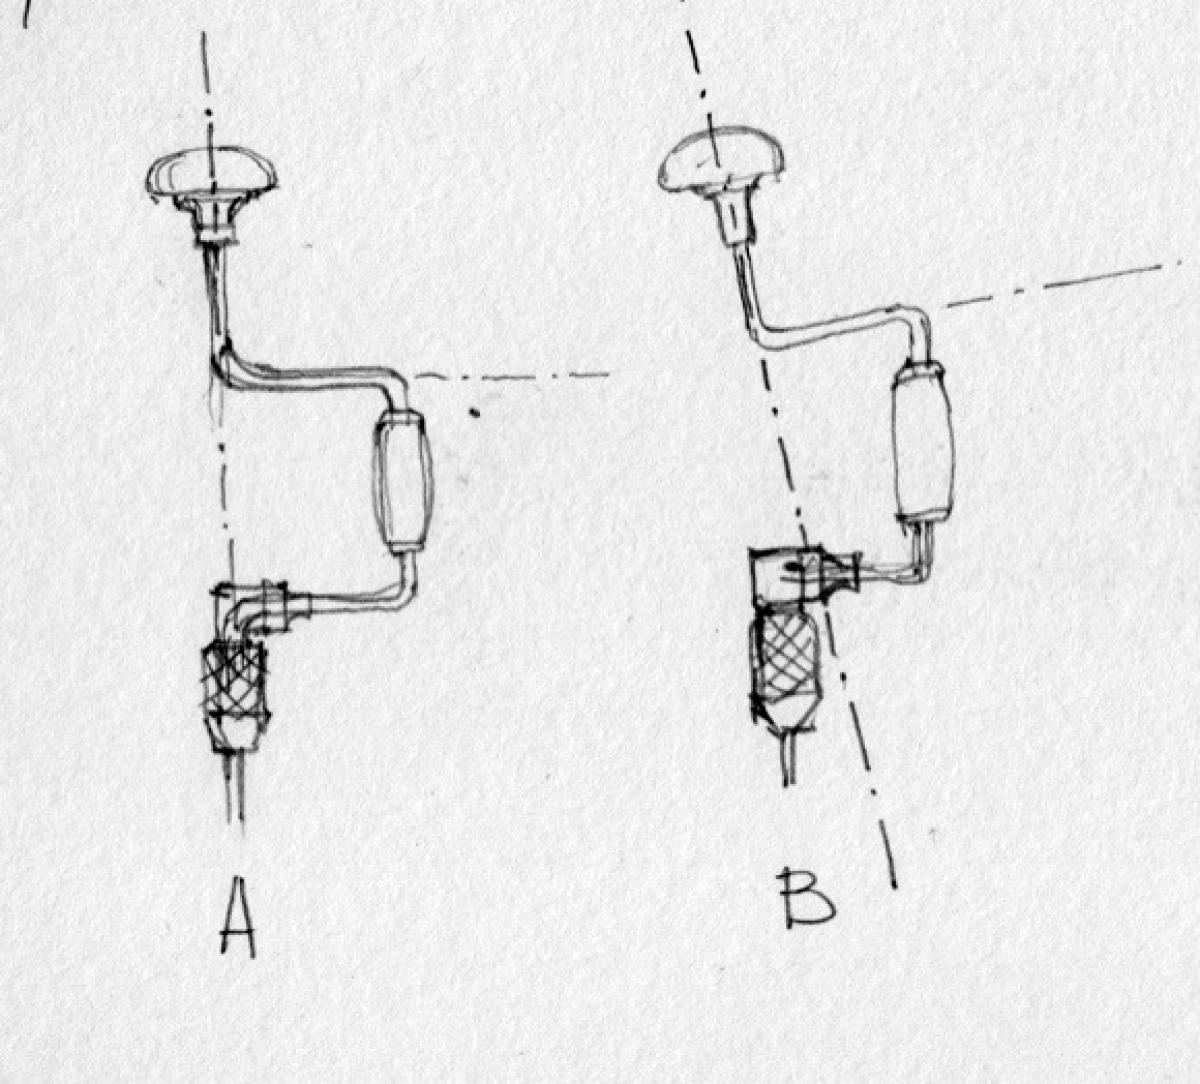
Another indicator for a mishandled or abused brace is when the brace’s crank is eccentric, or in other words when the brace’s axis do not run continuously through the head and the chuck (B). A “healthy” brace will display a concentric geometry, where its axis run through the head and the chuck (A).
Once your candidate brace passed the excessive play test, turn to check the other components.
Test the quill’s bushings and bearings. The quill is the metal sleeve underneath the wooden, or plastic, “mushroom” head that is inserted over the crank. Good quality quills have bronze bushings and ball thrust bearing to reduce friction and increase efficiency. You don’t want a wobbly quill of course, but don’t give up on a stiff turning quill as it most likely can be lubricated and be back in business in no time.
The first and second braces have a high quality head connected to quill that is equipped with ball thrust bearing. The third head is a simple head that spins well. The head of the last brace demonstrate a lot of friction while spinning but after the quill received a few drops of oil the busing was freed up and the head began spinning effortlessly.
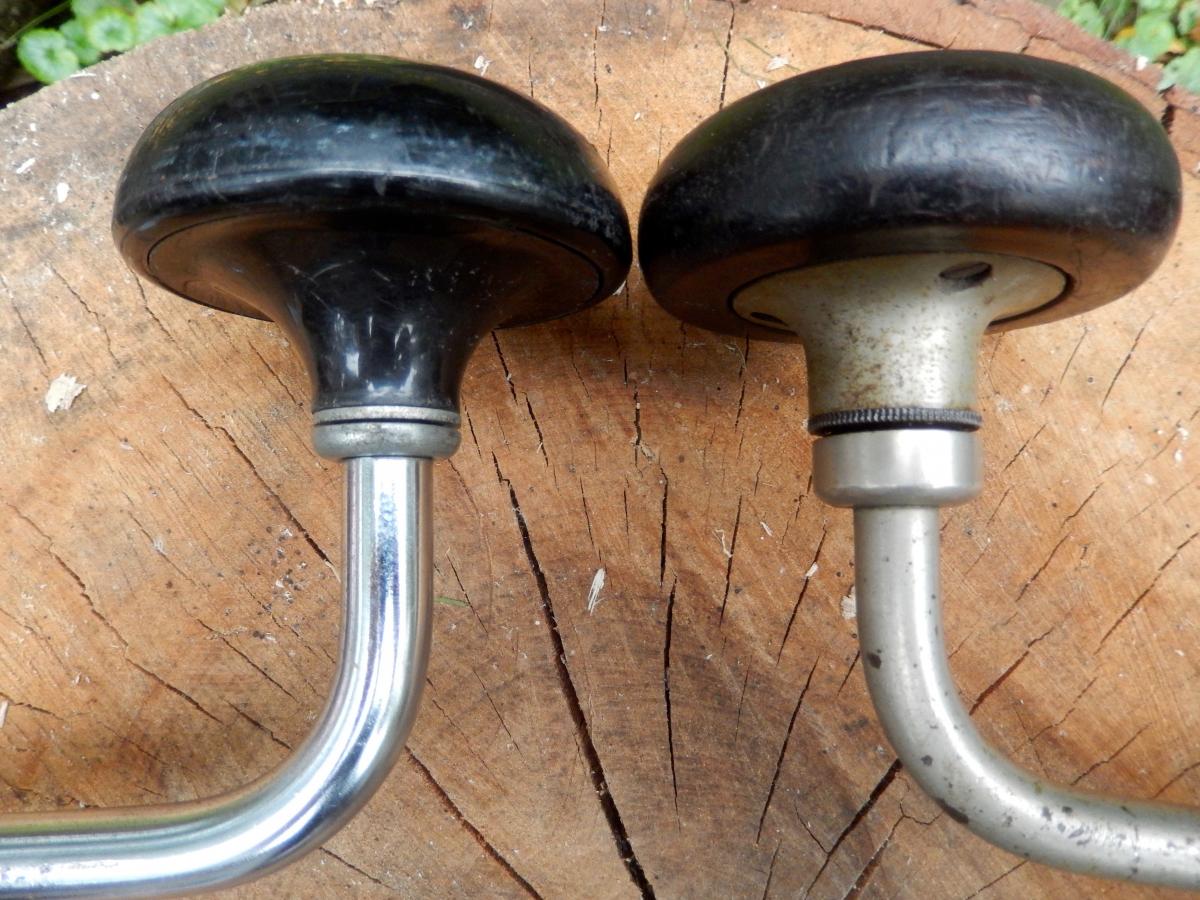
The brace on the left is newish. It has a ball thrust bearing encased in an inexpensive stamped steel clad. The older brace (right) has a milled clad and a high quality quill
Check the ratchet and pawls. Try to identify if the parts are worn out. If the corners of the visible ratchet gear are rounded it means excessive wear so you might want to stay away from this tool. Change the ratchet direction by turning the cam ring and see how the brace behaves. The pawls should smoothly react to the change.
Notice the way I check the ratchet mechanism by engaging the cam ring. The pawls of the last brace, the high quality Stanley No 2101A are engaged via a push rod which evidently doesn't do its job. But because this brace passed the visual, the excessive play and the quill test with flying colors I am willing to give it a chance and spend time restoring the complicated but unique concealed ratchet mechanism.
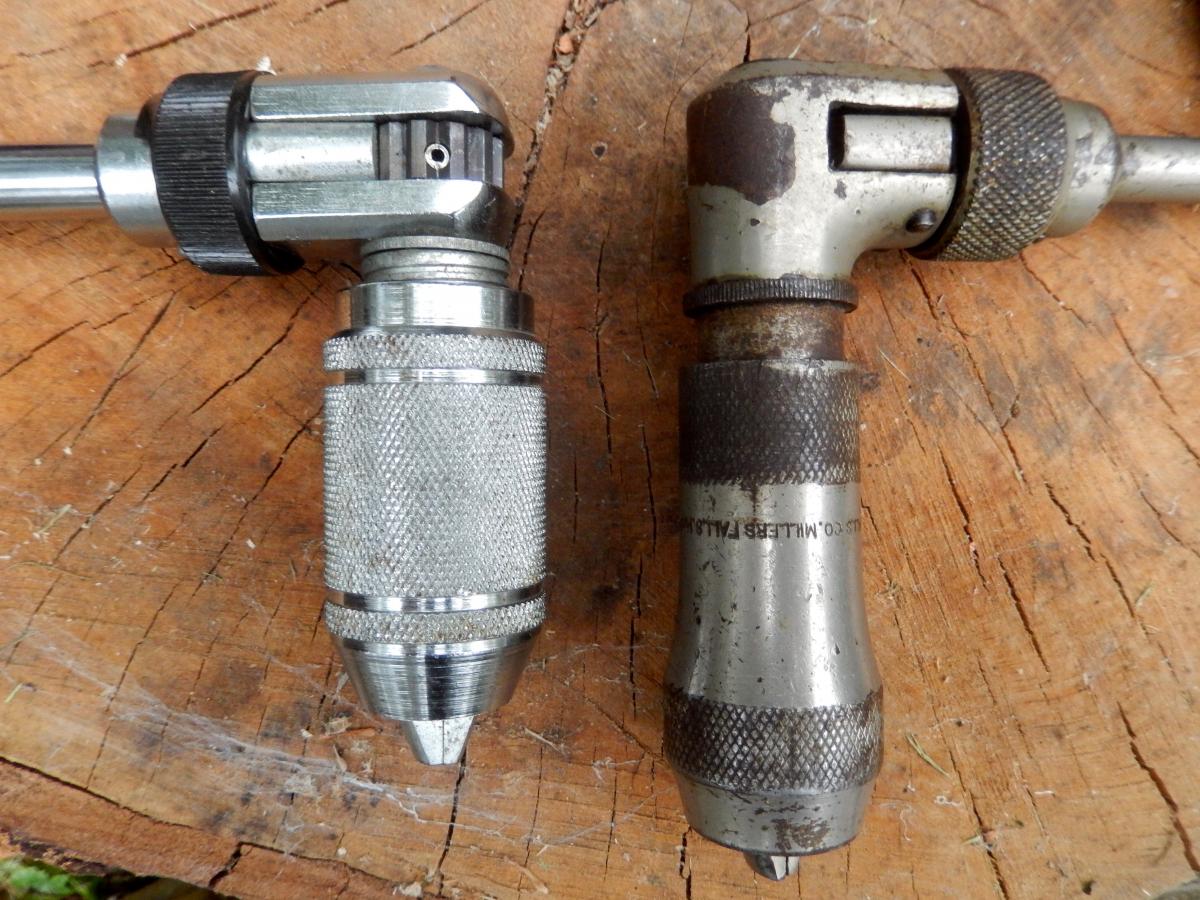
The open ratchet brace on the right is newish. The closed box ratchet brace on the right is vintage but still works great
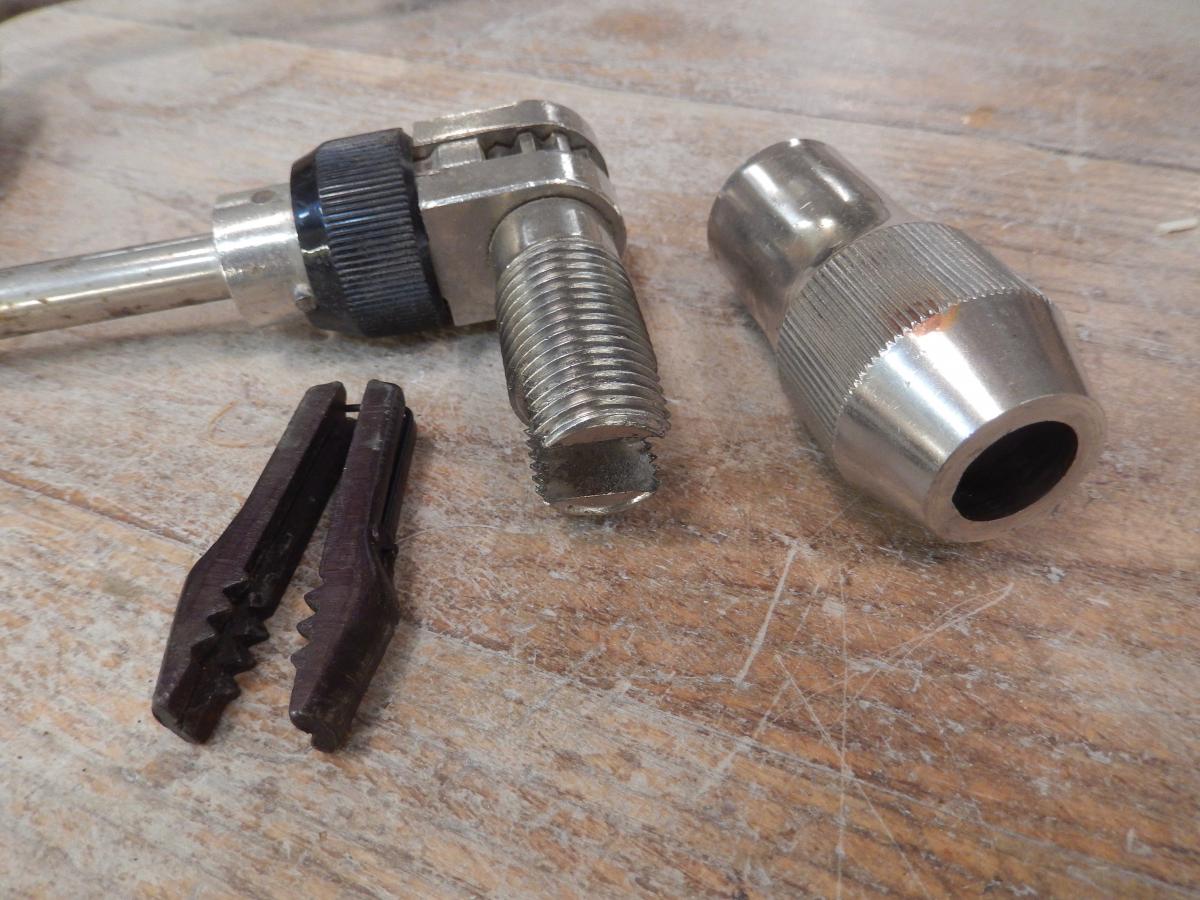
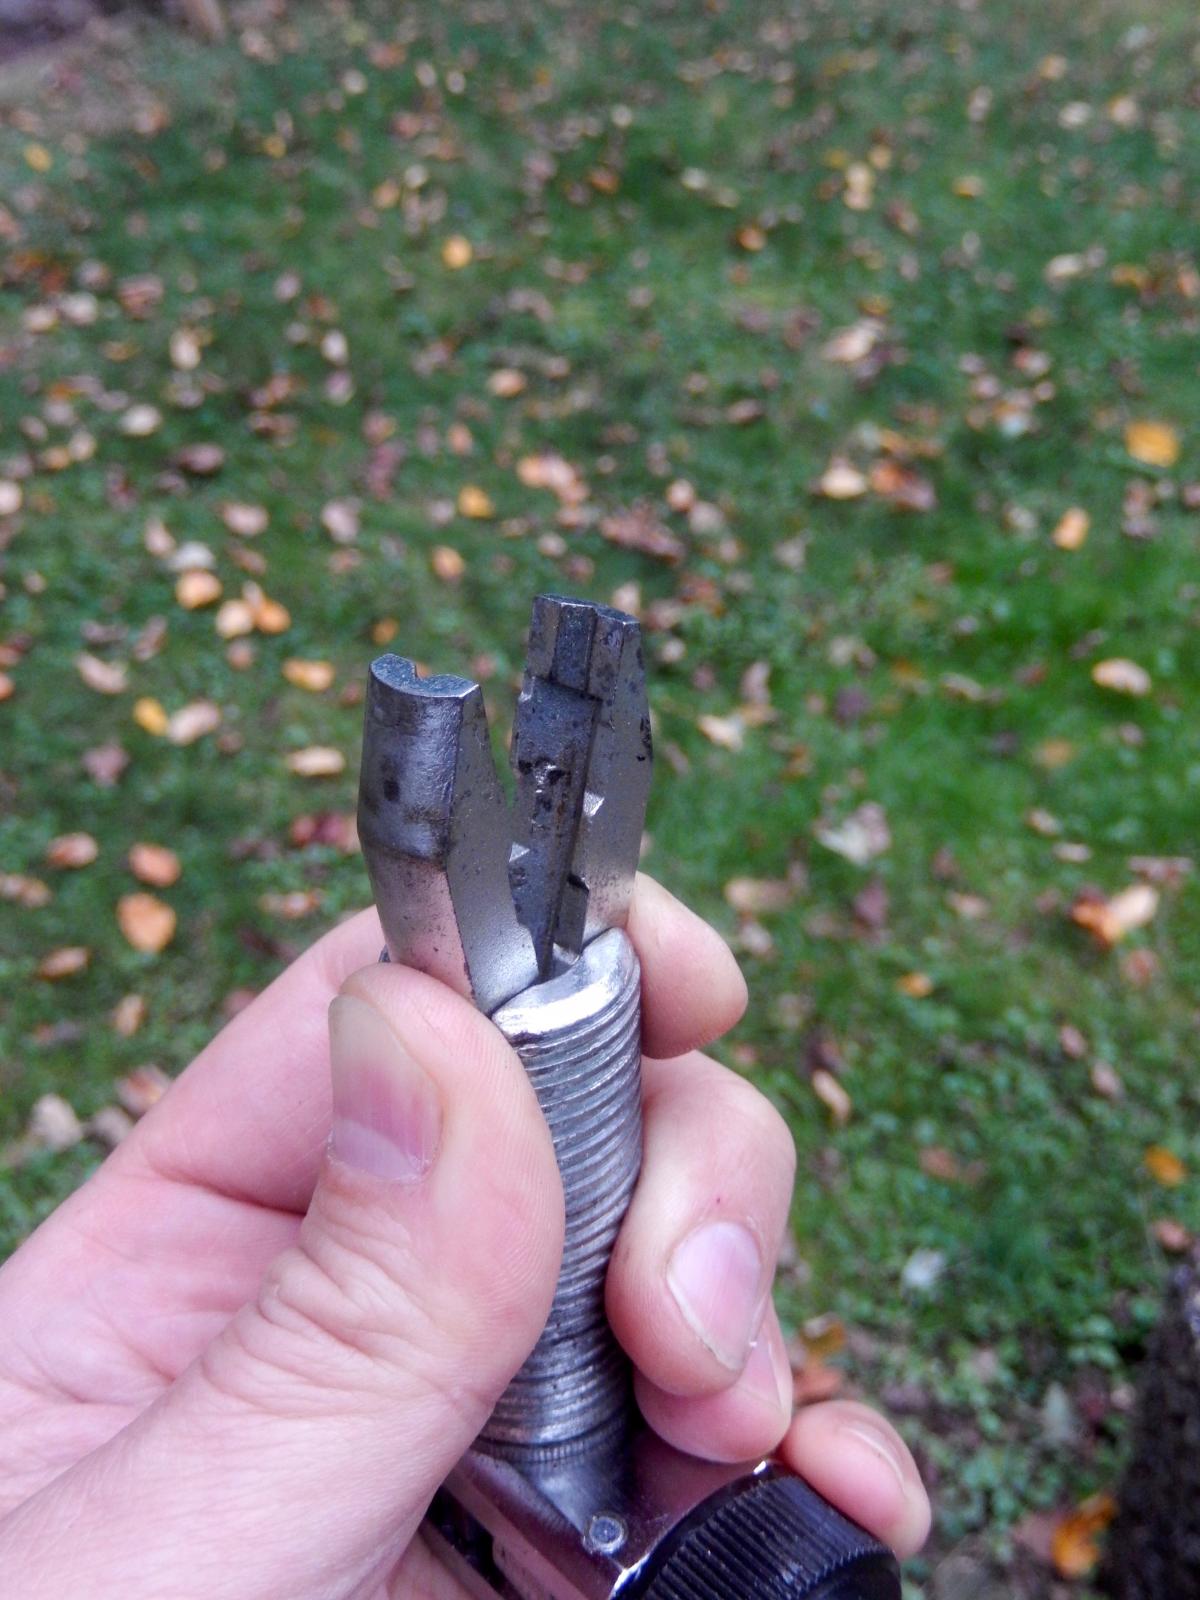
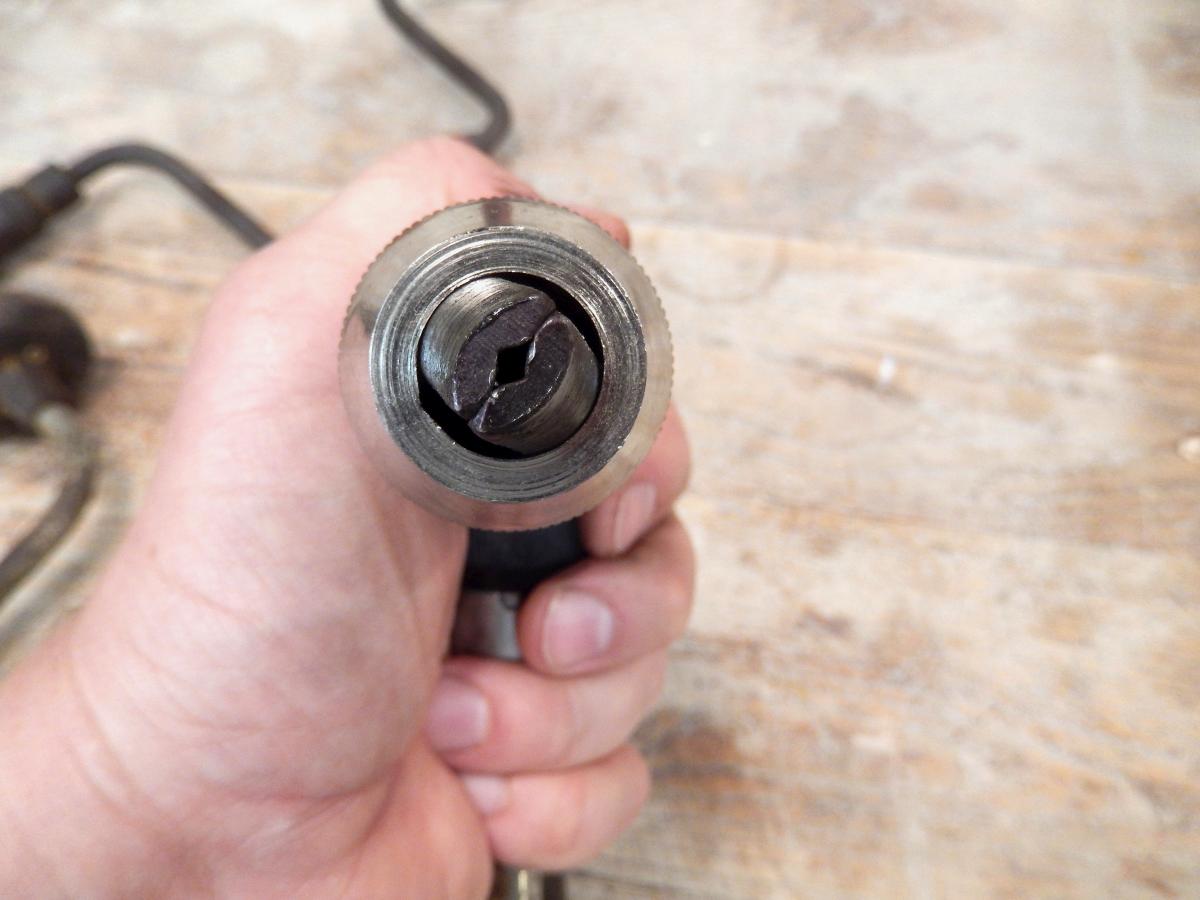
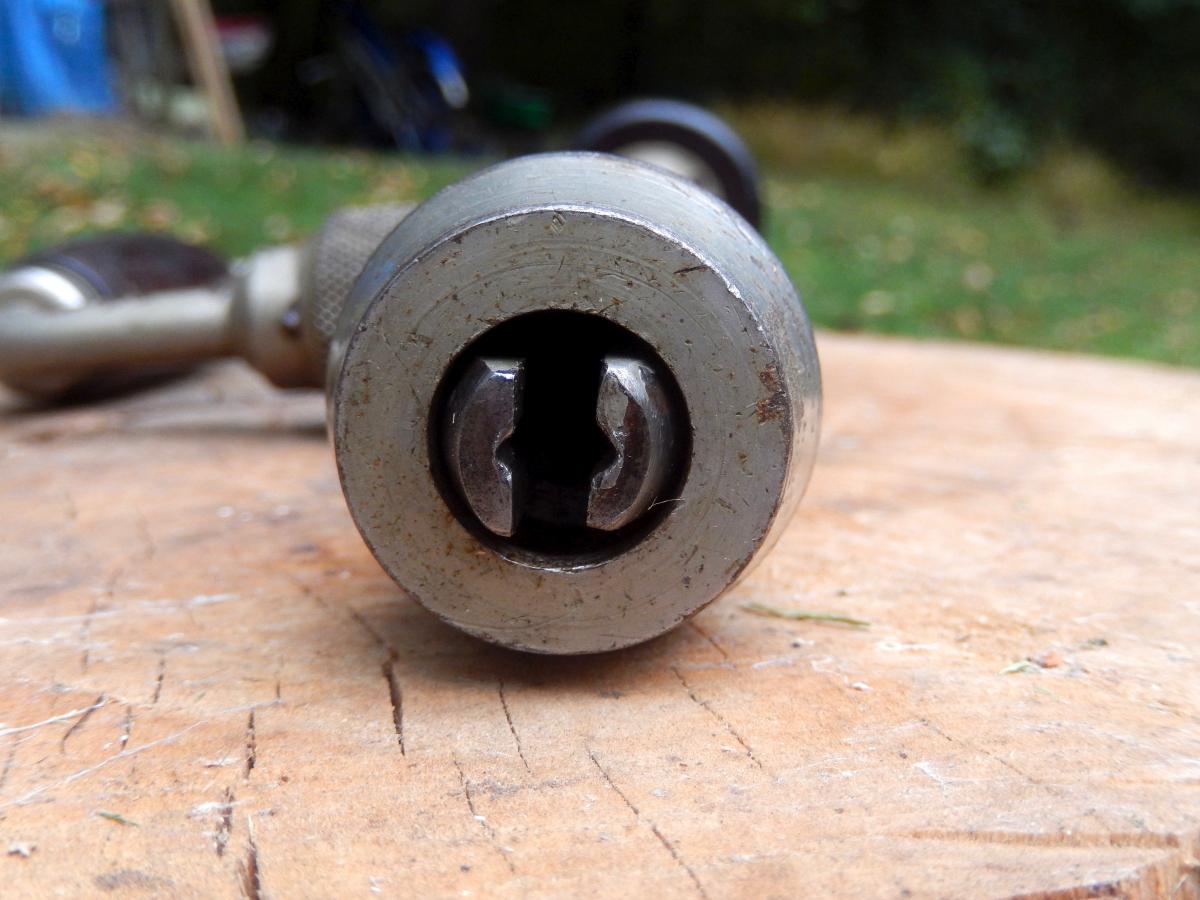
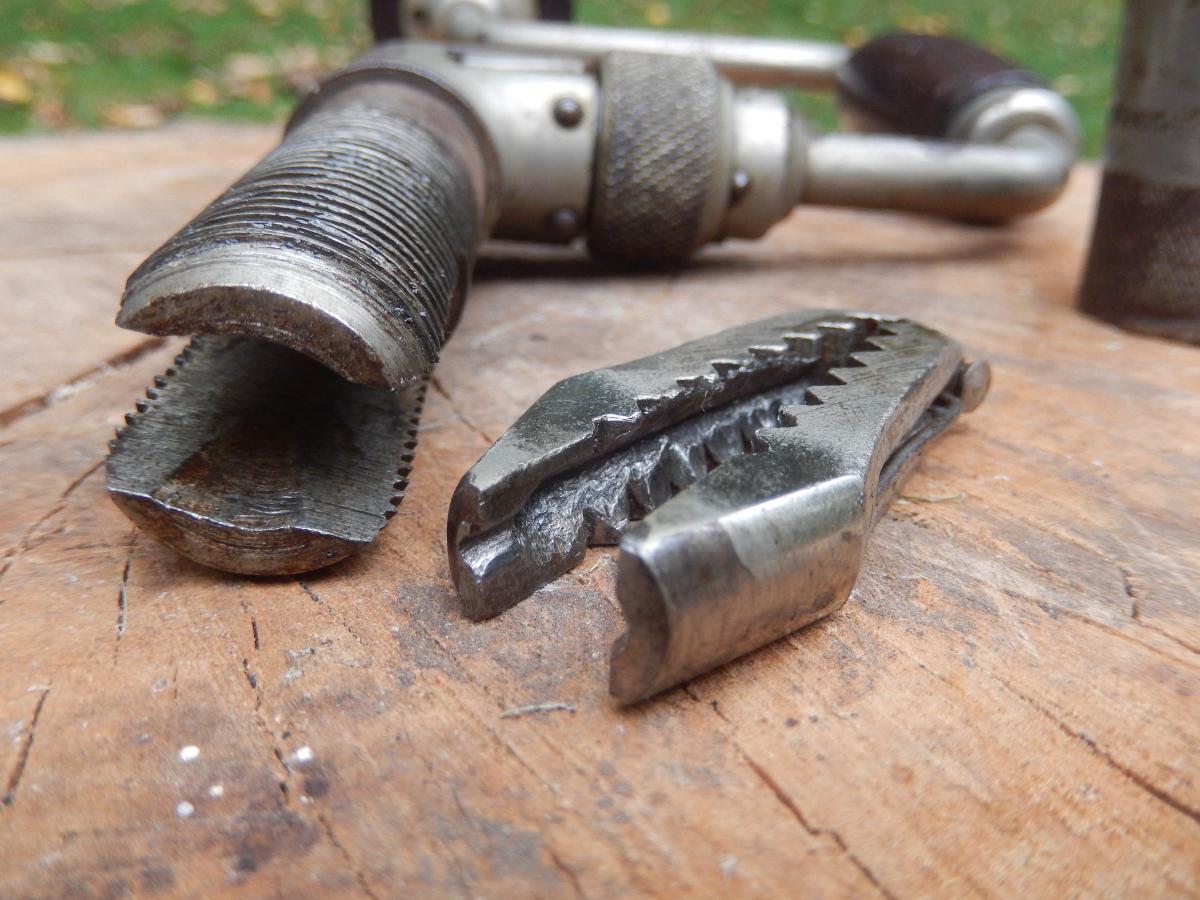
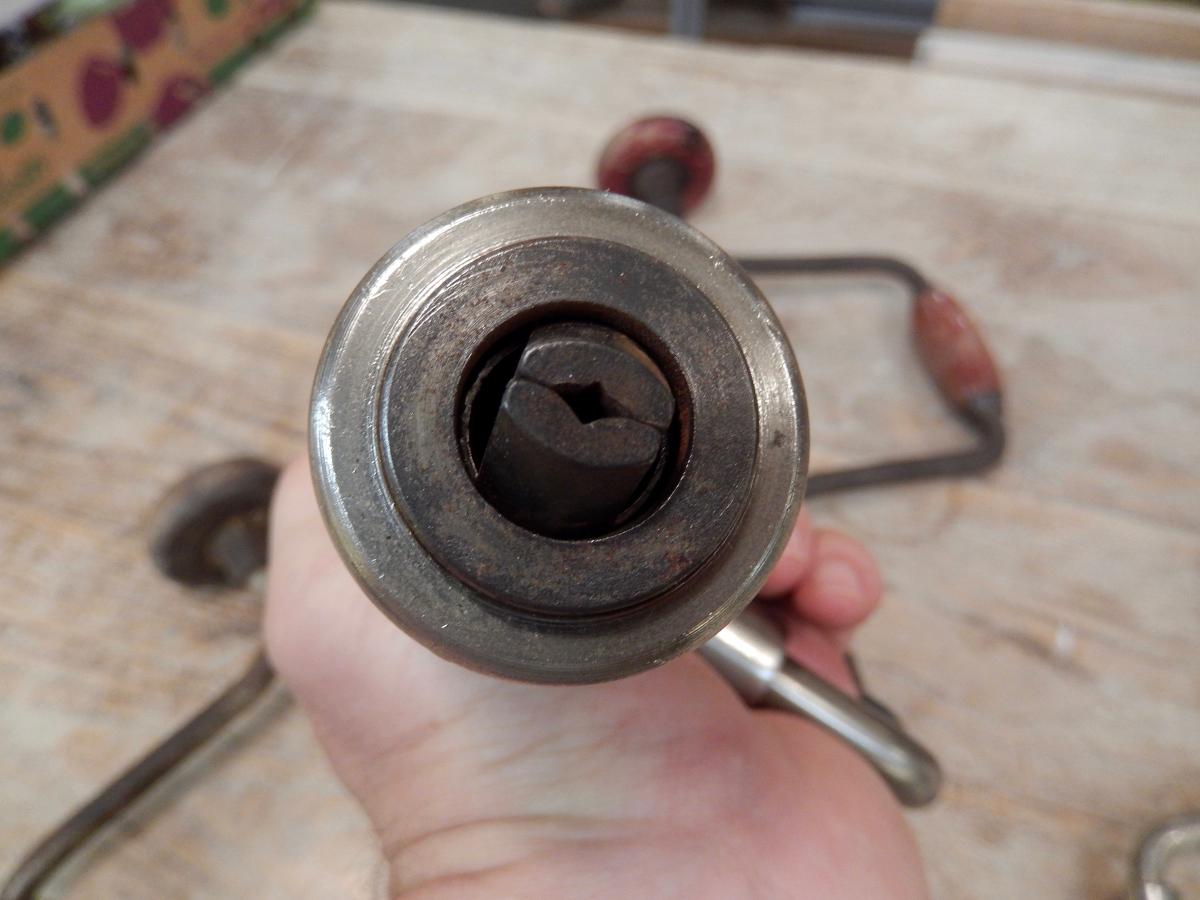
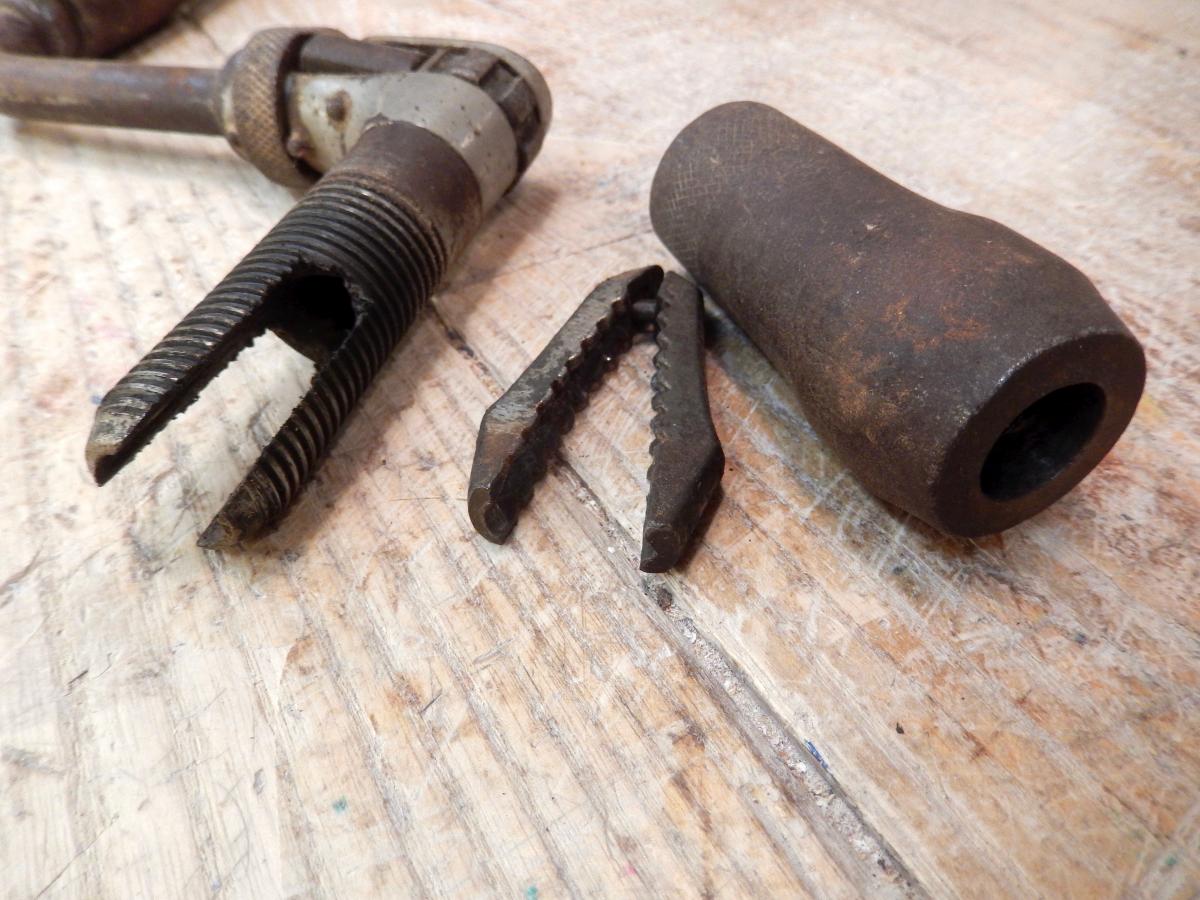
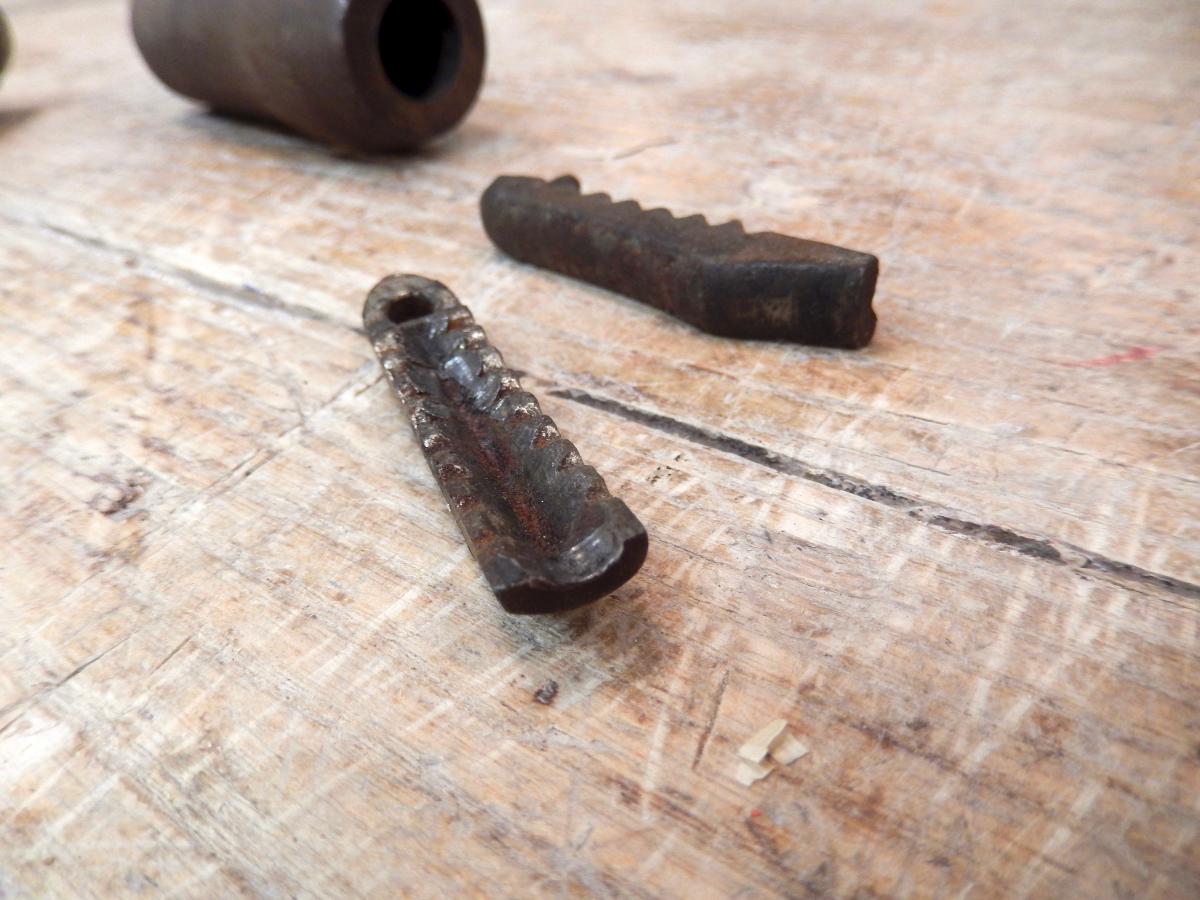
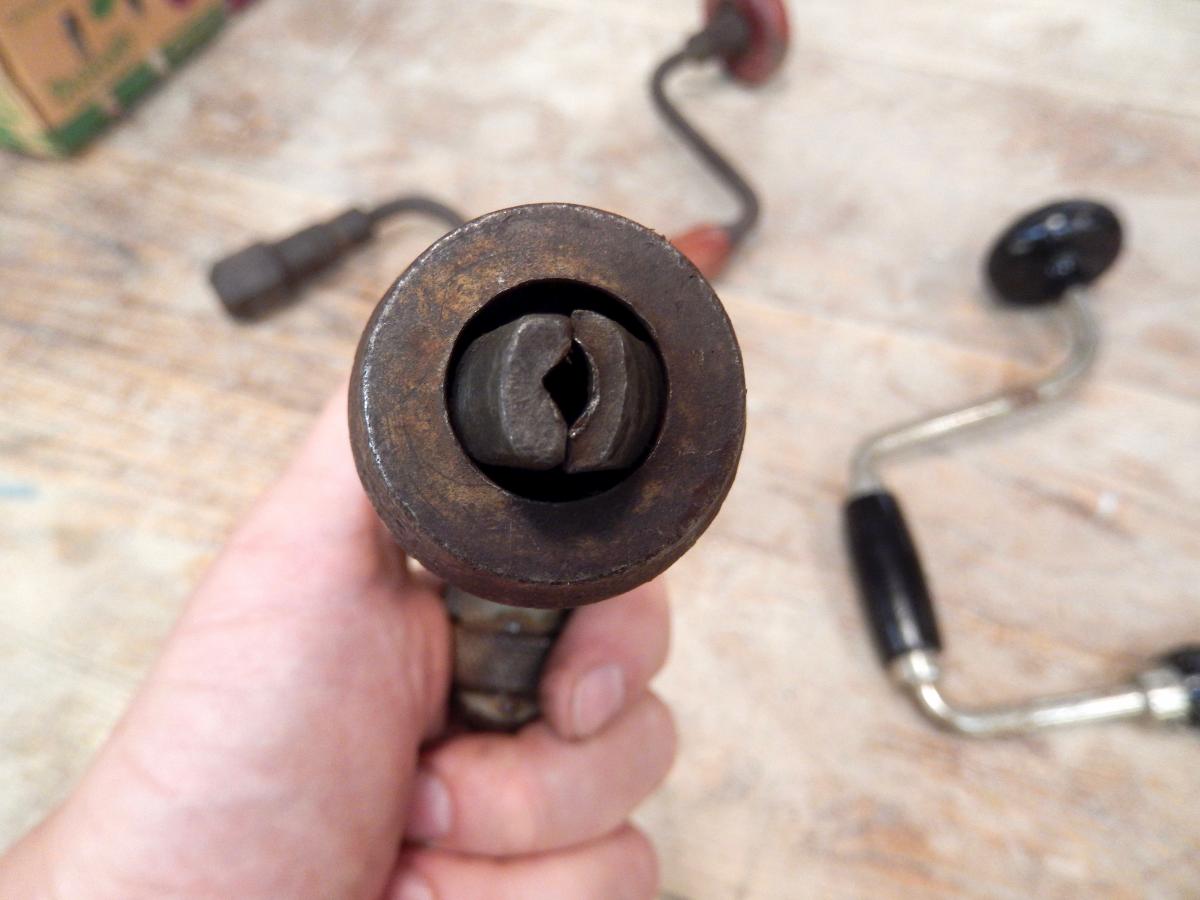
Another diagnostic tool to assess the health of the bracelet is examining the chuck’s jaws. Worn jaws will look deformed when closed. The grooves on a new or hardly used jaws will form the shape of a crisp square or diamond when joined together.
New and crisp looking jaws Used but in good condition jaws Used but in good condition jaws Used but in good condition jaws Worn but still usable jaws
For information about shopping for used tools in a flea market I highly recommend watching Rex Krueger’s youtube video titled: Pro Tips for Tool Hunting at Flea Markets.
Next time I will show the beginning of the restoration process.


 Joel's Blog
 Built-It Blog
 Video Roundup
 Classes & Events
 Work Magazine