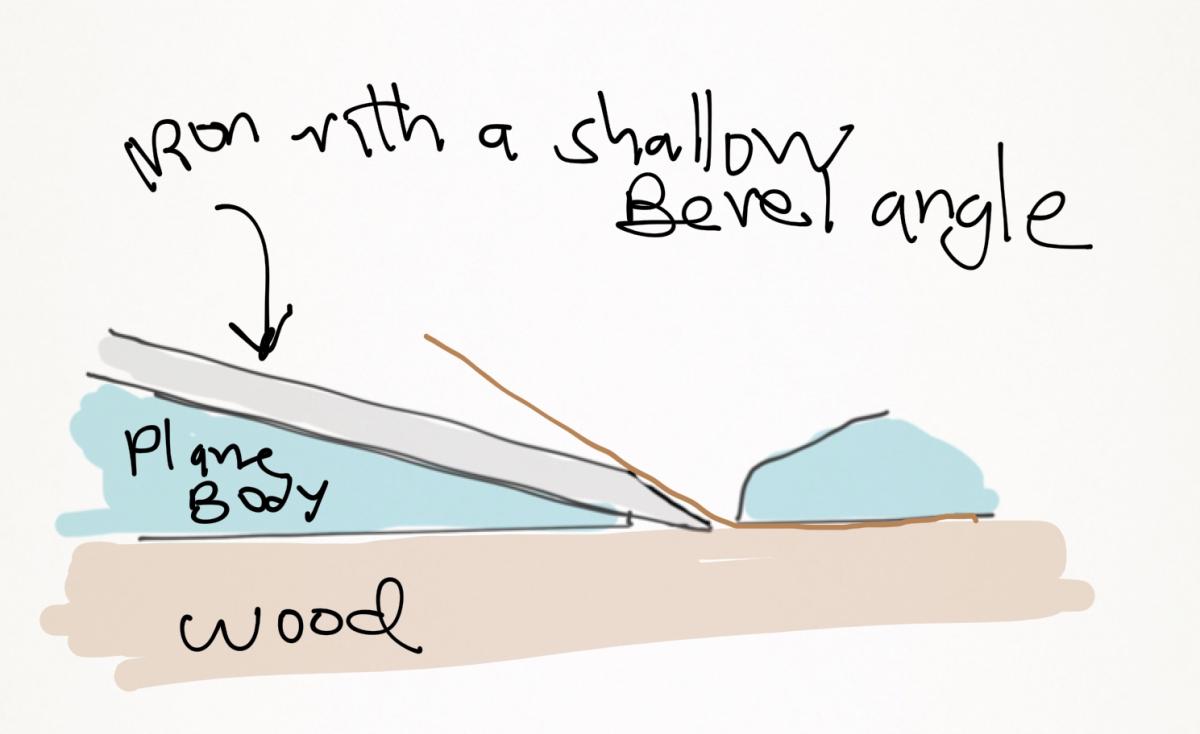
In last week's post's mention of high angle blades I forgot to mention a very important subset of high angle blades. Fortunately one reader made a comment about back bevels. The premise of a high angle blade is that the bed of a plane on a bevel down plane is set not at 45°, but at 50 or 55°, so a shaving could be turned and broken easily.
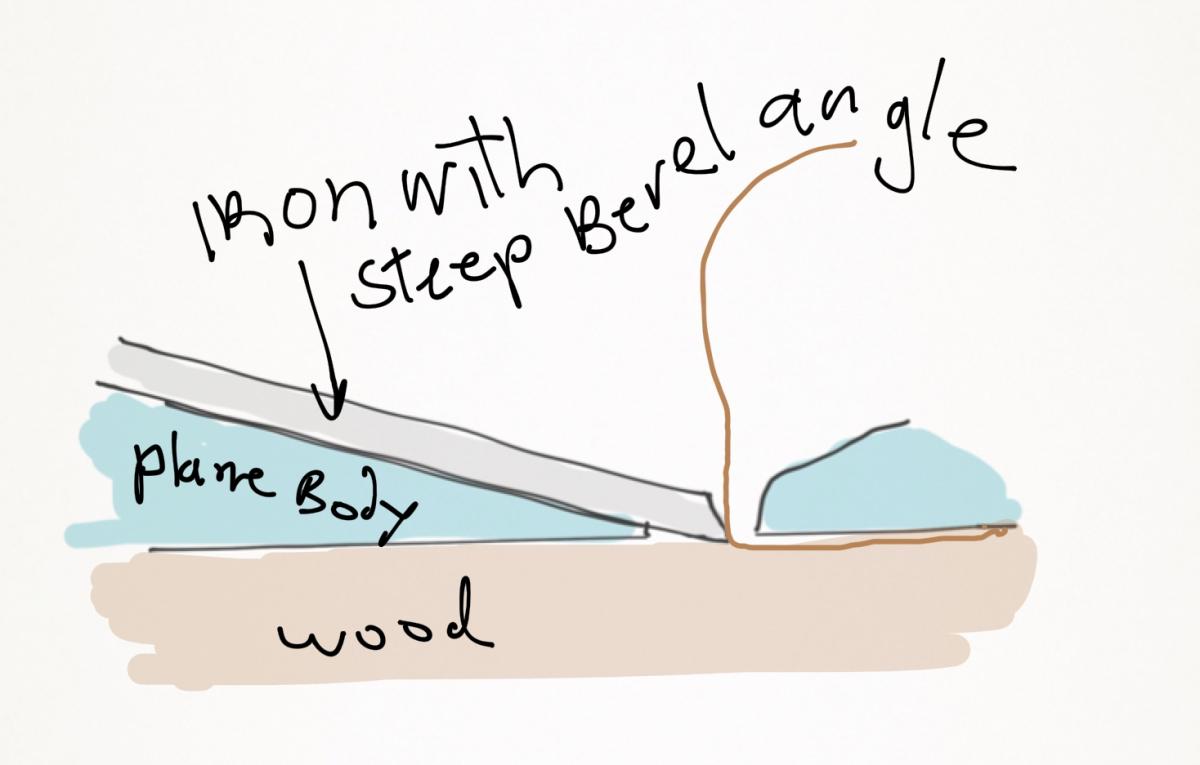
With a bevel-up plane, the angle at which you plane is set by the bevel angle of the blade. You can easily change and raise the angle that you're complaining at simply by changing the bevel angle grind of the blade. People do this all the time - it's one of the attractions of bevel-up planes.
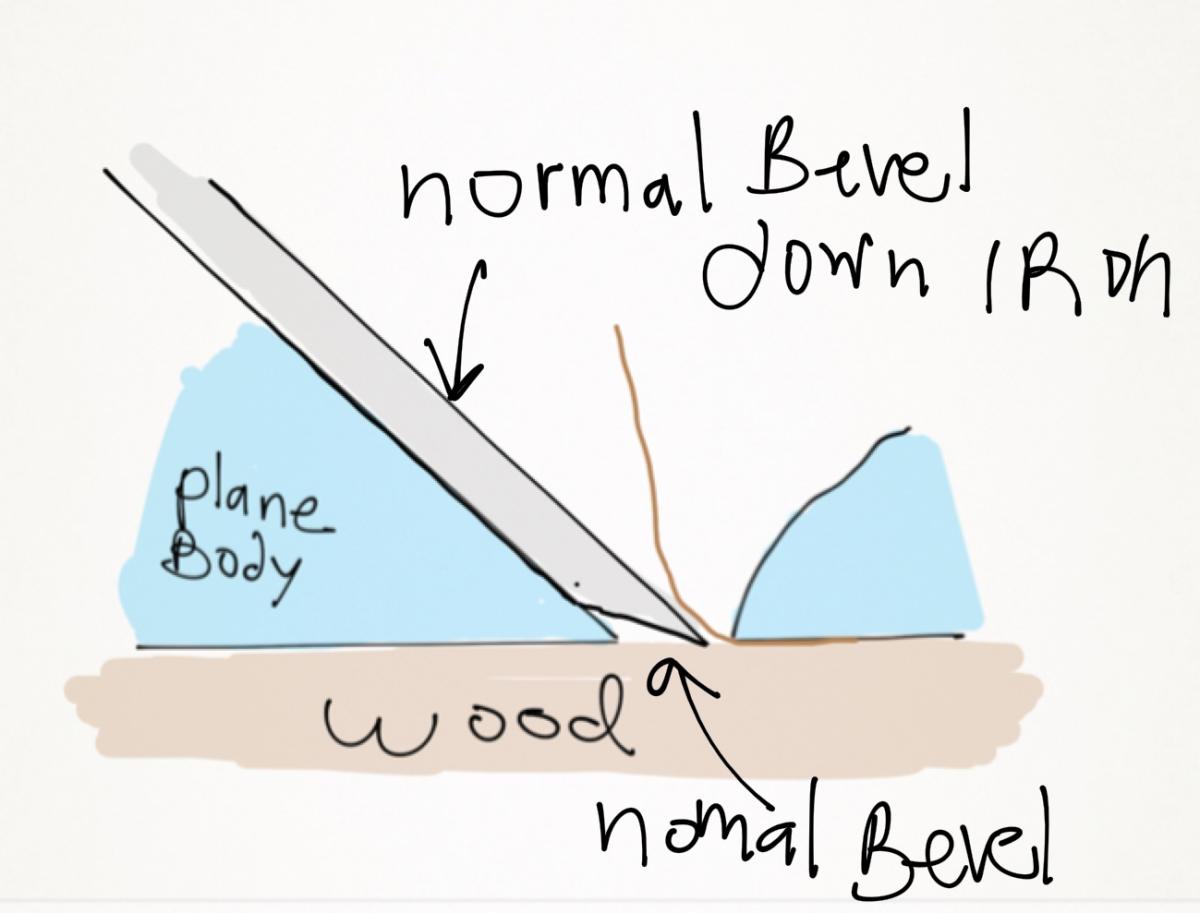
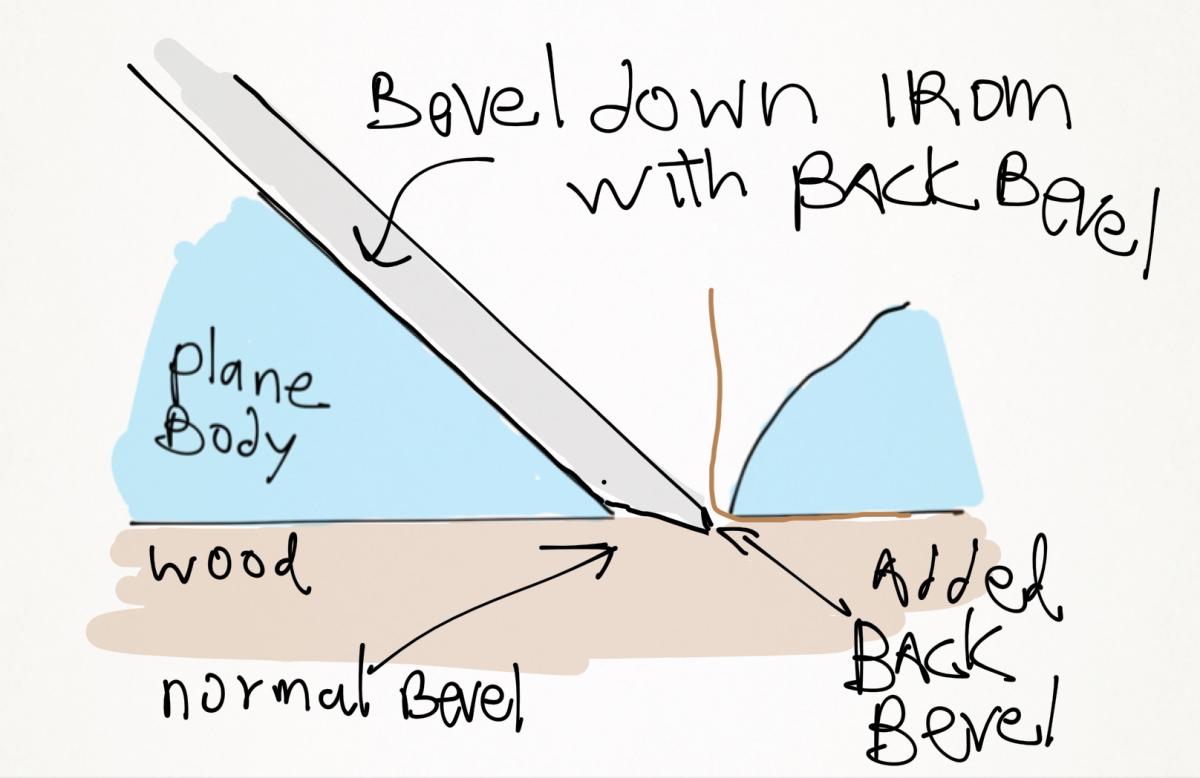
With bevel-down planes, you can do this too, but it's harder since the angle of the blade is determined by the bed of the iron. The most common way of changing the bevel angle grind of the blade is simply honing a small back bevel on the iron so effectively you're presenting a higher angle to the wood. You only really need a very slight back bevel. It's fairly easy to do, but it has two downsides.
The first drawback: By adding a back bevel to a blade, you effectively open the mouth of the plane slightly - so ideally you have to be able to move the frog to close it up again or you're back on Square One. The second drawback: if you get bored with the idea of a back bevel and want to remove it, you would have to grind back the plane iron. In days of yore people would typically have a dedicated back beveled blade, but the technique is not commonly used nowadays.
A while ago I wrote about a special accessory for that Norris advertised designed to enable you to consistently put a back bevel on a plane iron. Despite my interest in Norris planes, I've never actually seen one and I have no idea if they actually exist other than in a catalog. This gives you a sense of popular this idea was.
In general, older Stanley planes have movable frogs, but they're actually fiddly, with enough play so moving them back and forth, even on a Bedrock design, makes it easy to get an out of square mouth. So people don't like moving and adjusting frogs casually. It's very rare that I actually see any old planes that have any evidence of a mouth that was regularly adjusted. Modern makers Clifton, Lie-Nielsen, and Lee Valley have much tighter tolerances and their planes adjust much more precisely. Lie-Nielsen sells higher angle frogs so you can replace the whole mechanism, but I would just rather have an extra blade with a back bevel and call it a day. The extra blade is less expensive and takes up less storage space.
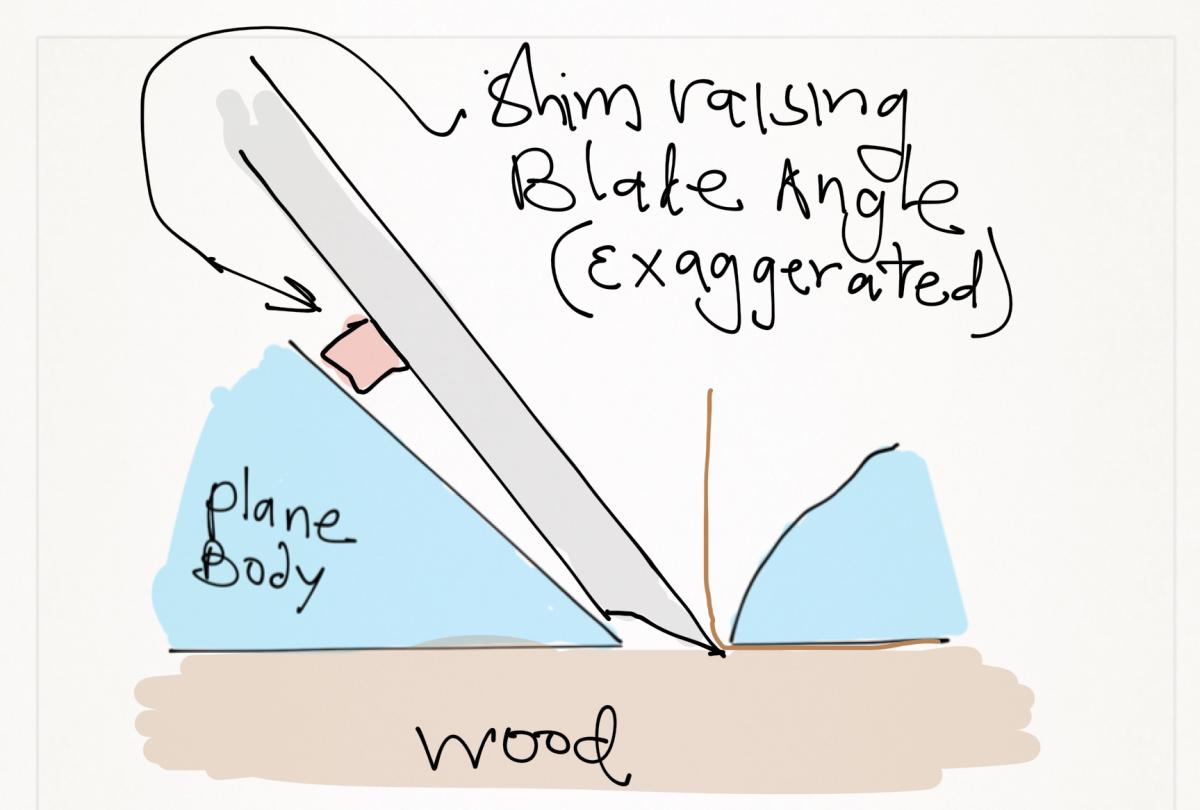
Another way of solving the high angle problem - mentioned in old magazines, but I have never seen or heard of in actual practice - is shimming the back of an iron to tilt it up further, instead of actually modifying the blade. I don't know how well this would work, but it is a thought.
In many cases having a higher angle doesn't solve all your problems.
Preston Violin Plane
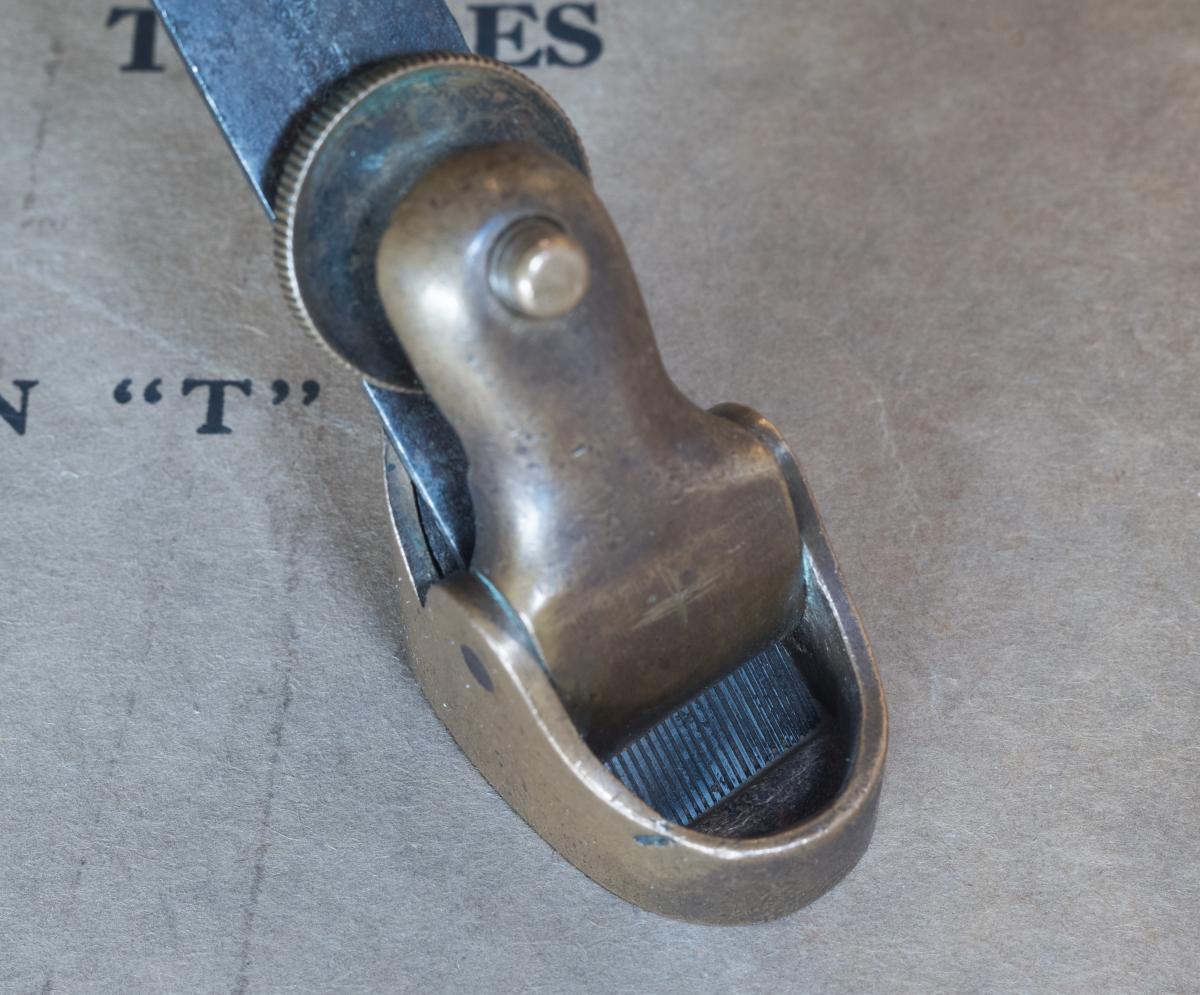
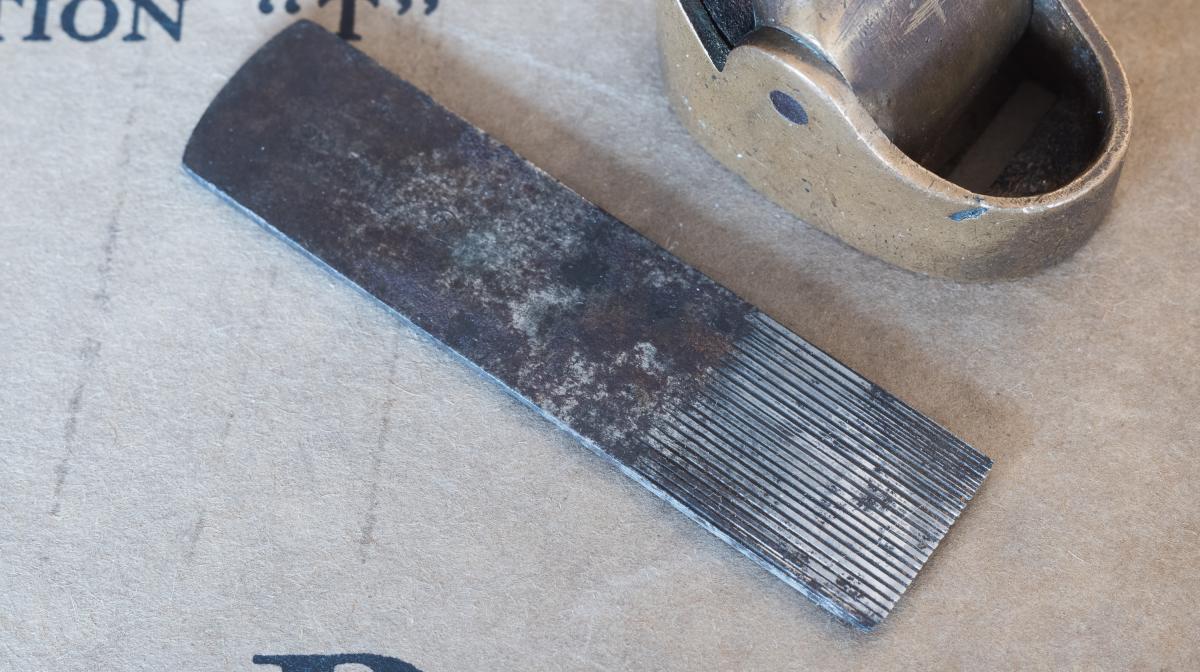
The best example of this is the work that luthiers do. The various parts of a stringed instrument are planed to different thicknesses based on how the instrument and wood sound. The shapes are carved, planed, and or scraped. Scraping is, of course, very reliable, but only takes off a very thin shaving. For heavier removal of material, luthiers typically use series of small planes. Metal-bodied violin planes for luthiers predate most metal planes for everybody else. But the luthier has to remove wood in all sorts of directions regardless of the grain of the wood - and worse, woods typically used for instruments may be soft and stringy and given to bending without breaking. A plane with a tight mouth and a high angle may not be enough to address these challenges. Enter the toothing iron. Take a plane iron and grind striations in the back. What you end up with is not a consistent single blade but rather a series of tiny blades. If you look into the mouth of a little Preston violin plane, you can see that the back of iron on the plane isn't straight across and polished but rather has a series of lines in it. This is a toothing iron. You can see from the other picture that the actual cutting edge is not one continuous edge across the 3/8" width of an inch of the iron but rather actually broken up every 1/32" or 1/16".
Previously we talked about a long thick shaving being strong enough to able to leverage out wood in front of the plane blade, causing tear-out. A wide shaving can also exacerbate tear-out in one area of the cut because the entire width of the shaving is pulled up (and like many hands lifting a package). If there is a weaker area in the wood, the overall shaving can have the strength to lift it up and give you tear-out. A toothing blade makes several very narrow shavings and thereby ensures that no one individual shaving is strong enough to cause tear out. A close-up of the toothing iron in the Preston violin plane
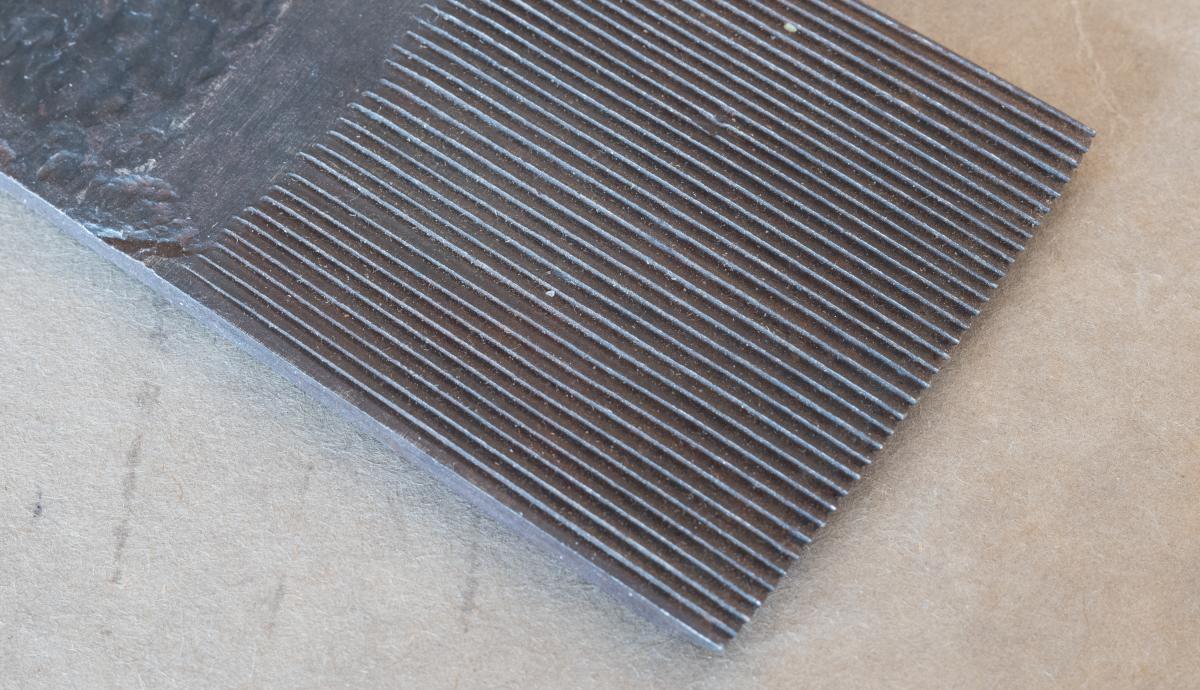
The trade-off with toothing irons is that you don't get a great surface, but that's okay because this is done for shaping a soundboard. The final finishing and polish is done with scrapers and other operations. The planes just make it go faster. Toothing irons are also made in much larger sizes. The picture below shows an unused Two Cherries toothing iron from (I'm guessing) the 19th century. A close-up of a unused toothing iron by Two Cherries
These days, because we typically involve power sanding in our finishing, having planes produce the final surface isn't as critical as it used to be. So toothing irons are not particularly popular with the general public, retaining popularity mainly among luthiers.
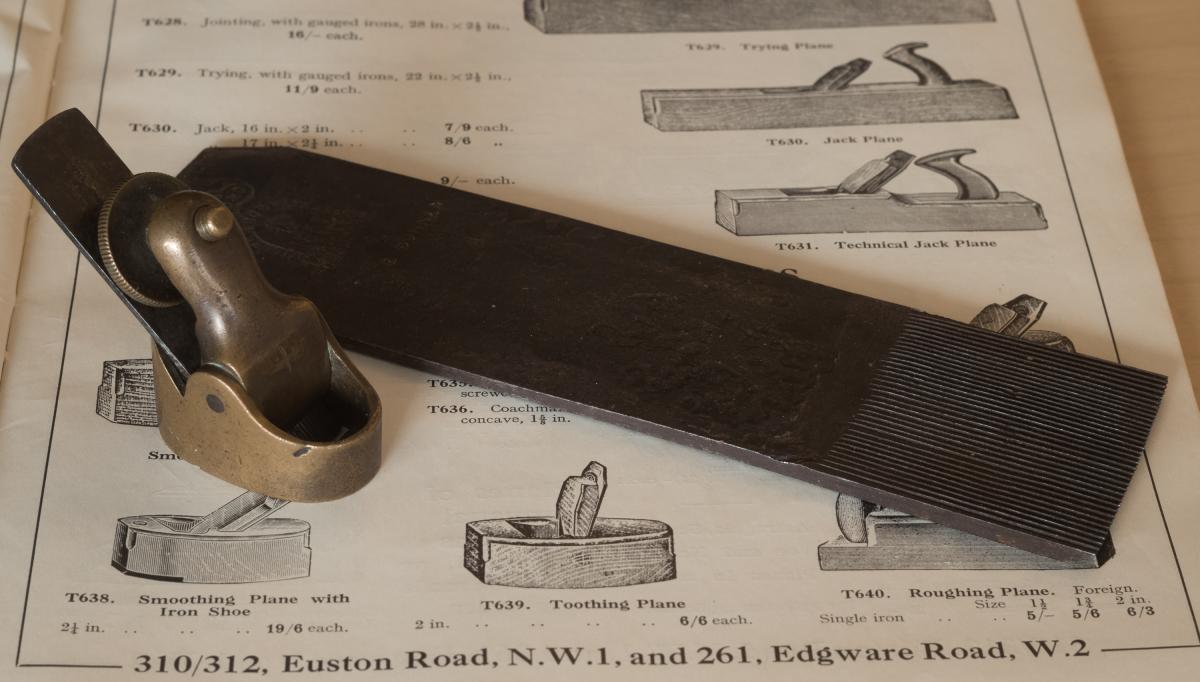
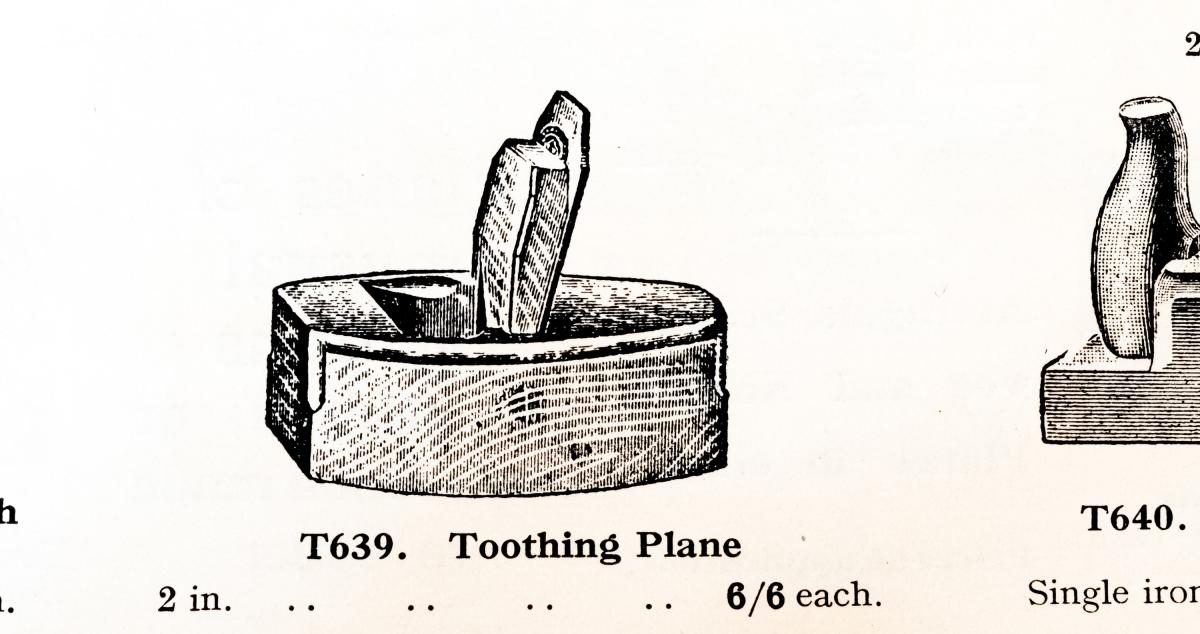
Wider toothing iron were used on veneers and difficult woods for the same reason. A toothing plane (see picture below) is typically a couple of inches wide like a regular plane, but the iron is mounted nearly vertical. What you get is a scraping action that removes a series of narrow little strips. You don't get tear-out for the reasons described above. You can take out saw marks and other things on fragile and tricky woods, like veneers, that you can't really plane without causing some destruction. (Reaching for a toothing plane was more common back when veneers were hand sawn.) Some documentation suggests that toothing planes were used on veneer to rough up the surfaces for gluing. This isn't actually correct. The toothing plane was used to take out saw marks, and make the wood even for gluing. Since the tooth surface wasn't seen you could glue it down as is. If you did the same treatment to the top surface to get rid of saw marks, you'd obviously follow with a scraper, a marquetry plane, or something to get a smooth surface. Glue works pretty well without striations in the material. I have a toothing plane somewhere but I can't find it. This is a engraving of one from the c. 1930 Buck and Ryan catalog
Next time I hope to bring this series to a close with the technical revolution caused by the double iron (or the cap iron, as it is called).
Join the conversation
05/24/2023 Derek Cohen
Hi Joel
You wrote: “ The first drawback: By adding a back bevel to a blade, you effectively open the mouth of the plane slightly”.
Now I do not use high back bevels on planes, but I do use high angle planes, such as the HNT Gordon planes with 60 degree beds, as well as Bevel Up planes with high angle bevels. When you get to around a cutting angle of 55 degrees, the size of the mouth is no longer influencing tear out control. It could be wide open and still control tear out.
Regarding toothing planes. I have been a furniture conservator for 30 years and reglued many historical veneers. During the 17th and 18th centuries, the toothing plane was indeed used to flatten the hand sawn veneer (on the glue side). The same toothing plane was also used on the solid oak (or pine) carcase, it was used on every surface prior to be veneered. Considering the solid oak carcase was manufactured to fairly high standard, using a smoothing plane and other tools, it is fair to deduct that toothing plane was not only used to flatten veneer, but it was also used to prepare the surface with heavy scratches prior to gluing. As the quality of veneer improves in the 19th century (mechanical saw by Cochot early 19th century), there is no need to flatten the veneer anymore. However, the toothing plane is still used right up to the middle of the 20th century, but with smaller teeth.
The toothing plane is still one of my favourite plane. I use it to prepare the carcase and to even out the surface of a marquetry. When making marquetry, it is not unusual to have different veneer thicknesses (I use saw cuts veneers), after gluing the marquetry on the piece of furniture, and before using the scraper, the toothing plane at 45 degrees across the marquetry surface is perfect for removing quickly any excess of veneer, with no risk of tearing the veneer. The scratches are minimal, and a quick scraper will remove any toothing plane mark on the surface. The toothing plane is the best option to avoid unwanted undulations created by a hand scraper.
The toothing plane was therefore used to prepare the veneer and carcases surfaces prior to gluing. Is it truly necessary to create larges scratches on the surface before gluing? the 18th century makers were clearly convinced by it, the modern glue scientist might disagree with that and maybe we could have another post about thin and thick glue animal joints ....
I have a LieNielsen with a 55 degree frog. It doesn't get much use but in things such as figured cherry, it really does help with tear out. Even with premium planes, it is still annoying to change the throat gap. I'd rather have a dedicated plane.
Rather recently, WoodbyWright (James Wright) on YouTube has posted some videos in which he partnered with Reed planes to make a brass 50 and 55 degree shims for the traditional Stanley No 4 hand planes. It was affordable.


 Joel's Blog
 Built-It Blog
 Video Roundup
 Classes & Events
 Work Magazine
You wrote: “ The first drawback: By adding a back bevel to a blade, you effectively open the mouth of the plane slightly”.
Now I do not use high back bevels on planes, but I do use high angle planes, such as the HNT Gordon planes with 60 degree beds, as well as Bevel Up planes with high angle bevels. When you get to around a cutting angle of 55 degrees, the size of the mouth is no longer influencing tear out control. It could be wide open and still control tear out.
Regards from Perth
Derek
Regarding toothing planes. I have been a furniture conservator for 30 years and reglued many historical veneers. During the 17th and 18th centuries, the toothing plane was indeed used to flatten the hand sawn veneer (on the glue side). The same toothing plane was also used on the solid oak (or pine) carcase, it was used on every surface prior to be veneered. Considering the solid oak carcase was manufactured to fairly high standard, using a smoothing plane and other tools, it is fair to deduct that toothing plane was not only used to flatten veneer, but it was also used to prepare the surface with heavy scratches prior to gluing. As the quality of veneer improves in the 19th century (mechanical saw by Cochot early 19th century), there is no need to flatten the veneer anymore. However, the toothing plane is still used right up to the middle of the 20th century, but with smaller teeth.
The toothing plane is still one of my favourite plane. I use it to prepare the carcase and to even out the surface of a marquetry. When making marquetry, it is not unusual to have different veneer thicknesses (I use saw cuts veneers), after gluing the marquetry on the piece of furniture, and before using the scraper, the toothing plane at 45 degrees across the marquetry surface is perfect for removing quickly any excess of veneer, with no risk of tearing the veneer. The scratches are minimal, and a quick scraper will remove any toothing plane mark on the surface. The toothing plane is the best option to avoid unwanted undulations created by a hand scraper.
The toothing plane was therefore used to prepare the veneer and carcases surfaces prior to gluing. Is it truly necessary to create larges scratches on the surface before gluing? the 18th century makers were clearly convinced by it, the modern glue scientist might disagree with that and maybe we could have another post about thin and thick glue animal joints ....
Best regards,
Yannick Chastang, The Marquetry Centre.
I have a LieNielsen with a 55 degree frog. It doesn't get much use but in things such as figured cherry, it really does help with tear out. Even with premium planes, it is still annoying to change the throat gap. I'd rather have a dedicated plane.
Rather recently, WoodbyWright (James Wright) on YouTube has posted some videos in which he partnered with Reed planes to make a brass 50 and 55 degree shims for the traditional Stanley No 4 hand planes. It was affordable.