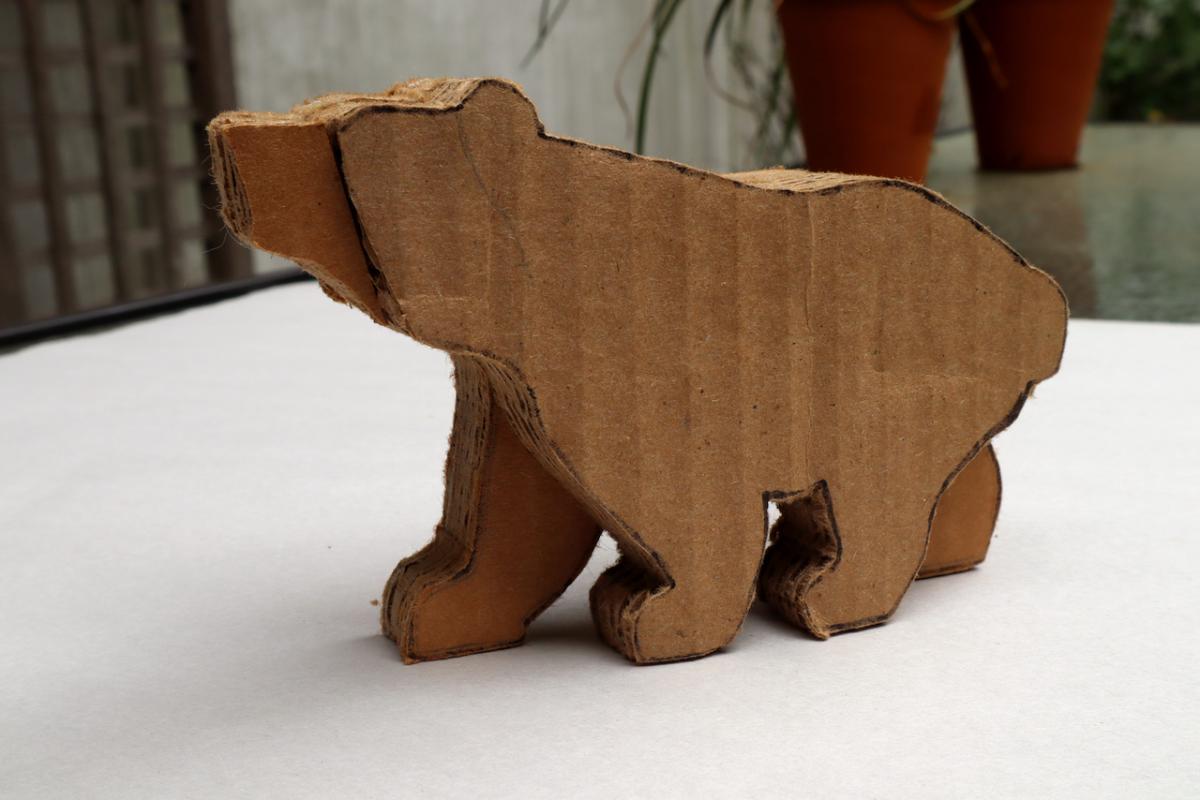
A bear carved out of layers of cardboard
Corrugated cardboard is a wonderful material to work with. It is a readily available resource and can be “harvested” by taking apart the many boxes that we receive in the mail these days. A cardboard project can be artistic in nature (a sculptural animal project) serve a function (building a box or furniture) or be a combination of the two. A rudimentary corrugated cardboard project can be made from stacking and gluing together a few plies of cardboard that we design, precut to shape and then carefully glue together.*
Remote learning and Corrugated cardboard projects
As I was designing this class I was making an effort to be considerate of the available time, tools, and supplies that parents/students have or can obtain. I would also like to make the process of creating the project coherent and independent and to enable the student as much agency as possible in choosing the project themes and the method of executing it.
Design and Techniques For Teachers and Parents:
The design: Help your student/child to choose an object, an animal, or a building that will become the influence for their cardboard project. I recommend beginning with an animal project such as the one I show below. Help the child choose a copy of the animal’s side view (if possible try also to obtain the top and the front view) from a magazine, a book, a printout, or even draw it out of their imagination. Try to generate templates that will feature the most important attributes of the animal. If your child decided on a four legged animal, for instance, make two templates: one for the right side of the animal and one for the left. The right side legs can point forward where the left side has the legs point backward and thus facilitate perception of movement and realism.
Once the two (or three) templates are done the student will transfer their design onto the corrugated cardboard and cut the shapes. After this, we will glue the layers (or plies) together. Once the project is dry In the end, we could use coarse sandpaper to smooth out the corners or even cover the three-dimensional form with paper mache.
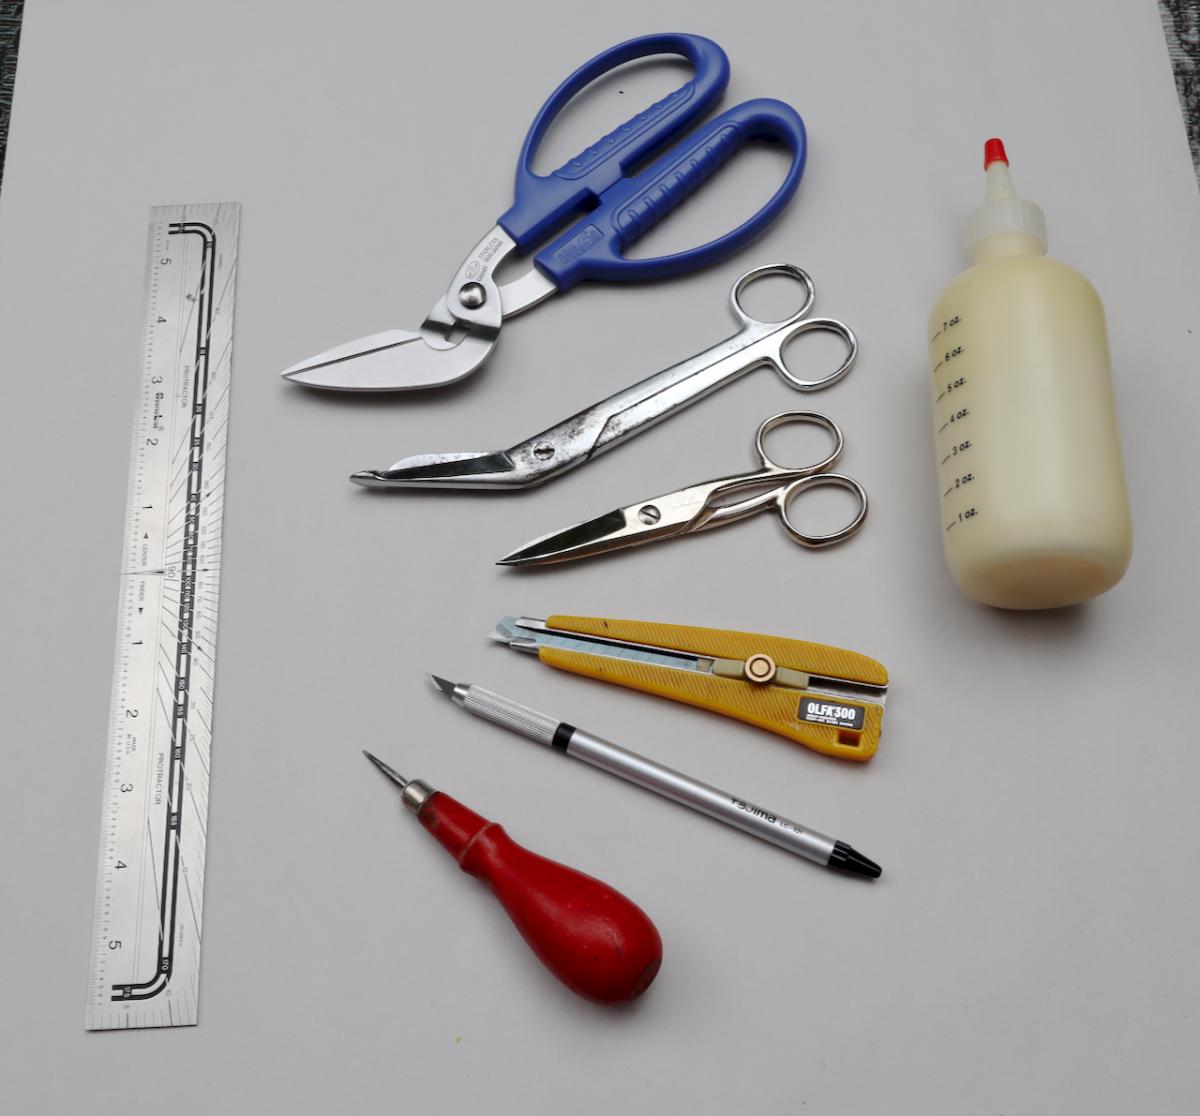
Tools of the trade. From top to bottom: A special cardboard scissors, safety scissors, electrician’s scissors, utility knife, detailed precision knife, awl, some glue, and a rule. As mentioned before, any heavy-duty scissors can be instrumental in helping us here, so try what you have at home first before buying a new pair.
Tools & Supplies
Here is a basic list of tools and supplies which are most likely available in most homes, and will serve as our baseline tool kit for the project.
Corrugated cardboard boxes
White or yellow PVA glue (any brand will do including typical "school glue" or BT&C 4/4 Wood Glue )
Writing instruments: Pencils, erasers
Scissors: heavy-duty, light-duty, and even nail scissors are all very practical for us.
Blank sheets of paper
Ruler
That said the following tools will help in speeding up the design and building process and will enhance the feel and look of the outcome.
A dedicated cardboard scissors ($17) (highly recommended)
A hot glue gun
Tracing paper
Carbon Transfer Paper
An emery board
An awl of some sort (A sewing kit awl, a push pin or even a wine opener screw tip will do)
Masking tape (Blue 3M tape is the most suitable, but a regular tape will do too)
Here are some basic tips when working on your projects:
Cutting tips
Special corrugated cardboard scissors can be very helpful in separating the boxes parts, and for cutting the shapes.
Using an art knife will help to get into tight spots.
When cutting notches with scissors: Cut the two parallel cuts first, fold out the cardboard in between, and cut it with the scissors parallel to the surface of the cardboard.
When cutting a right angle "bay": Cut the two parallel lines. Then cut an arc from one of the cuts to the terminus of the other. Continue to cut from that point to the adjacent terminus.
When cutting using a knife we should work on a cutting board or on a few sheets of "sacrificial" cardboard to prevent any damage to our desks and tables.
For best results when cutting a curved object such as an animal's tail or an elephant trunk, prefer using the scissors on the outside curve (convex) while the layout knife is incorporated on the interior (concave). By the way, intricate objects (such as the one I mentioned above) can also be prepared. separately and then be assembled or joined into the main form.
Without an art knife, we need to cut concave shapes with extra care. Try to cut as many straight lines as possible, getting closer to the circumference or curve edge. Then proceed carefully to the design line.
Gluing tips
Once the plies or layers are ready for gluing and stacking, we can look for a heavy object that can be used as a weight which we will place on the glued-up stack for a few hours. A pot or two, filled with water, or jars, or baking trays with books on top will be a perfect solution.
You can make a makeshift glue spreading “paddle” from a piece of cardboard. Apply the glue in a meandering pattern, then spread the glue on all the surface with a spatula or a makeshift paddle.
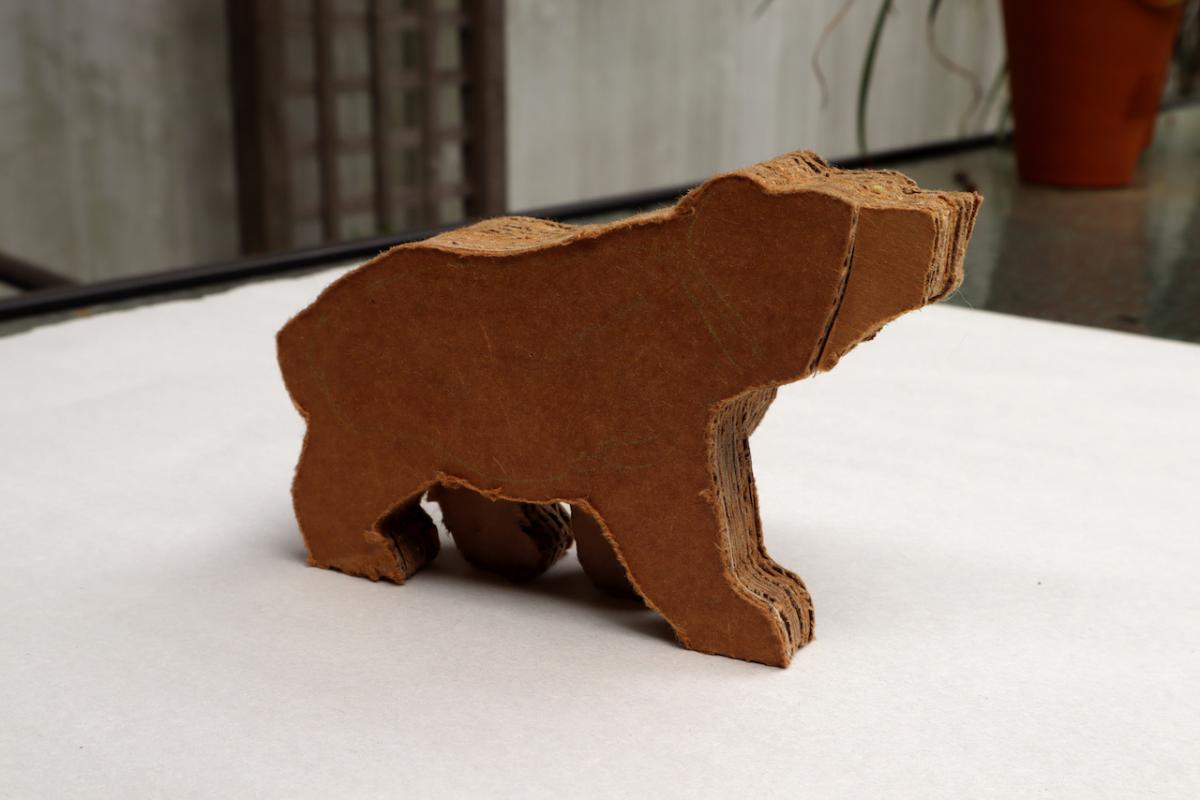
A Bear project
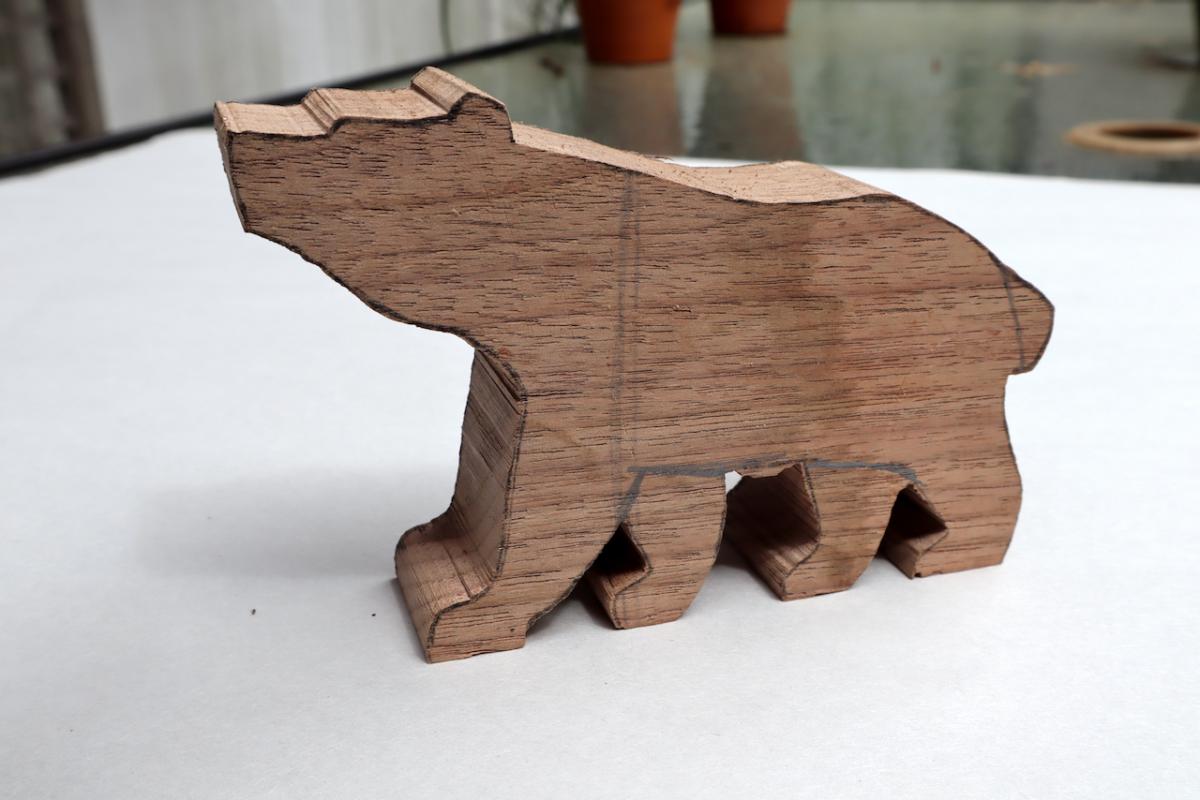
The cardboard bear project actually began as a woodcarving project. Last fall I used a bandsaw to cut an outline of a walnut bear in preparation for further carving and detailing. The bear as a walnut carving blank
I wanted the legs to feature a walking bear or a bear that is just about to walk, so I had all four legs visible. Busy with the school year and other chores I ended up proposing this project and tucked it away until… Covid19. When I needed a sample project for my cardboard class I remember the bear and decided to use it as a model.
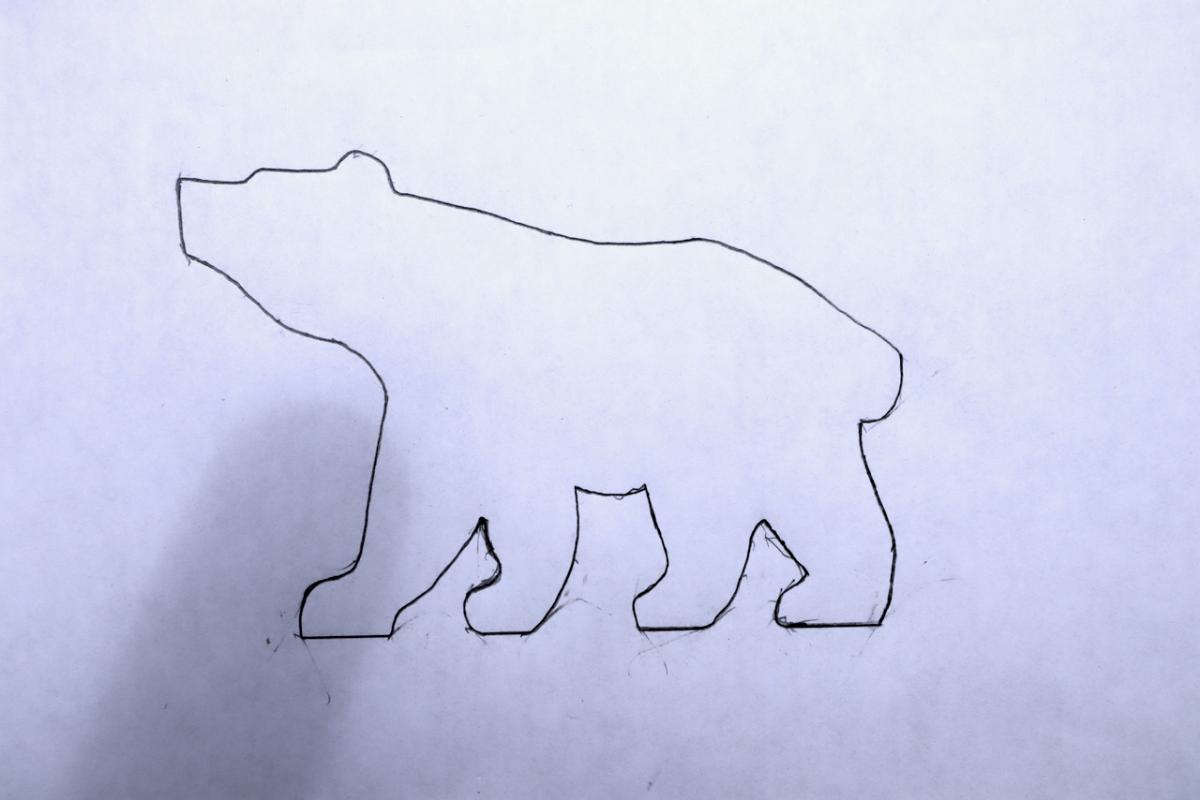
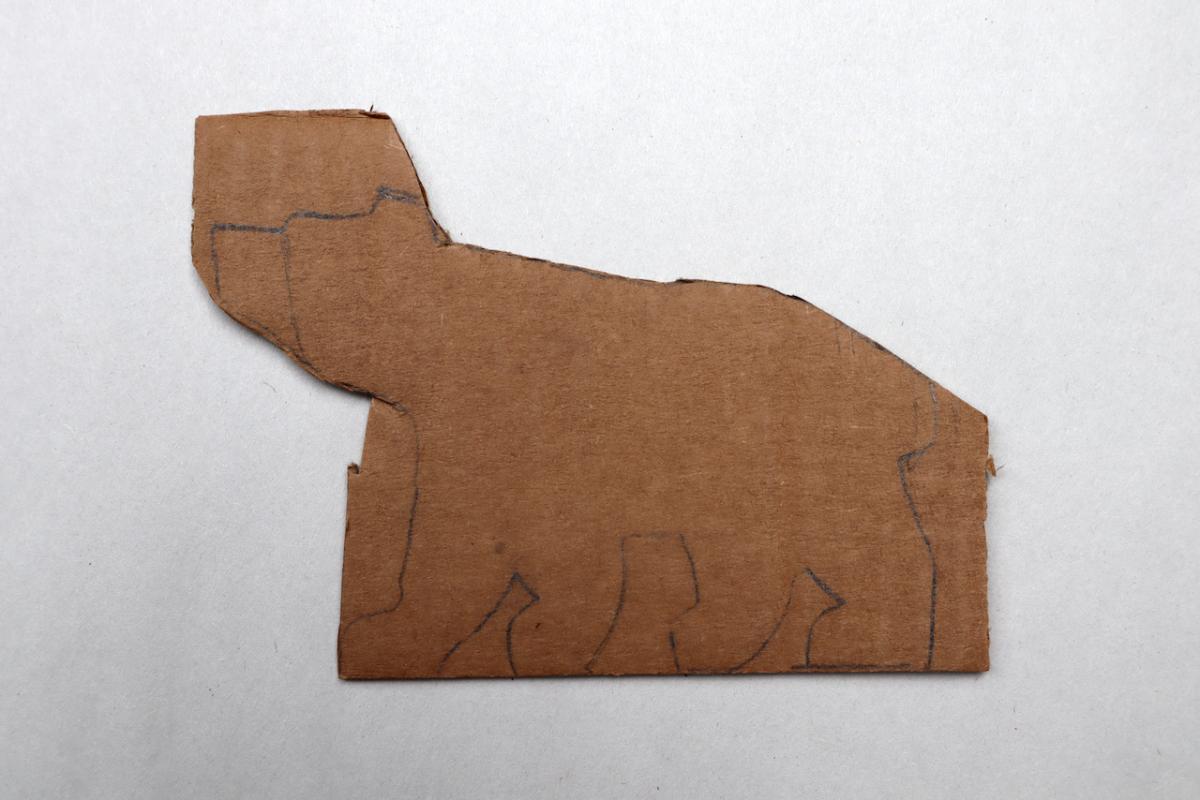
First I outlined its shape on a piece of paper First I outlined its shape on a piece of paper
and on scrap corrugated cardboard pieces.
Then I cut the shapes and highlighted two distinct leg positions: In option one, the legs on the right side of the bear are pointing backward where the legs on the left side point forward.
In option two the legs on the right side are closer together. On the left side of the bear the two legs are splayed (the front one point forward and the back one backward)
.
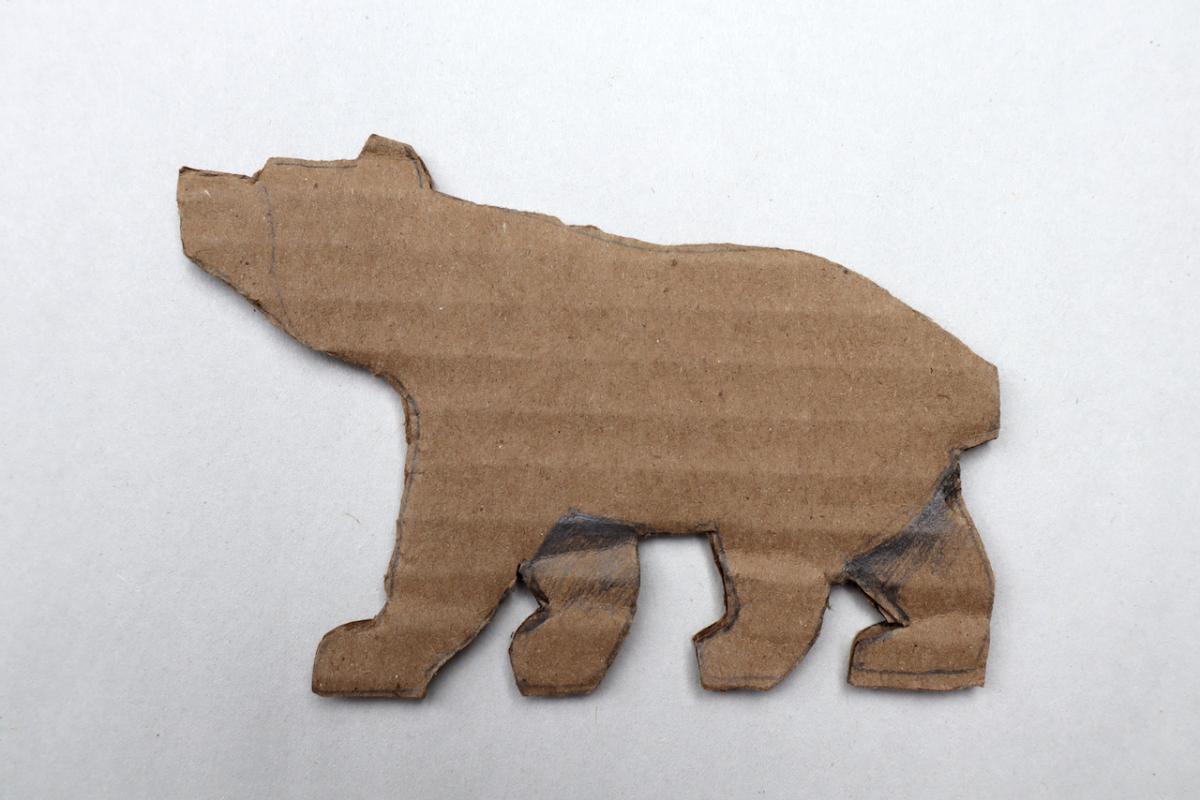
After looking at the two alternatives I decided to choose option two and made two cutting templates - one for each side of the bear.
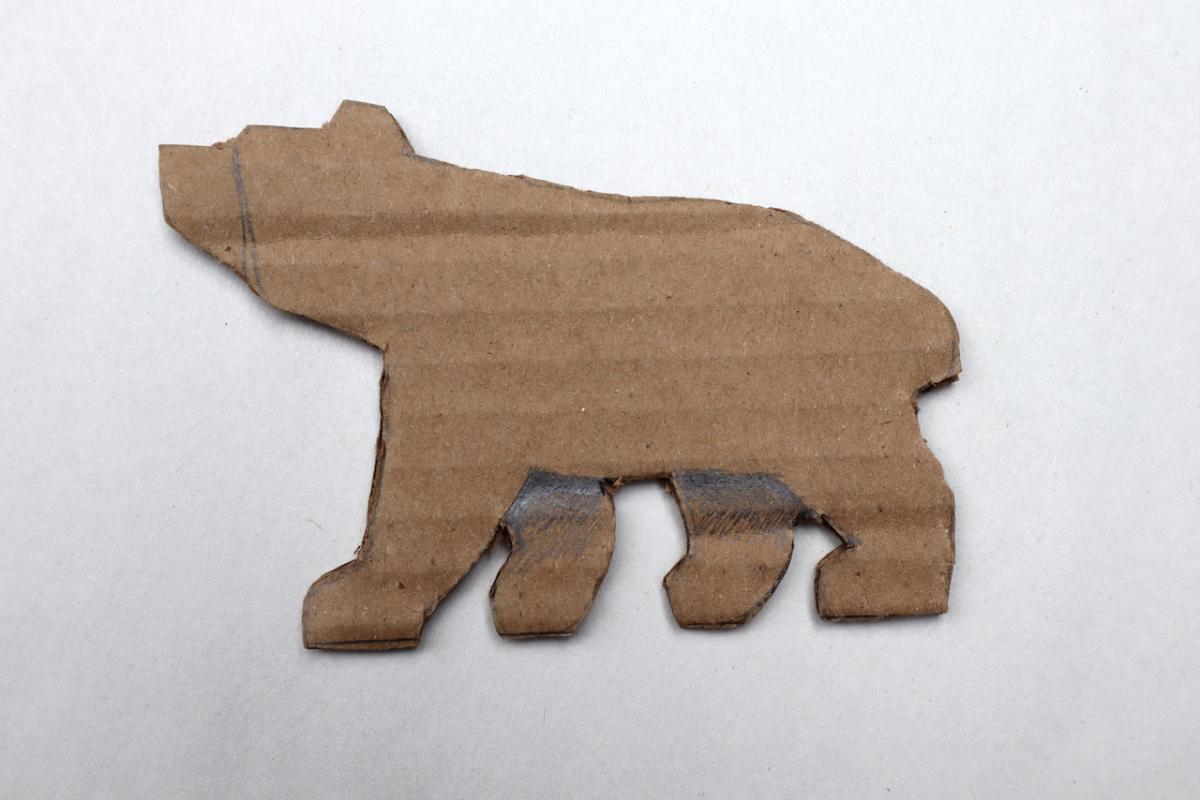
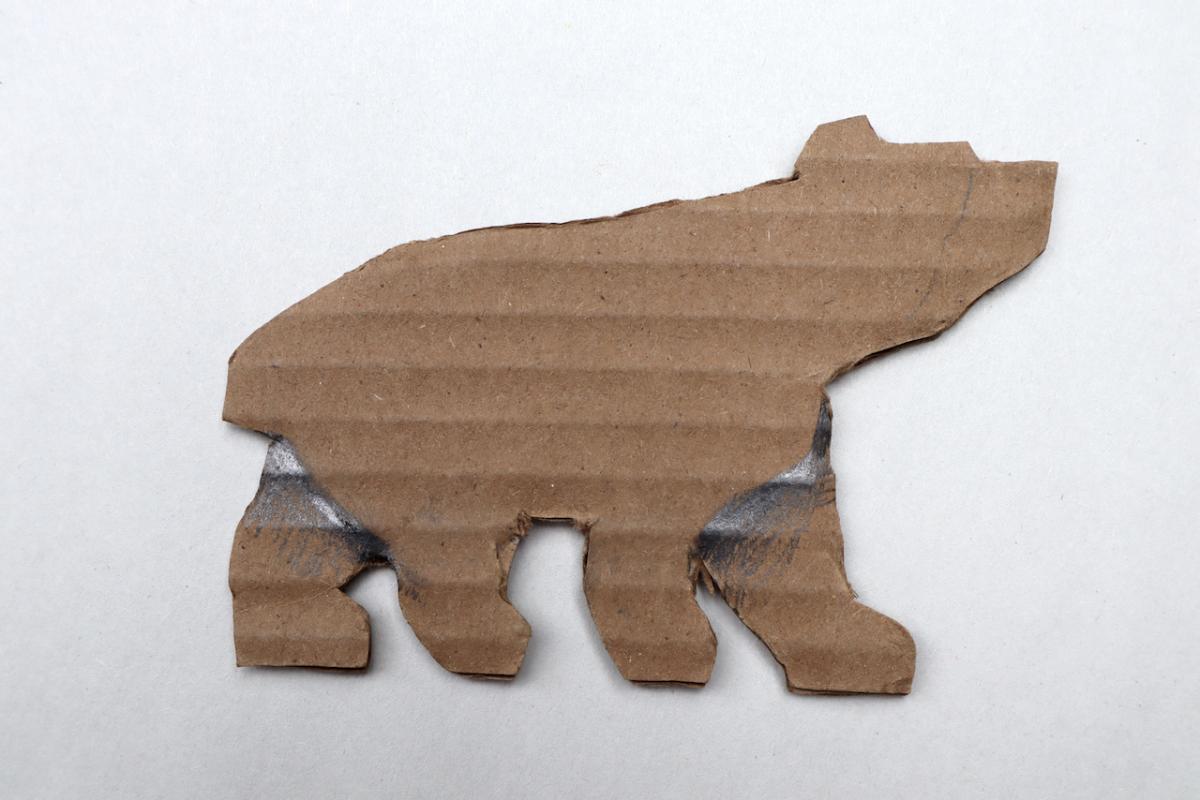
I used the right and left templates to trace a few more plies of cardboard until I made enough for each of the sides. After cutting the plies to shape I dry-stacked them together to decide if there is anything else I can do to augment the shape and make it more realistic. One of the easiest and the most effective alterations that we can do here is to cut off the front part of the head on the two exterior plies (on the right and the left sides). This makes the head look more in line with the real animal by having the snout narrower than the entire head.
Next time I will talk on ways to make your design even more realistic.
Join the conversation
06/11/2020 Eric Weissman
Corrugated cardboard is indeed a wonderful material. I remember an ad in a packaging industry magazine in the late '70s – a photograph of a full size automobile sitting on a sort of bridge made entirely of corrugated. And don't forget the packaging designers who, when I was purchasing corrugated and paperboard cartons by the truckload were still designing die-cut containers on the drawing board. Their ability to visualize a three-dimensional container formed (economically) from a two-dimensional sheet was simply phenomenal.


 Joel's Blog
 Built-It Blog
 Video Roundup
 Classes & Events
 Work Magazine