Menushopping cart
Tools for Working Wood
Invest in your craft. Invest in yourself.

JOEL Joel's Blog

Winding Sticks

01/18/2011

Winding Sticks 4
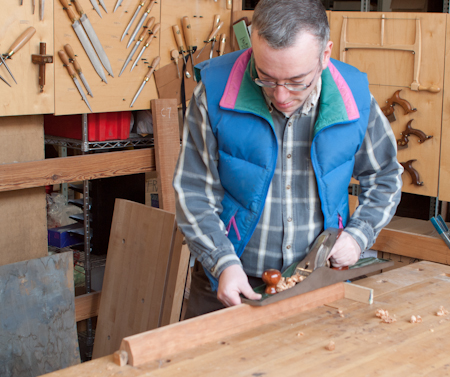
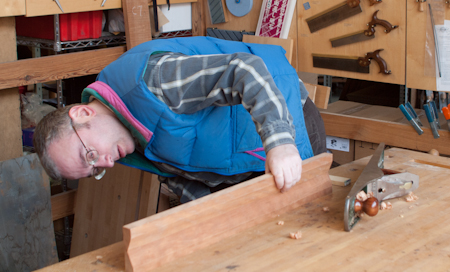
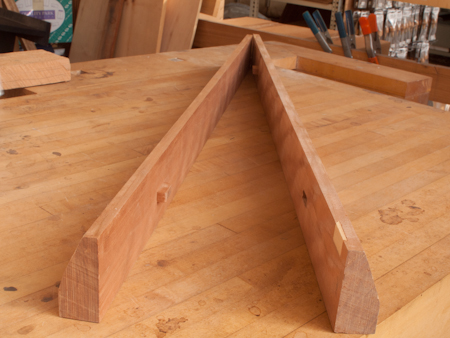
I wasn't actually planning to write about winding sticks but I started to write something on dressing lumber and my winding sticks are just about the only measuring tool I use. I also use my winding sticks as a straightedge and suddenly it seems pretty obvious that before I could write anything useful about dressing lumber a look at winding sticks was imperative.
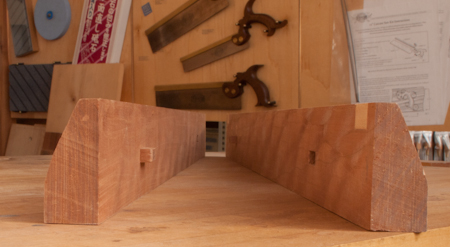
By definition winding sticks are two matching sticks that are used to help determine if a pieces of wood is in wind (twisted). When we talk about dressing lumber I'll go into their use. Now I want to concentrate on how to make a decent pair.

Winding Sticks 5
My winding sticks are 24" long. You can make them longer - the longer they are the more accurate they can be and also more useful as a straightedge. Shorter seems a mistake to me. I wish mine were a little longer. Winding sticks are used by balancing them on a boards at each end and seeing if the winding sticks line up. You do that by sighting down them. The longer the winding sticks the more the error of the board is magnified and you can work more accurately. As a straightedge longer is better. The latter use is why they need to be wood. Even if your wood is untwisted the wood might have a dip or belly and to figure that out we use one winding stick as a straightedge. If the stick sits flat on the wood and moves evenly the wood is flat. If the winding stick pivots in the center the wood is convex. If the winding stick seems to stick at the ends the wood is concave. You can also look at light leaks under the winding sticks. Shorter sticks are less accurate and cover a shorter distance, metal sticks can easily dig in the wood, causing dents and other problems.

The problem with a single wooden straightedge is keeping it accurate. But pairs of winding sticks can be checked against each other and are easily kept accurate.

Winding Sticks 6
My winding sticks were made a long time ago out of a random scrap of cherry. I cut the piece in half, bookmatched them and roughly planed them to size. Then I cut small matching mortises on the inside of each piece and made two small tight fitting floating tenons. The tenons must be a tight fit. Normally the tenons stay put in their sockets but if I have to plane the faces of the sticks they need to be removable. At this point I also inlaid (poorly) some contrasting boxwood on one piece to give a target.
Winding Sticks 7
It's important that whatever you use as a target is plane-able because the way you keep the sticks accurate is by planing them together. Finally I planed the taper on opposing sides of the sticks to make the top sighting area thinner, but keeping the bottom fat for stability.

Winding Sticks 8
To check to make sure that the winding sticks are accurate all I need to do is put the pair together and make sure they line up. If not I plane them together. The floating tenons make this easy. Then I take apart the sticks and stand them on top of each other and see if there are any light leaks. I do this on both edges. In my case the windows in my shop give a great light source and the human eye can detect gaps of I think around a millionth of an inch - which is way overkill. The best way to plane them is to plane them intentionally concave, and then plane the concavity until it's flat. (It's very hard to plane a convex surface flat, but planing a concave surface flat is trivial - more on that when I write about milling timber).

The wood is unfinished because periodically I check the sticks for accuracy and re-plane the top and bottom. If I need to plane the joining surfaces I just pry out the floating tenons and it's no sweat.

Winding Sticks 9
What I ended up with is a pair of 24" wooden winding sticks that work great as winding sticks, but also function more frequently as a pair of 24" straightedges. Since the method for checking that they are accurate doesn't require any other reference is really easy to do any time I work on anything important. There is no hunting for another straightedge and in fact I don't own one. Another great thing about them is that they are light and if they do knock into the wood there isn't much of a chance of a ding or a dent in the work.


Join the conversation
01/18/2011 Frank V
Thanks Joel... very useful information.

If I am understanding this correctly, you seem to take no exacting measure to ensure the tapered edge is parallel to the wider edge. It seems that as long as both edges are perfectly straight - and the two pieces are referenced properly when used - wind will be revealed correctly.

Can you elaborate a little on the "target"?

Thanks,
Frank
01/19/2011 Robert
Very pretty winding sticks! Mine are ugly, but true - 1 inch aluminum angle. On each, one end is painted black, the other white. I may have to try to make some prettier ones like yours.
01/20/2011 John
This has inspired me to make a new set of winding sticks. I made a pair from maple with walnut inset along one edge maybe 6 years ago. They are too short, about 16", nicked up from several drops to the concrete floor, and naturally I had never checked them for true since I made them. Thankfully, they were only out a smidge.

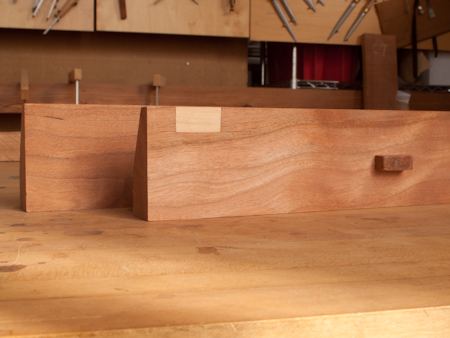
But, I have no idea why you need to mortise the backs of the sticks or use a floating tenon. What purpose do they serve?
The targets are two bits of boxwood inlaid in one stick. When you sight along the winding sticks to check your wood the contrast between the targets and the body of the sticks make the farther away winding stick (which has the targets) easier to see, and it sort of foreces you to always compare differences at the same place on the winding stick - you just naturally look at the target each time.

The reason for the floating tenons is that to check square you just put the sticks together (using the tenons) and then make sure the top and bottom edges line up exactly. It's trivial to line them up for checking, and planing a correction if they can be tenoned together.
01/23/2011 Wally
Joel...Is it only my computer? There is a picutre pasted over the body of the story on the winding sticks...I couldn't read the paragraphs behind the picture. This is a fascinating read, i do have some winding sticks but I now want to make myself a new set...is there any way you can move the picture so I can read the rest of your explanation?? Ihope! Thanks! Wally
Try a different browser. Maybe try printing it out. Which browser are you using? Older browsers might have formatting probems. If that doesn't fix it please let me know.
01/26/2011 Wally Cox http://n/a
Joel, I discovered the problem I wrote about previously of not being able to read all of the article hidden behind a picture in the article. I have windows 7, a new computer, and there is an option on it to increase the print size from 100% to 150% (for older eyes?? like mine are getting to be!!) And when in this mode, it causes the pictures to over ride the written article content. All I did was to return it to 100% mode and now I can see it all. (a bit of a strain for these eyes , but iI can now read it all...plus, printing it out is an option as well...Thanks and sorry for any inconvenience. Wally
01/29/2011 murrmac
I am using Windows XP with IE 9 and the picture is also superimposed on the text.

If you right click on your mouse and then click "View Source" you will see the HTML listing for the page, and also be able to read the covered up text.
It's fixed. (for all blogs. ) I got rid of the old style formatting which isn't correctly supported everywhere and added in CSS styles which are. Looks better in google reader too.

sorry for the inconvenience.

joel

Comments are closed.
The opinions expressed in this blog are those of the blog's author and guests and in no way reflect the views of Tools for Working Wood.