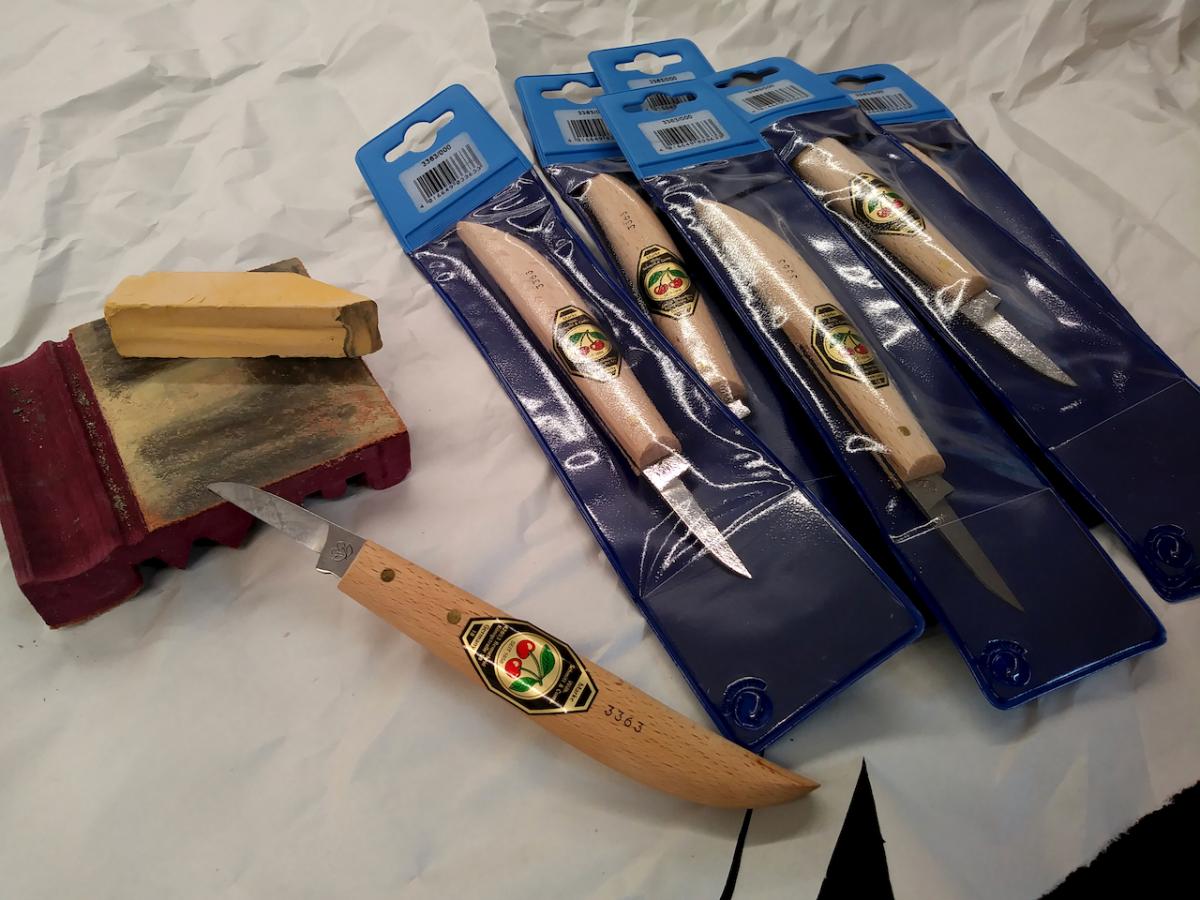
A Two Cherries carving/marking knife were the sole tool in the first whittling project which I introduced to the 8th-grade class
Every fall I welcome a group of new students to our woodshop in the basement of our elementary school building in Manhattan. For the 4th graders, this is both a triumphal and joyful moment, since their dream of holding a gouge, a saw or a chisel is about to become true. Ever since they poked through the shop’s door on their way to the dining hall and saw their 5th-grade seniors toiling on various projects, they dream of joining our little “Santa’s workshop”, but this fall we had to disappoint them and tell them that woodworking is postponed a bit and will instead take place in their classrooms. This profound change of plans is due to New York City Covid-19 regulations which our school pay heed too. Instead of a woodshop, we teach in the classrooms to avoid the potential risk of shop infection, as students from different age groups would have frequented the shop a few times a day.
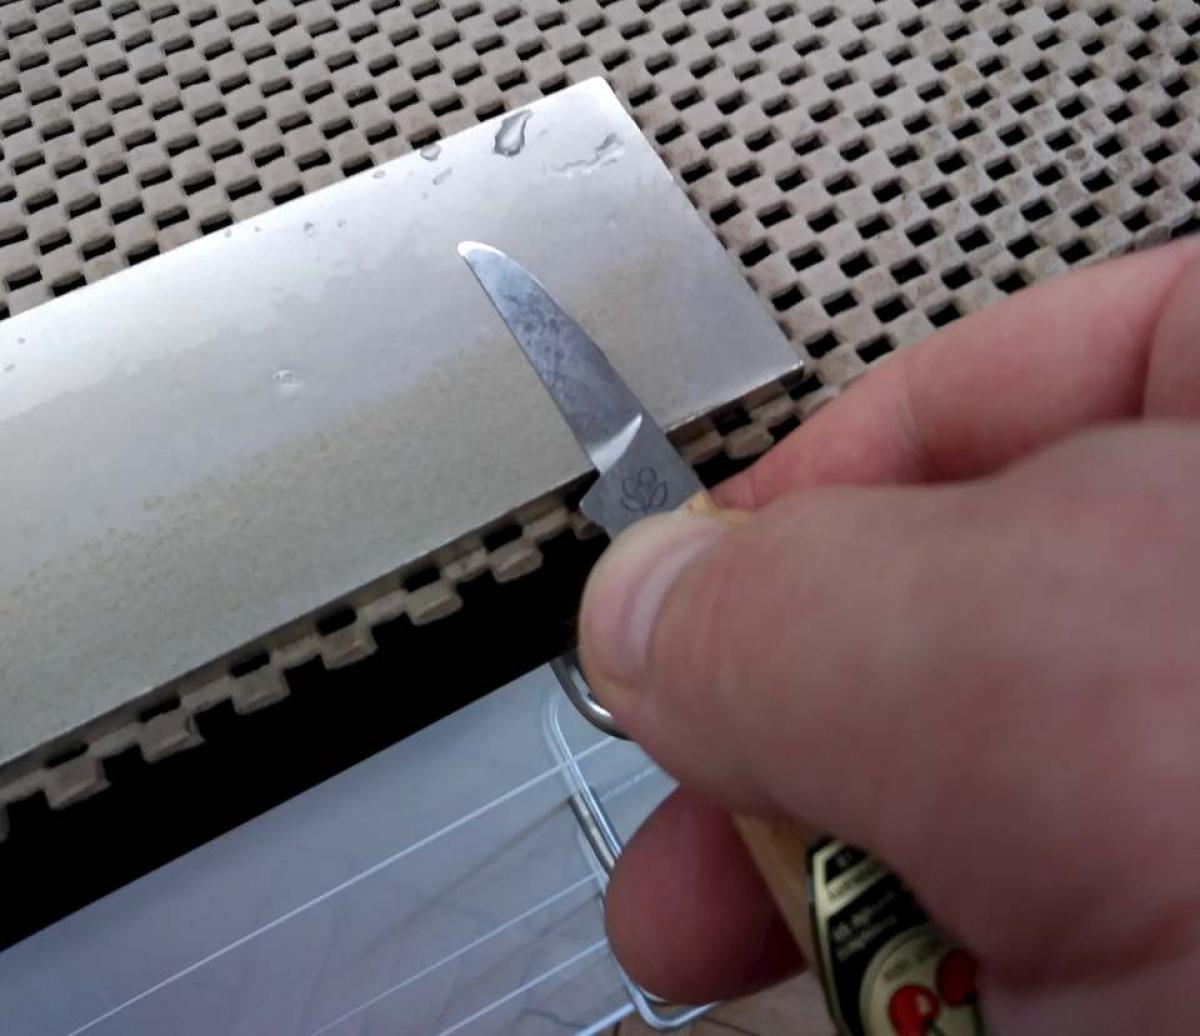
Some of the Two Cherries needed a touchup with a 1200 grit diamond stone before I finished the blade on a strop
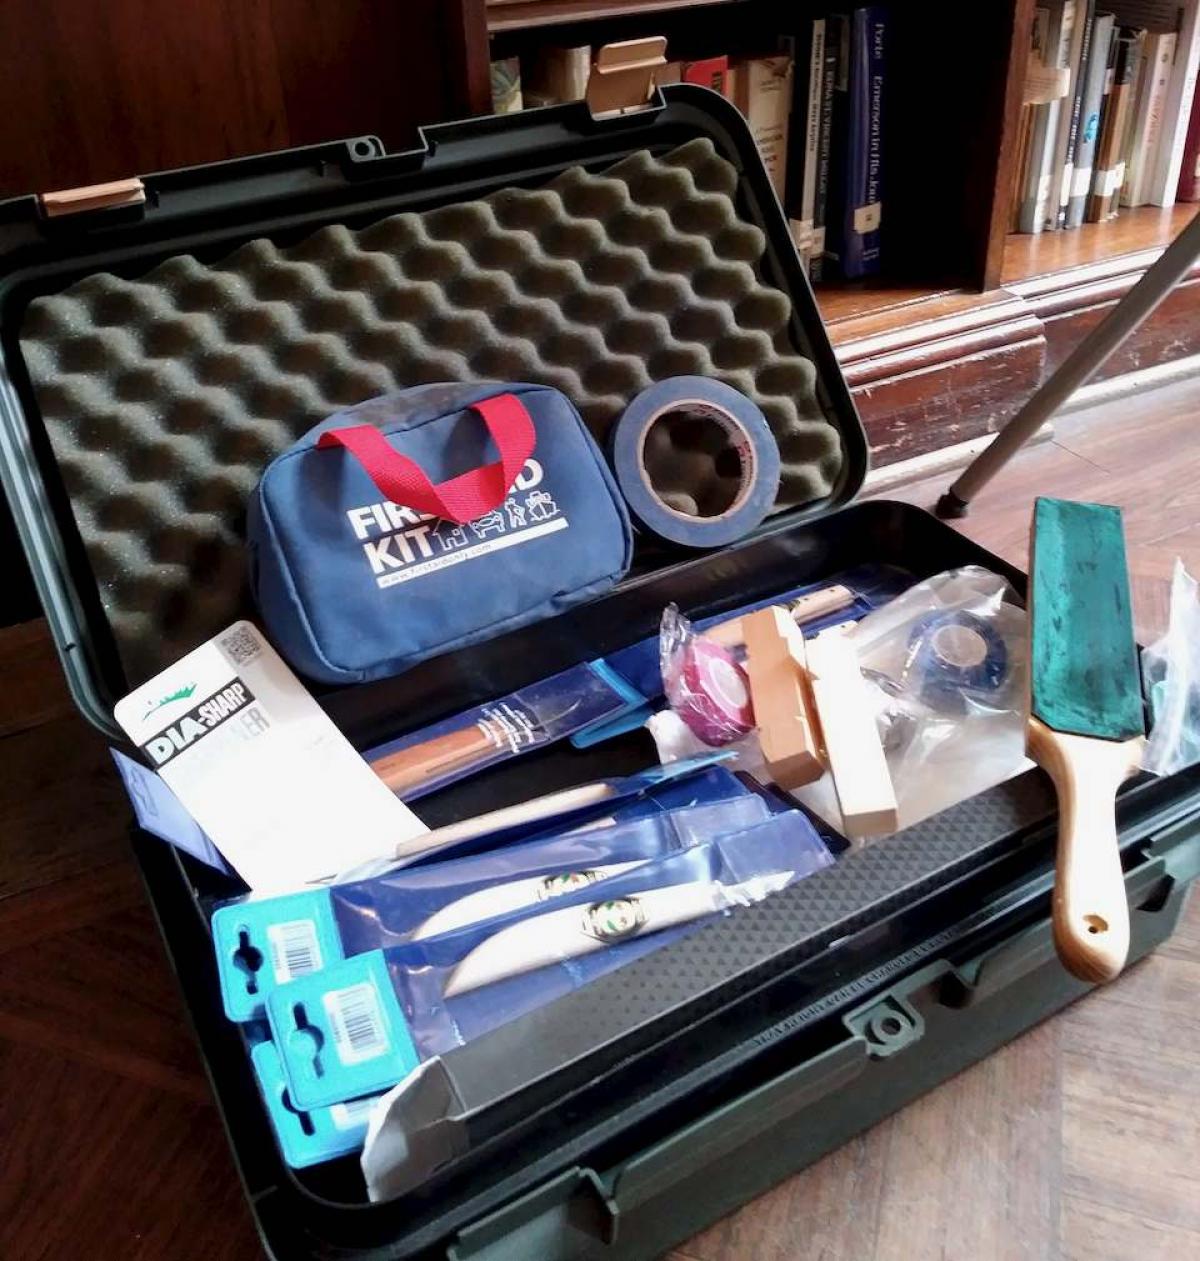
For each of my whittling classes I carry with me a box with tools, a first aid kit, self-adhesive elastic brands (used as finger protectors), and a strop.
As a teacher and designer, I am quite capable at rethinking curricula and adjusting it to new needs and situations, but nothing had prepared me for a complete and drastic change like this. Unable to use the shop, to clamp the work to our sturdy benches, and with a limited amount of tools and supplies that I could schlepp from one classroom the other, I was left with quite a small group of options to play with.
Last spring, during the "shelter in place" period I taught a successful class on Corrugated Cardboard design using Zoom, this fall I did not want to forsake working with wood, and wood cutting tools, and so I needed to come up with a plan to teach whittling.
My goal was to come up with a basic set of projects (for each of the grades) which would be small enough to be held by hand and worked upon during class, and that could be stored away in the desks or the classroom’s shelves in between our meetings. I also wanted to keep the tool or tools to a minimum, and ideally incorporate only one tool to accomplish all or most of the project.
These sets of parameters led me to favor a whittling orientation and to plan my coarse accordingly. Many of the whittling projects that I am familiar with include carving of small and cute figures, animals, and the like. But since the first class that I was about to teach was the 8th grade, who traditionally have been working on a stool project, I decided to explore the idea of making a stool with a whittling knife. To many, this might sound crazy, but I believe that this actually can be achieved with a great level of success.
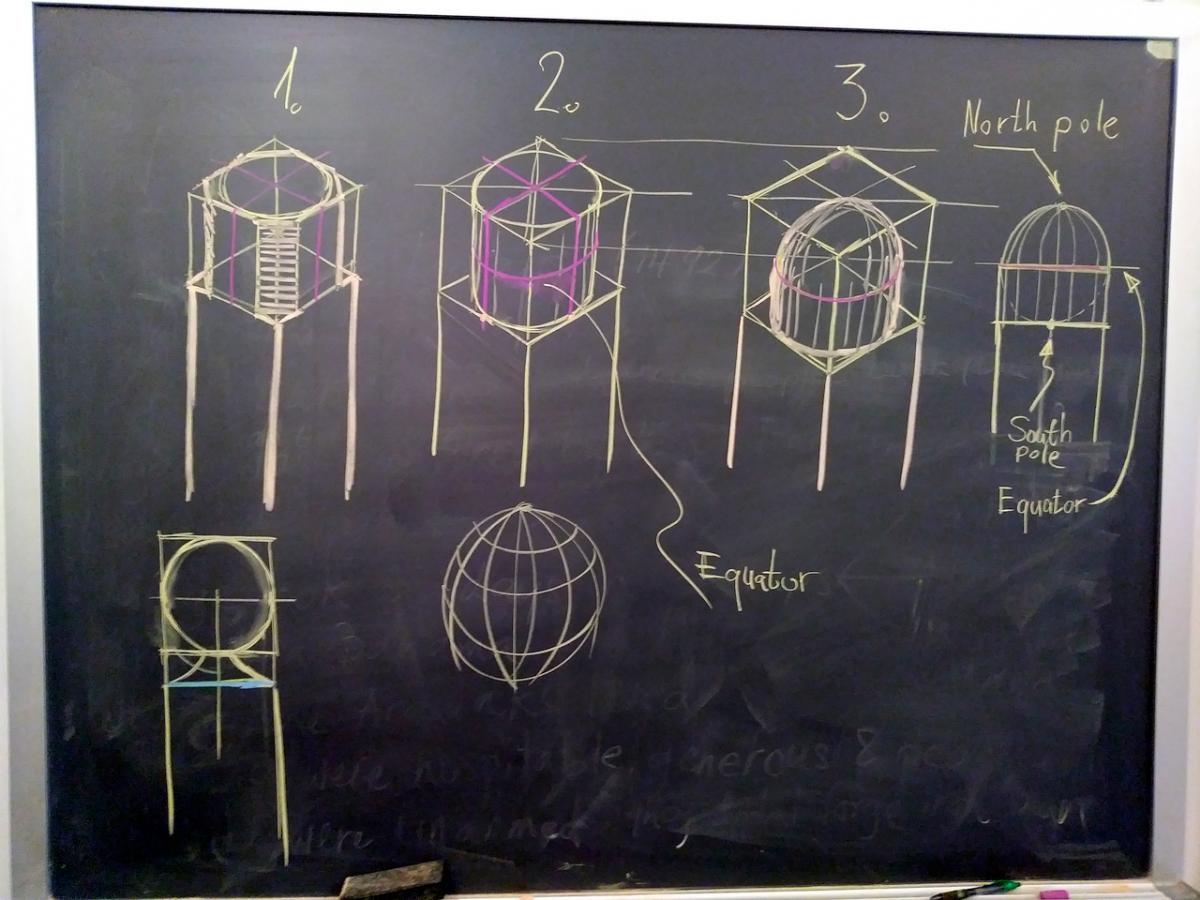
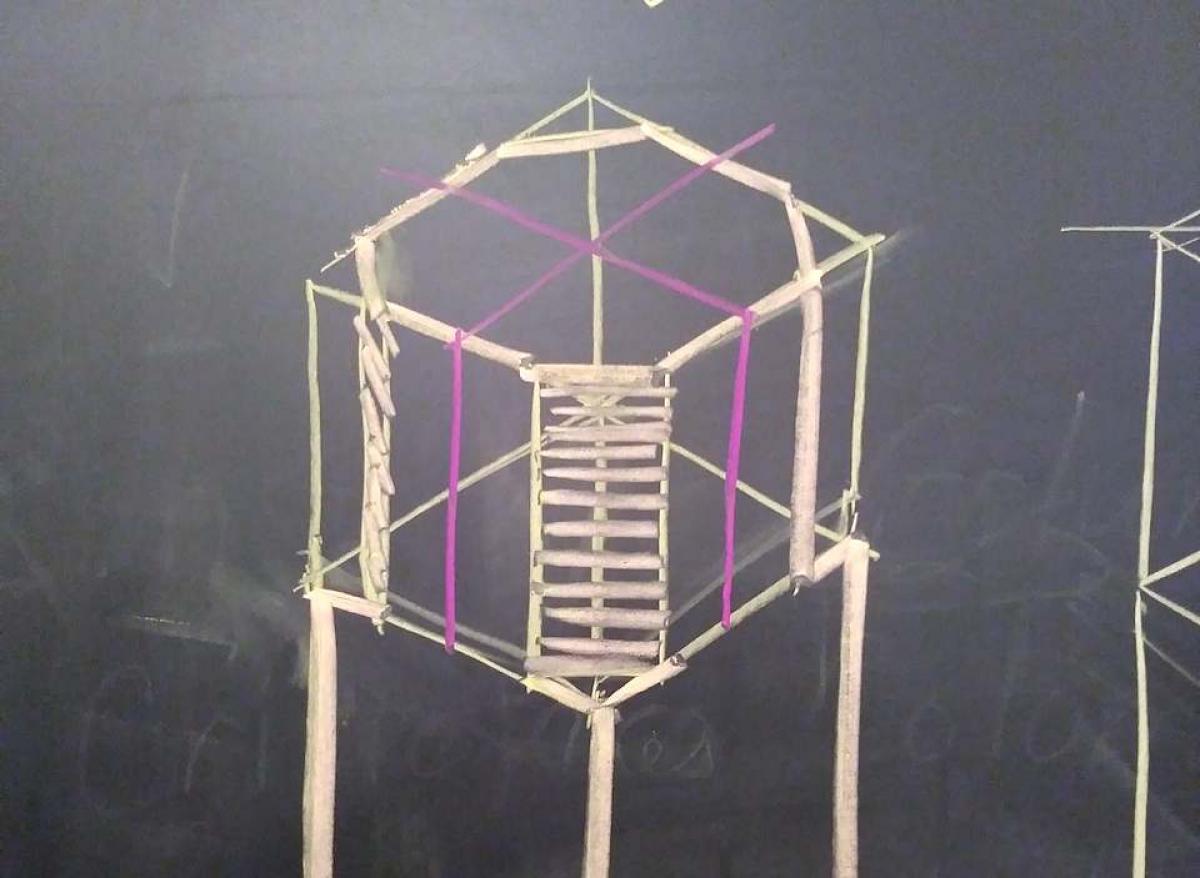
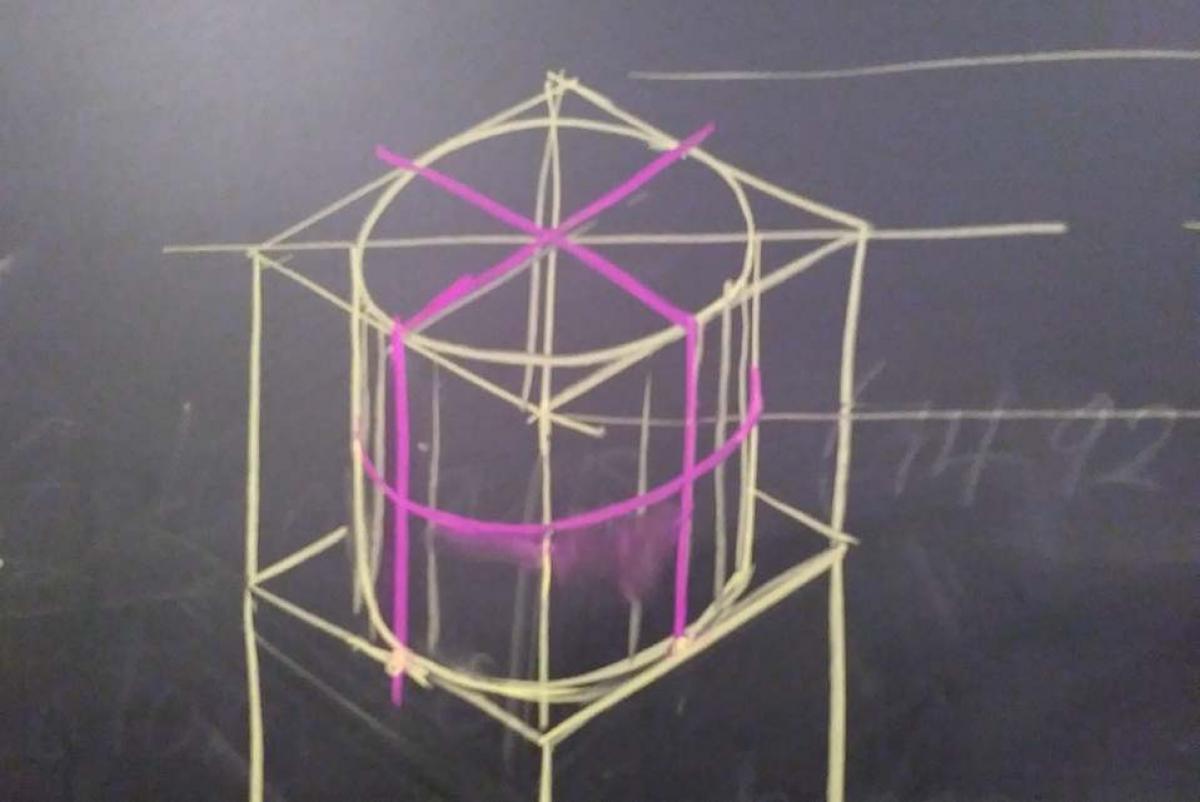
At the beginning of class I drew on our blackboard the sphere project plan. First, we will draw the cylinder parameters, then we will chop off four facets on each corner, and then we will round the cylinder over.
So here was the plan: Each student would receive three basswoods blanks to build the three legend stool. The students would use a carving knife to shape the cylindrical tenon, and then will work on augmenting the leg’s blank with chip-carving designs of their choosing. Once the legs were ready, I would provide them with a predrilled seat blank, or, if we could find a good way to reliably drill a 1-⅜” holes in the classroom, we would do so, and thus give the students the opportunity to experience boring a wide hole. Lastly, we would glue, lightly sand, and apply flaxseed oil on the parts.
Basswood, I thought, would be an ideal wood for the job for two reasons. First, it is very easy to carve, and secondly, our math teacher, Mr. Marsch, who is a sawyer and miller could provide us with thick blanks to work with.
Just before the school year began the 8th-grade class teacher asked me if we could incorporate a study in Platonic solids prior to working on the stool. She mentioned that it would work well with the class geometry lessons. I thought about it and decided that it is a worthy proposal since it would give the students a test run on a smaller piece of wood before embarking on working on the leg blanks. Thus came the ball on a stick exercise.
To protect the students’ fingers we got some elastic self-adhesive mash tape.
The wood: I ordered for us a few 6” x 1” x 1” long basswood blocks.
Now all was ready for the fun to begin.
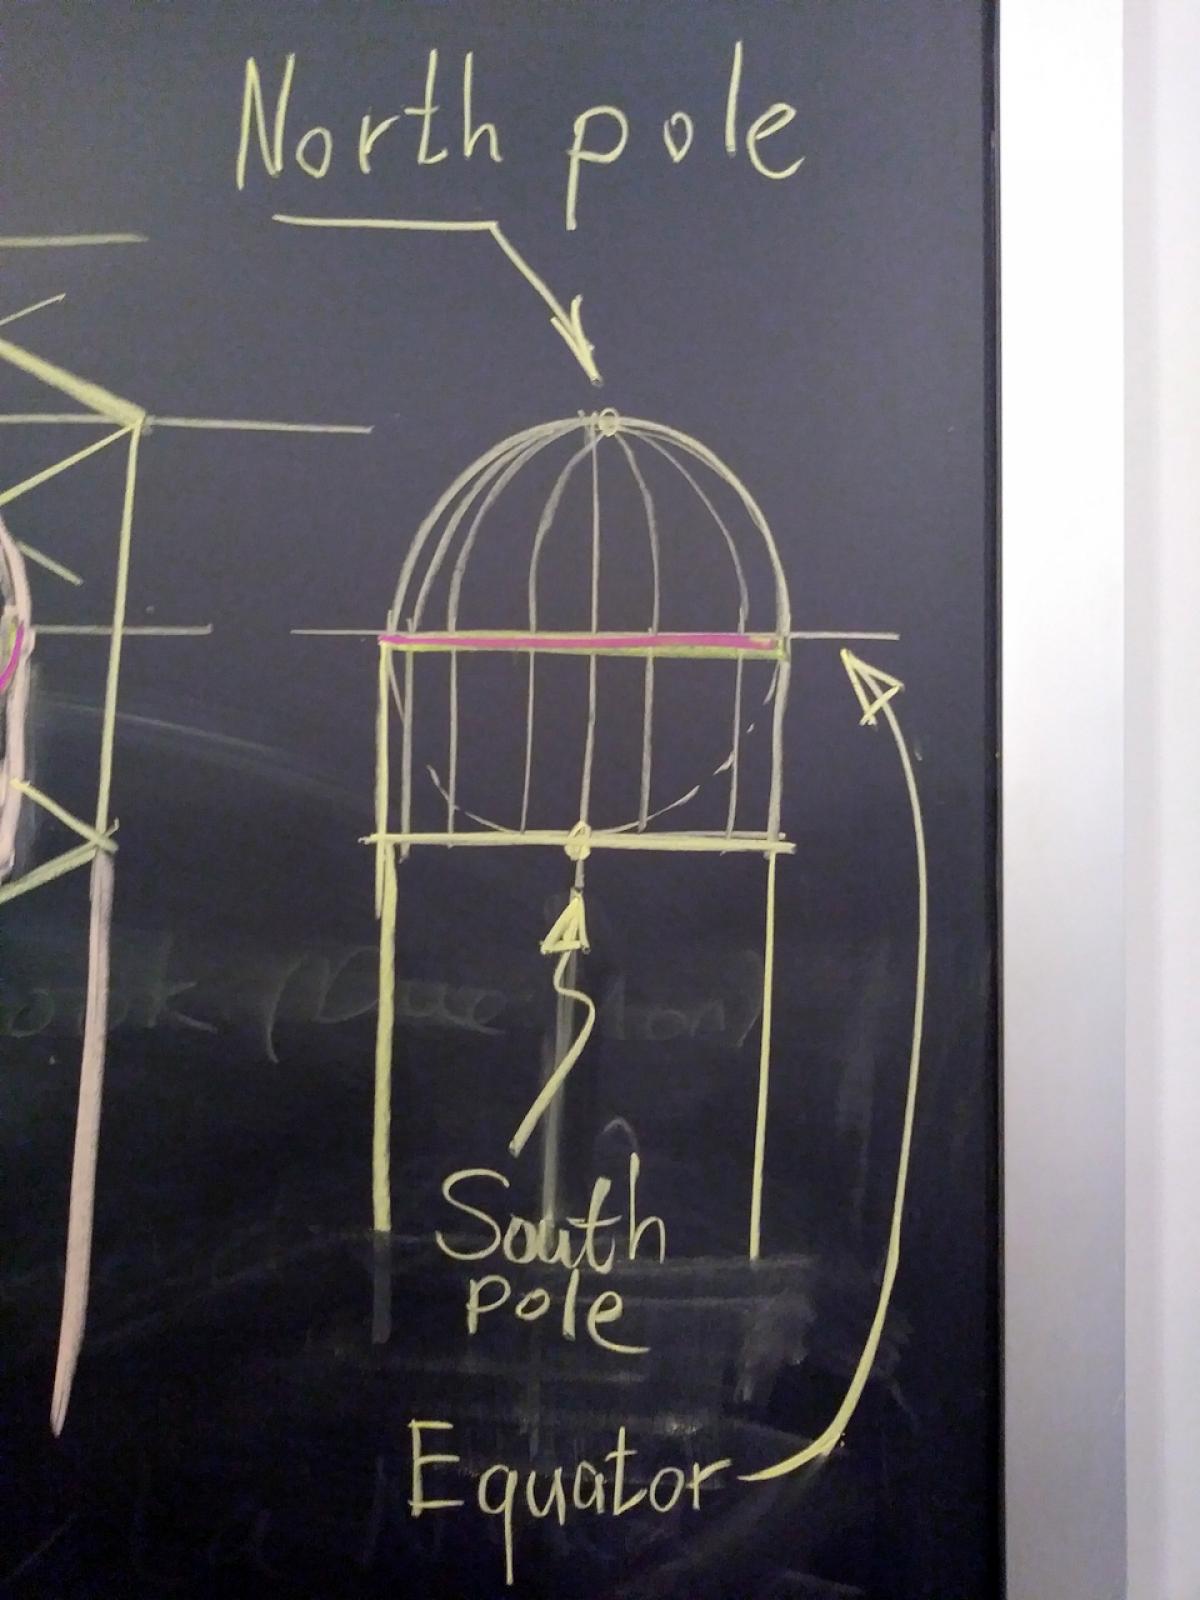
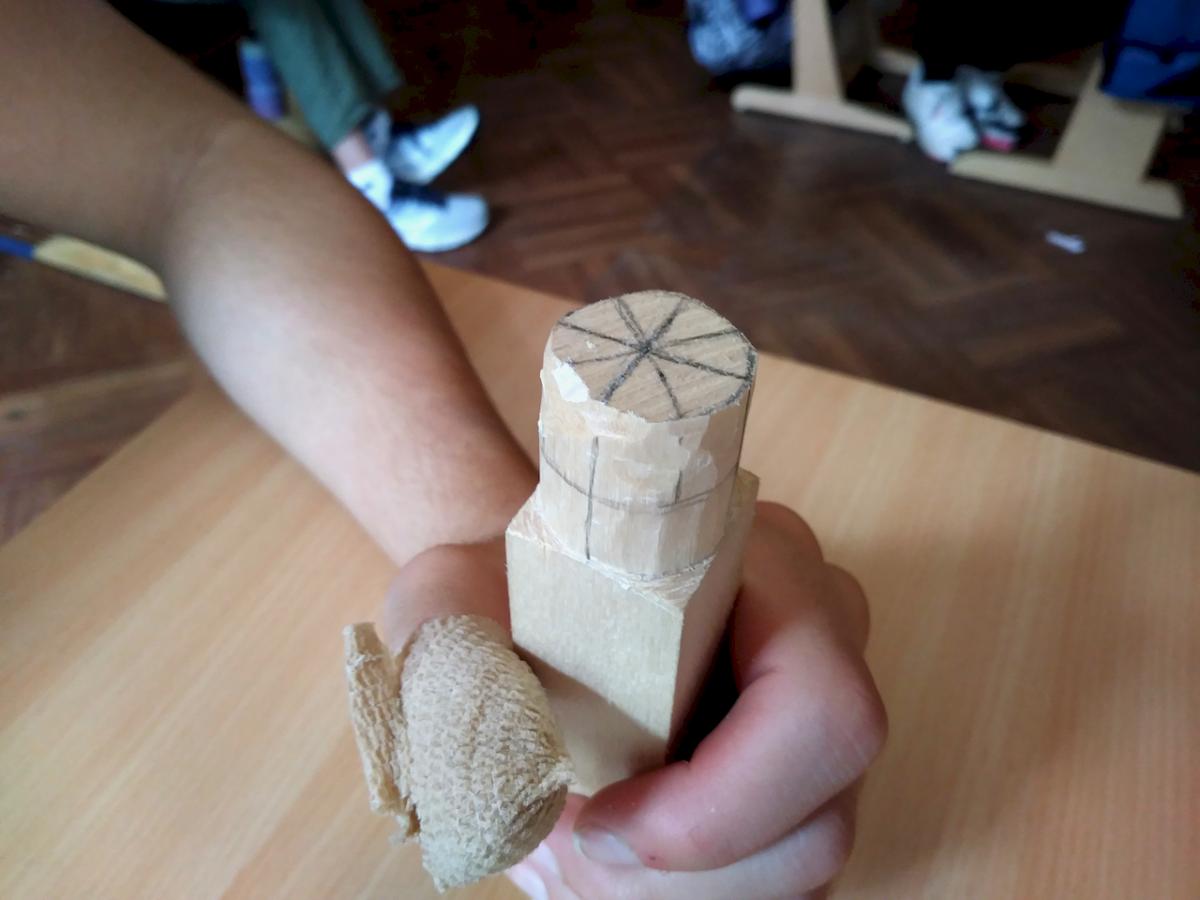
At our first meeting, I presented the students with the task of carving a ball on one end of the stick. First I asked then to draw an X on one end of the stick and then draw a cross through the middle of the X (practically to draw a square Union Jack). The intersection of all those lines was later to become the sphere’s “North pole”. After this, we carefully drew a 1” diameter circle on the edge. The students were then asked to draw a baseline 1” away from the top on each of the blank’s facets. That baseline was to become the “South pole”.
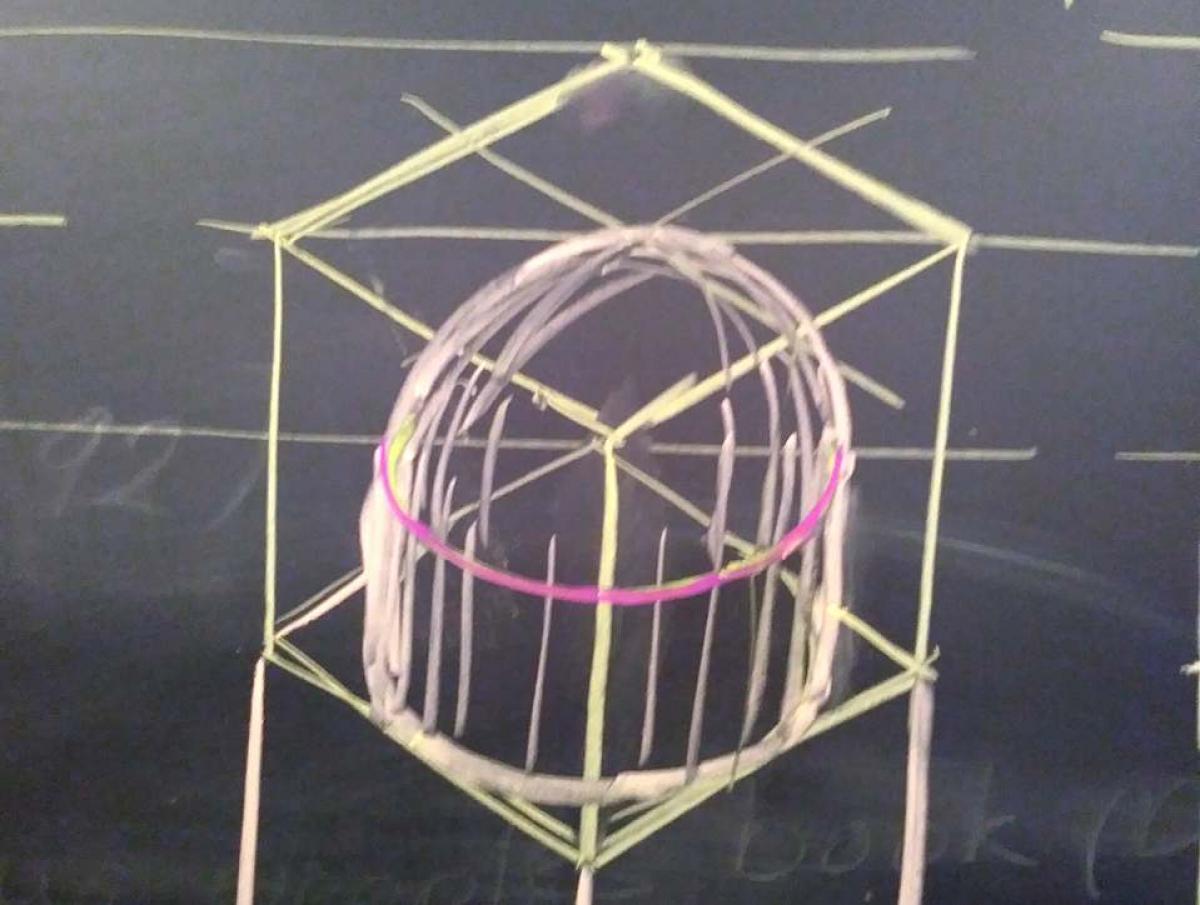
But before we delve into making the northern and southern hemispheres I asked the students to create a cylinder by gradually removing thin chips of wood away from them.
I taught them the three basic whittling motions that are done with a small knife:
We form a "stop cut" to sever the fibers at a steep angle from opposite sides to create a “V” shape valley. This valley can substitute for a saw kerf and could stop the grain from being split beyond the stop cut location. A stop cut is going to be very effective when shaping the southern hemisphere.
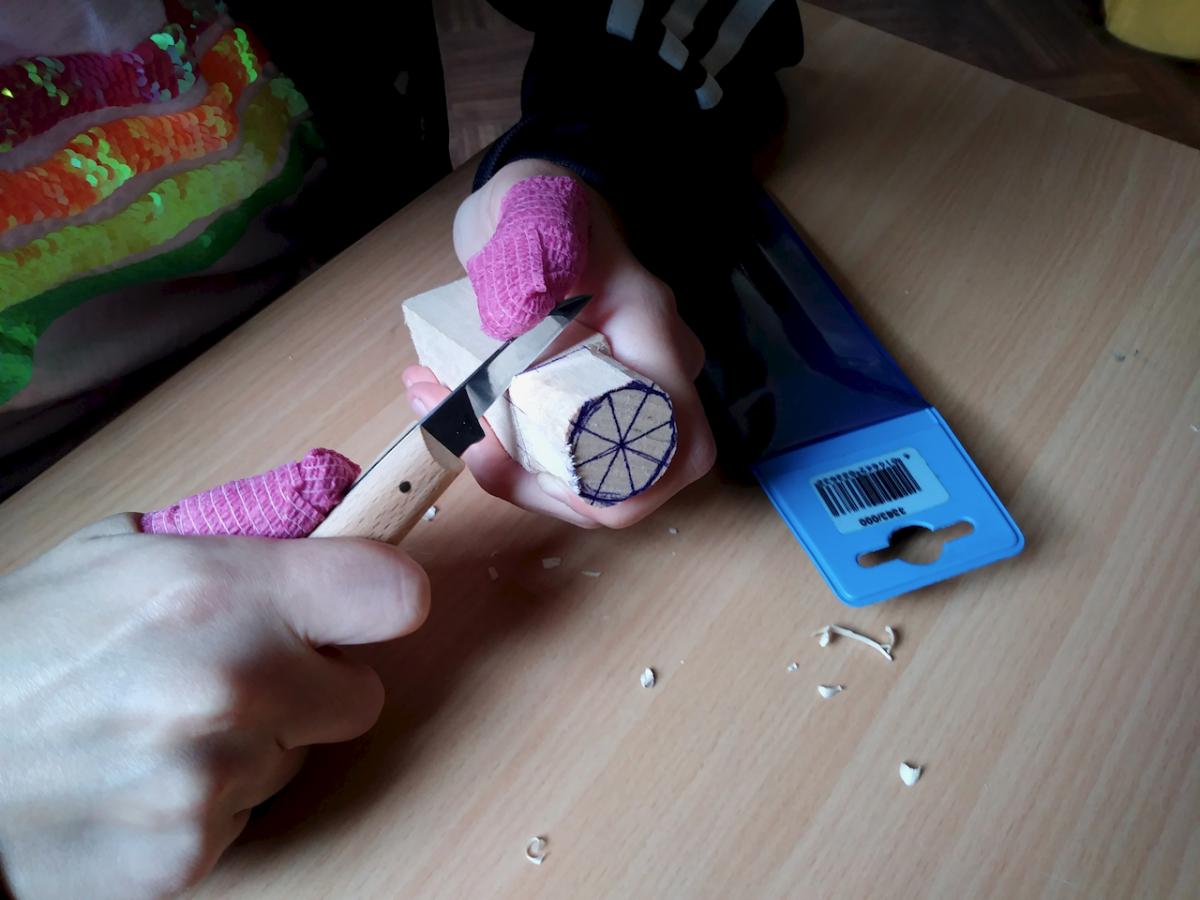
A "push cut": This cut is a very safe cut that is performed predominantly by the thumb of the non-dominant hand. You hold your knife with your right hand (I am a righty) and place your left thumb on the blunt part of the knife’s blade, then you push the blade with that thumb away from you.
A "pull cut": This is a semi-risky cut as you need to pull the knife by the force of your dominant hand towards your dominant hand’s thumb. To protect the thumb you can buy a thumb protector, a glove, or wrap the elastic band around it. This cut resembles an apple peeling cut.
Once my students finished drawing the circle and the baseline, they began shaping the cylinder. First, they used a push cut to form the top of the cylinder, and then they gradually “Walked backward” using the push cut towards the baseline, transforming the square into a cylinder.
Drawing the framework
Drawing the circle and cylinder The sphere - Northern Hampshire The sphere - Northern Hampshire
Using a Push Cut the students begun shaping the cylinder
At the baseline, they formed a stop cut on the circumference of the cylinder’s base. But they also incorporated the Pull as needed.
Using a stop cut the base of the cylinder is taking shape. The cylinder is almost completed


 Joel's Blog
 Built-It Blog
 Video Roundup
 Classes & Events
 Work Magazine