| | 02/27/2024 with Transcend Furniture Gallery | |  Like most people, we spend lots of time (way too much time) surfing the web, entranced by various videos. In Video Roundup, we offer some videos from all over the world that we found especially intriguing.
Angie of Transcend Furniture Gallery rescues bunnies and furniture. That is, she operates a rabbit rescue in Nova Scotia and refurbishes damaged, neglected and battled-scarred pieces of...more.. Like most people, we spend lots of time (way too much time) surfing the web, entranced by various videos. In Video Roundup, we offer some videos from all over the world that we found especially intriguing.
Angie of Transcend Furniture Gallery rescues bunnies and furniture. That is, she operates a rabbit rescue in Nova Scotia and refurbishes damaged, neglected and battled-scarred pieces of...more.. | |
| 08/23/2023 | |  Like most people, we spend lots of time (way too much time) surfing the web, entranced by various videos. In Video Roundup, we offer some videos from all over the world that we found especially intriguing.
We often get questions about how to use a Sliding T Bevel, so here you go.
Sliding T-bevel How2...more.. Like most people, we spend lots of time (way too much time) surfing the web, entranced by various videos. In Video Roundup, we offer some videos from all over the world that we found especially intriguing.
We often get questions about how to use a Sliding T Bevel, so here you go.
Sliding T-bevel How2...more.. | |
| 03/10/2023 | |  Like most people, we spend lots of time (way too much time) surfing the web, entranced by various videos. In Video Roundup, we offer some videos from all over the world that we found especially intriguing.
OK! This roundup shares 6 different ways of cutting circles in wood, and while you might know a few of them it can be helpful to learn a variety of ways in order to choose the right...more.. Like most people, we spend lots of time (way too much time) surfing the web, entranced by various videos. In Video Roundup, we offer some videos from all over the world that we found especially intriguing.
OK! This roundup shares 6 different ways of cutting circles in wood, and while you might know a few of them it can be helpful to learn a variety of ways in order to choose the right...more.. | |
| No blogs were found that match the search criteria.
| | | 03/30/2023 By Joe Samalin | | 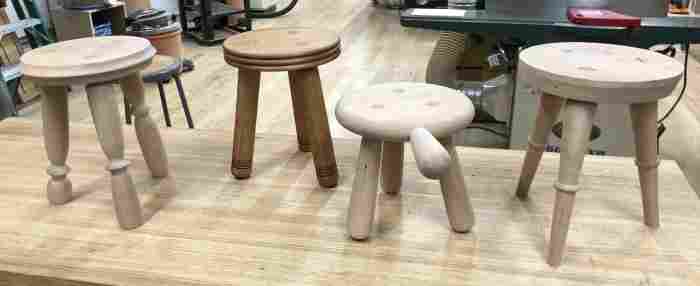 Variations on a theme. Mine is on the far right. I will just assume it is your favorite of the four.
For 5 years I lived in Bloomington, Indiana, quite a change for this born-and-raised New Yorker. It was while living there I was first introduced to woodturning. Just before moving back to New York I bought myself a lathe, a really nice medium-sized benchtop JET that I had saved up for. Of...more.. Variations on a theme. Mine is on the far right. I will just assume it is your favorite of the four.
For 5 years I lived in Bloomington, Indiana, quite a change for this born-and-raised New Yorker. It was while living there I was first introduced to woodturning. Just before moving back to New York I bought myself a lathe, a really nice medium-sized benchtop JET that I had saved up for. Of...more.. | |
| 05/26/2022 By Joe Samalin | |  From the article "Artists’ Frames in Pâte Coulante" by Peter Mallo
Summertime tends to slow down for us here at Tools for Working Wood, giving us that rare chance to take a quick deep breath and look around for a moment. And to break out the big fans. It gets hot here in Brooklyn.
And so as part of taking a breath, we wanted to share a bit of what is inspiring us at the moment, in the...more.. From the article "Artists’ Frames in Pâte Coulante" by Peter Mallo
Summertime tends to slow down for us here at Tools for Working Wood, giving us that rare chance to take a quick deep breath and look around for a moment. And to break out the big fans. It gets hot here in Brooklyn.
And so as part of taking a breath, we wanted to share a bit of what is inspiring us at the moment, in the...more.. | |
| 03/03/2022 | |  One of the perks of living in a place like New York City is access to a very wide range of people and experiences. This last weekend I was able to enjoy just such an experience - a four hour class on carving traditional Japanese bamboo matcha (powdered green tea) scoops, or chashaku.
The class was led by a master of the Japanese tea ceremony, Nagano Yoshitsugu , and that is who carves...more.. One of the perks of living in a place like New York City is access to a very wide range of people and experiences. This last weekend I was able to enjoy just such an experience - a four hour class on carving traditional Japanese bamboo matcha (powdered green tea) scoops, or chashaku.
The class was led by a master of the Japanese tea ceremony, Nagano Yoshitsugu , and that is who carves...more.. | |
| | | 01/21/2016 | | 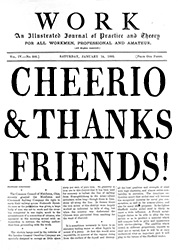 Tweet #TfwwWorkBlog!function(d,s,id){var js,fjs=d.getElementsByTagName(s)[0],p=/^http:/.test(d.location)?'http':'https';if(!d.getElementById(id)){js=d.createElement(s);js.id=id;js.src=p+'://platform.twitter.com/widgets.js';fjs.parentNode.insertBefore(js,fjs);}}(document, 'script', 'twitter-wjs');
Greetings Workateers! Our fourth and final volume has come to a close and so has the Work Magazine...more.. Tweet #TfwwWorkBlog!function(d,s,id){var js,fjs=d.getElementsByTagName(s)[0],p=/^http:/.test(d.location)?'http':'https';if(!d.getElementById(id)){js=d.createElement(s);js.id=id;js.src=p+'://platform.twitter.com/widgets.js';fjs.parentNode.insertBefore(js,fjs);}}(document, 'script', 'twitter-wjs');
Greetings Workateers! Our fourth and final volume has come to a close and so has the Work Magazine...more.. | |
| 01/14/2016 | | 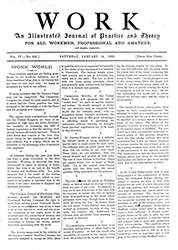 Tweet #TfwwWorkBlog!function(d,s,id){var js,fjs=d.getElementsByTagName(s)[0],p=/^http:/.test(d.location)?'http':'https';if(!d.getElementById(id)){js=d.createElement(s);js.id=id;js.src=p+'://platform.twitter.com/widgets.js';fjs.parentNode.insertBefore(js,fjs);}}(document, 'script', 'twitter-wjs');
The editions of Work mag we have here in the shop often have the ads removed but the last couple...more.. Tweet #TfwwWorkBlog!function(d,s,id){var js,fjs=d.getElementsByTagName(s)[0],p=/^http:/.test(d.location)?'http':'https';if(!d.getElementById(id)){js=d.createElement(s);js.id=id;js.src=p+'://platform.twitter.com/widgets.js';fjs.parentNode.insertBefore(js,fjs);}}(document, 'script', 'twitter-wjs');
The editions of Work mag we have here in the shop often have the ads removed but the last couple...more.. | |
| 01/07/2016 | |  Tweet #TfwwWorkBlog!function(d,s,id){var js,fjs=d.getElementsByTagName(s)[0],p=/^http:/.test(d.location)?'http':'https';if(!d.getElementById(id)){js=d.createElement(s);js.id=id;js.src=p+'://platform.twitter.com/widgets.js';fjs.parentNode.insertBefore(js,fjs);}}(document, 'script', 'twitter-wjs');
ARTICLES FOUND IN THIS ISSUE:
STENCILS FOR WALL DECORATION
•
THE ART OF...more.. Tweet #TfwwWorkBlog!function(d,s,id){var js,fjs=d.getElementsByTagName(s)[0],p=/^http:/.test(d.location)?'http':'https';if(!d.getElementById(id)){js=d.createElement(s);js.id=id;js.src=p+'://platform.twitter.com/widgets.js';fjs.parentNode.insertBefore(js,fjs);}}(document, 'script', 'twitter-wjs');
ARTICLES FOUND IN THIS ISSUE:
STENCILS FOR WALL DECORATION
•
THE ART OF...more.. | |
|


 Joel's Blog
 Built-It Blog
 Video Roundup
 Classes & Events
 Work Magazine