|
|
11/11/2020 |
The Gramercy Tools Spoonmaker's Drawknife comes sharp and ready to use but over time you will have to resharpen it. Small drawknives of all kinds pose a sharpening challenge - their handles can get in the way when you sharpen. Even the Gramercy Tools Spoonmaker's Drawknife, which has the least interfering handles of any drawknife on the market, still has handles which get in the way when you sharpen. Any tool that has a blade with wings has the same problem - traditional spokeshave blades have a similar issue. The actual sharpening process is the same for any edge tool. The issue is how to create handle clearance. The issue of a flat back is less concerning. We just need flatness on the back so that we could chase the burr. Any convexity that grows over time in a drawknife isn't a problem in use since the blade is narrow and never struck.
In all cases, simply laying your sharpening stone flat on a workbench won't do the trick. You will have to prop up the stone so that it's least high enough off the bench so you have clearance for the drawknife handles and your hands. But with wide stones and small drawknives, the stone can still get in the way. I think that there are two obvious ways to solve this. The first is have a stone that is narrower than the drawknife. The Gramercy Tools Spoonmaker's Drawknife has a 2-1/4" wide blade so a 2" stone works very well. As it happens, twenty years ago 2" wide sharpening stones were pretty common, but now most stones are 3" wide. I use 2" wide diamond stones for the rough work instead of my usual 3" diamond stones. I just clamp a scrap of wood in my vise, put the stone on top and I'm fine. A short length of 2x4 will work too.
But not everyone has such choices of stones. Another approach (if you don't really want another set of stones) would be to use lapping film and cut it into 2" strips and stick it to a narrow scrap and clamp it down.
Normally my standard approach is to go to an 8K waterstone after I did all my coarse work with the 2" diamond stones, but these waterstones are all 3" wide. I don't have any narrow finishing stones. While I could have used the lapping film solution, I also have single grit finishing stones. I just stood one up and used the side of the stone. Worked like a charm. This doesn't work with combo stones.

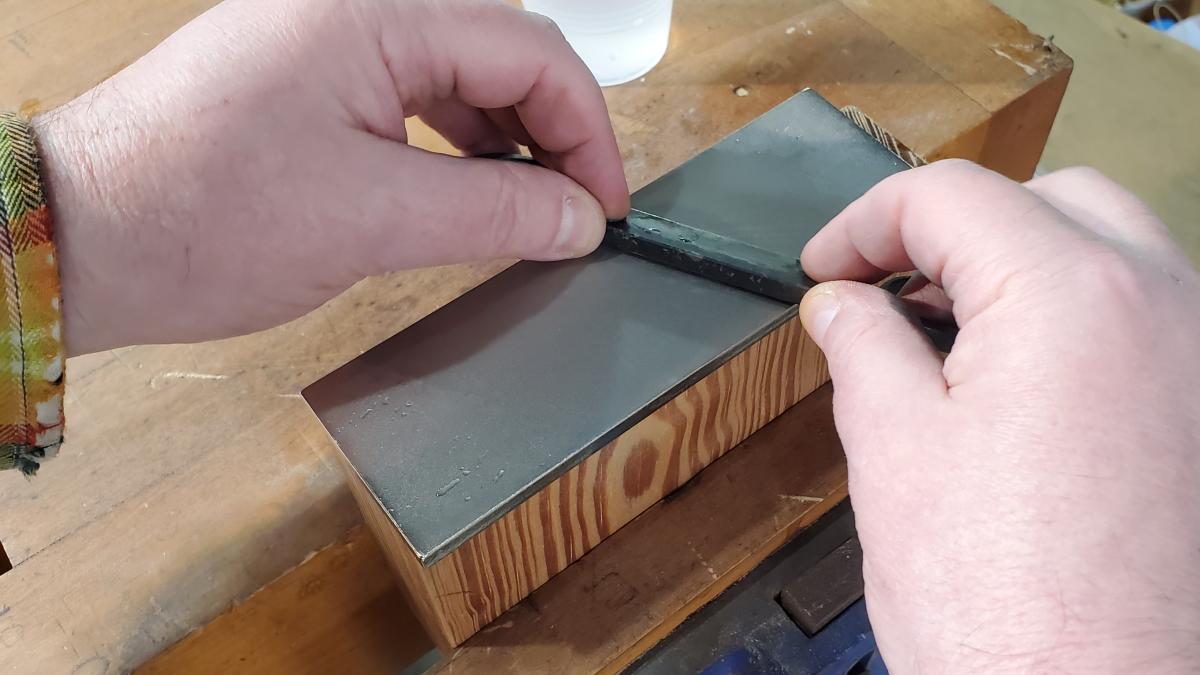
In the following picture you can see how I am working the back of the shave and I am holding the shave at a slight skew angle. This isn't an accident.
The more I skew the blade, the easier it is to hold the tool flat on the stone and have it not accidentally roll. On the bevel with even less to register the tool, this approach is even more important. Think of yourself standing in a bus facing the front. The bus lurches forward and you can stumble unless you are holding on to something. But if you are standing askew to the front, or facing the bus windows, your feet give you a nice wide platform for support and you are much more stable. When using a 2" stone and a 2 1/4" blade, I can't screw the blade much, but the stability of this arrangement is markedly improved. On the solid stone on edge (1" thick), skewing the blade not only makes the blade more stable from front to back it, also gives greater stability from left to right on the blade.
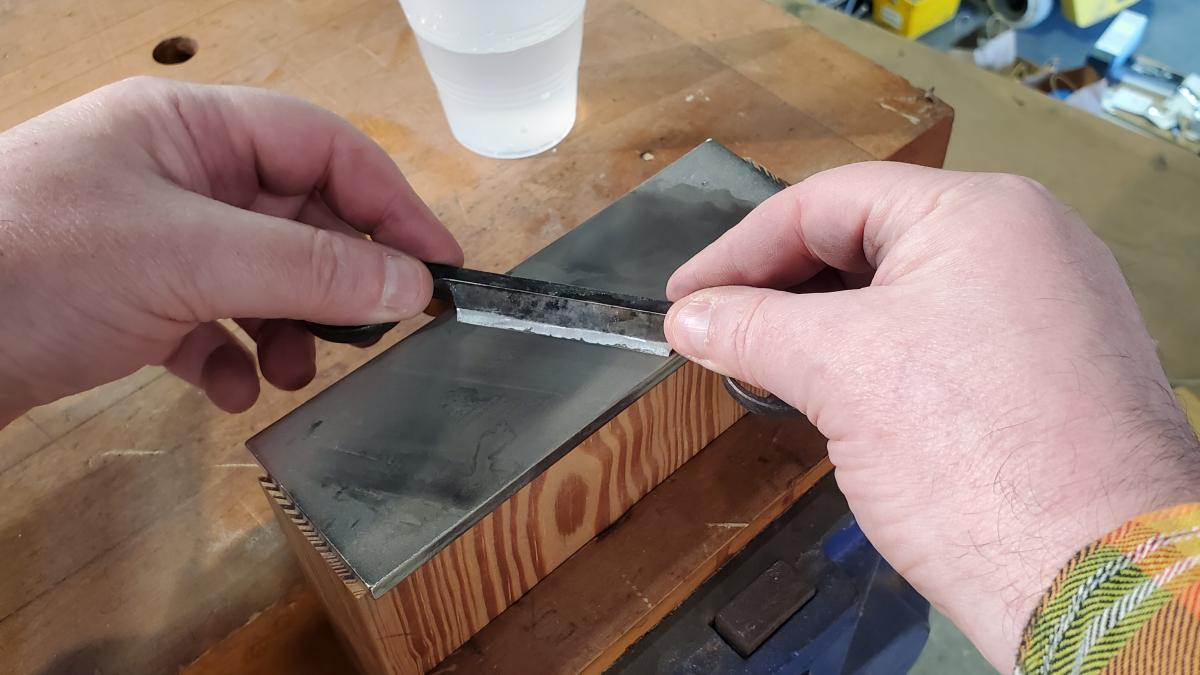
As you can see in the next picture, I clearly haven't tried to hone the entire back of the shave. When we harden a shave, we try really hard to ensure that the back is either flat or concave - preferably concave. This is so that when you go to sharpen your blade, all you have to worry about is the cutting edge. It makes for a much easier tool to sharpen; the few thousands of an inch concavity does not affect performance in any way. Over time, that concavity will be honed out, but for the first few years of use it really saves time. If the shave bottom were convex, it would be hard to get consistent registration at the cutting edge when sharpening. The concavity makes it easier. In this particular case, I had only a small band of flatness at the back edge, but it was just enough to turn a consistent burr along the entire edge - which is all I needed to do.

In the final step, I strop on a plain untreated strop. Honing compound is actually coarser than the 8000 grit stone I used, so all I want the plain strop to do is wipe off any leftover wire burr. However, our Horse Butt Strop is wider than 2 1/4" so it won't work unless I were to trim the strop, something I would not do. The solution was to use the backside of my belt. Except for the additional excitement of wondering if my pants would fall down, it worked fine. Long term a scrap belt or bit of leather would be better. Horse butt makes for an awesome strop that doesn't have a lot of give and isn't particularly forgiving. My belt is of cowhide, which is softer and will round the bevel and back slightly over time. With a drawknife I don't think that it is worth thinking about.
|
Join the conversation |
|


 Joel's Blog
 Built-It Blog
 Video Roundup
 Classes & Events
 Work Magazine
• 1/4" thick steel plate
• 2.75" x 8"
• covered with CBN material - 180 grit one side / 220 grit one side, 350 grit one side / 600 grit one side, or 1000 one side / 1200 one side
Then I use your process. I have 1.5" horse butt straps glued on a wood handle. I got my shave from you and really enjoy using it.